Announcement

Collapse
No announcement yet.

Ryan's A.M.C.A. Giveaway bike build!

Collapse
X
 
  • Filter
  • Time
  • Show
Clear All
new posts

  • #91
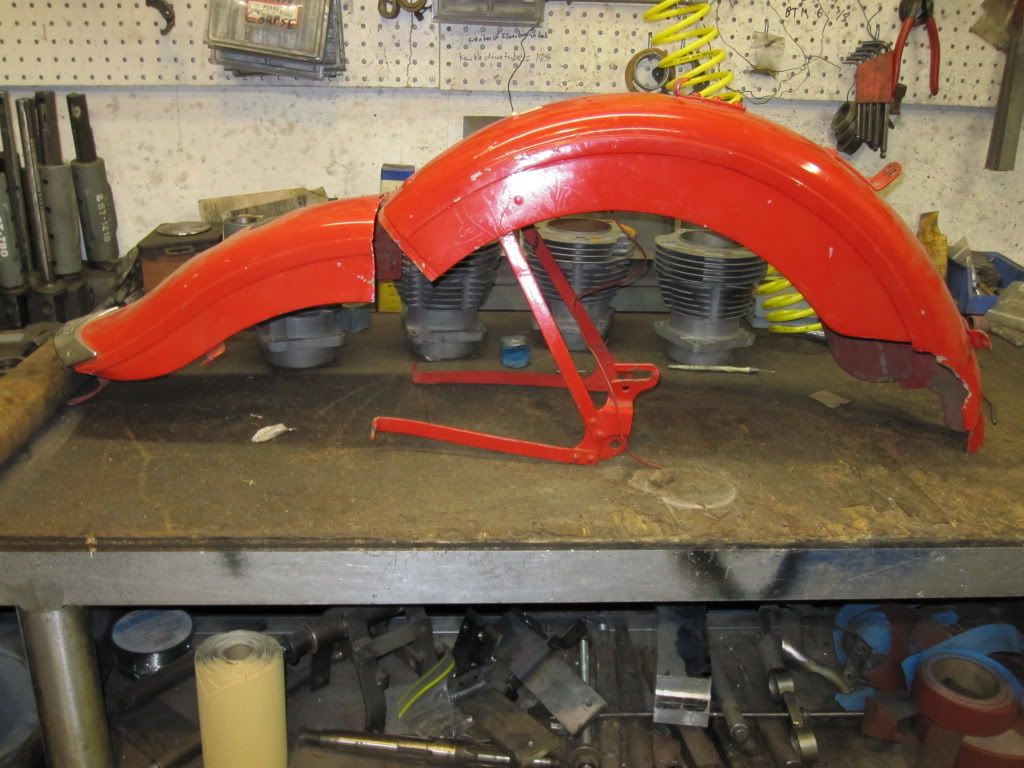
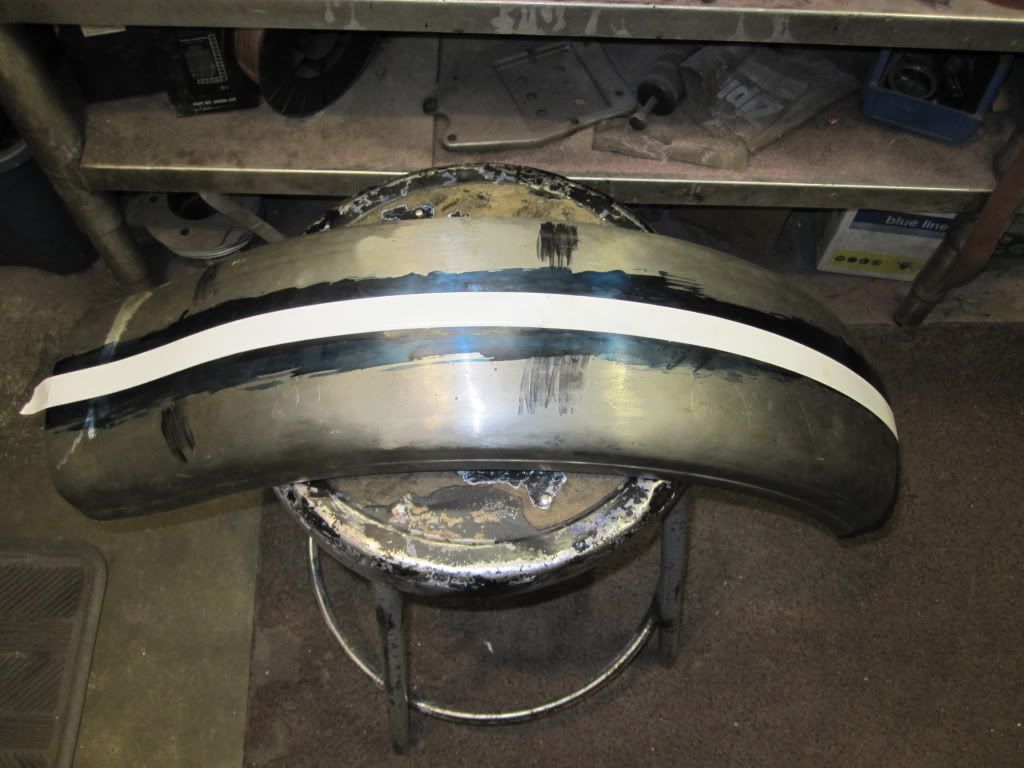
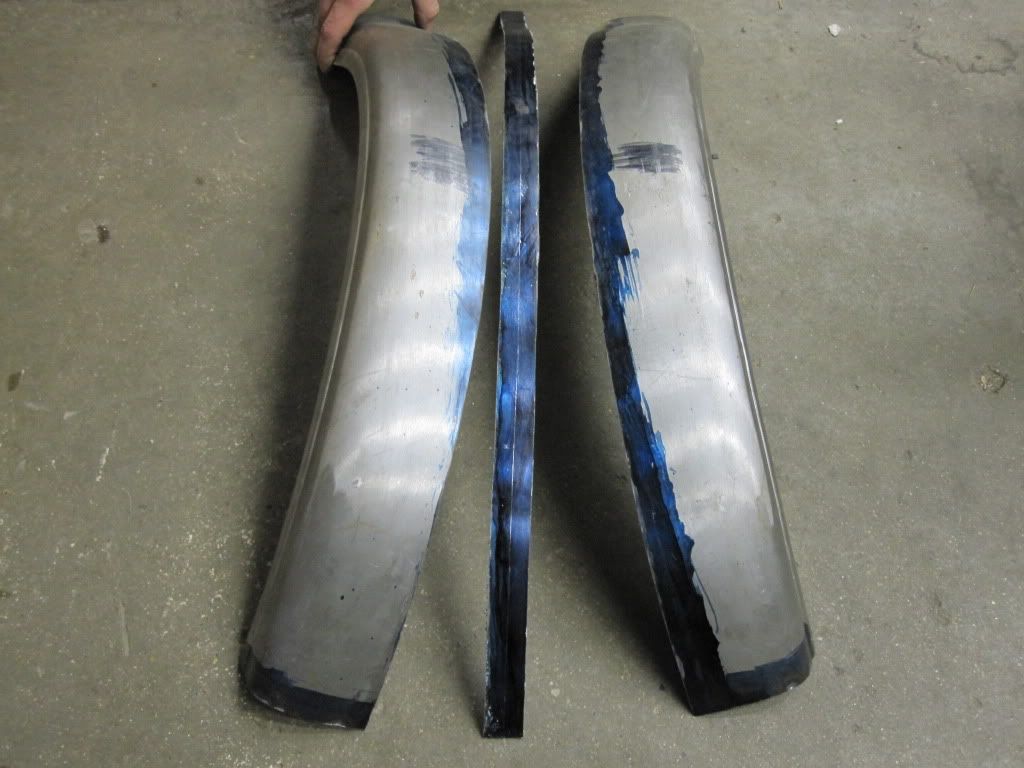
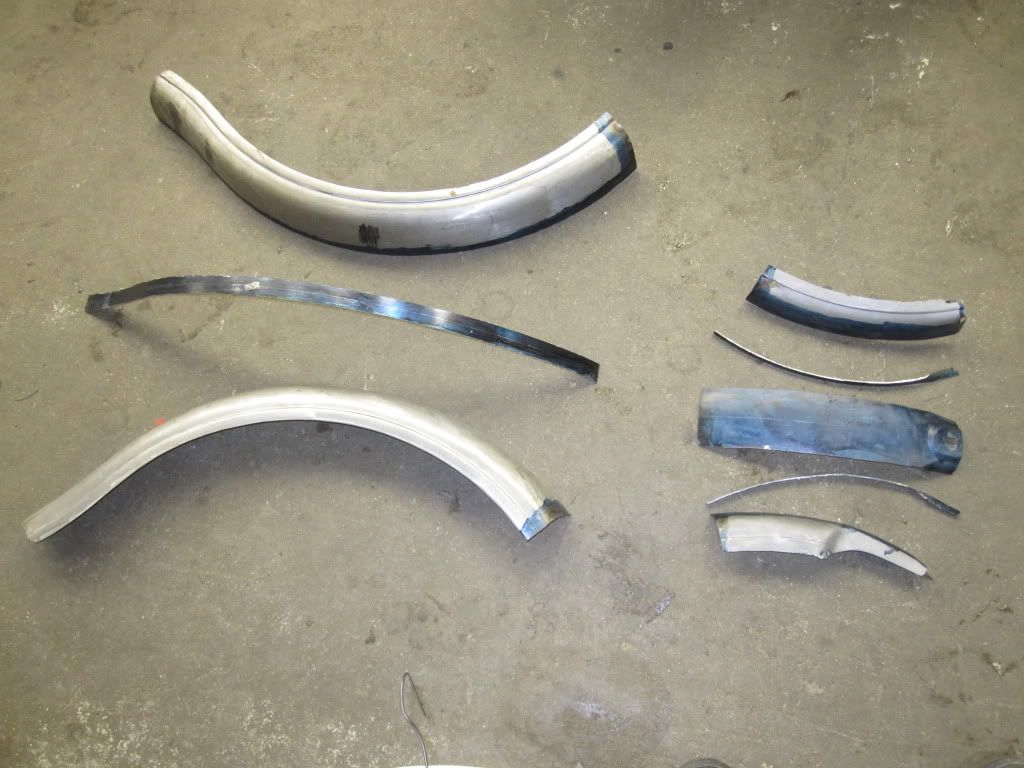
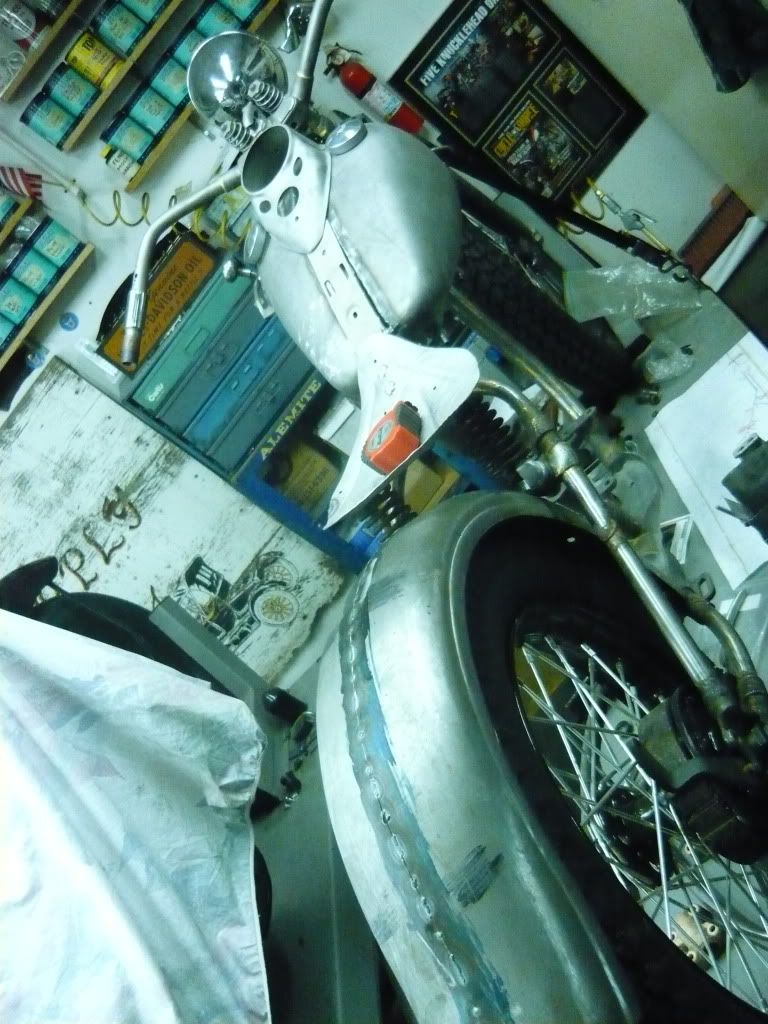
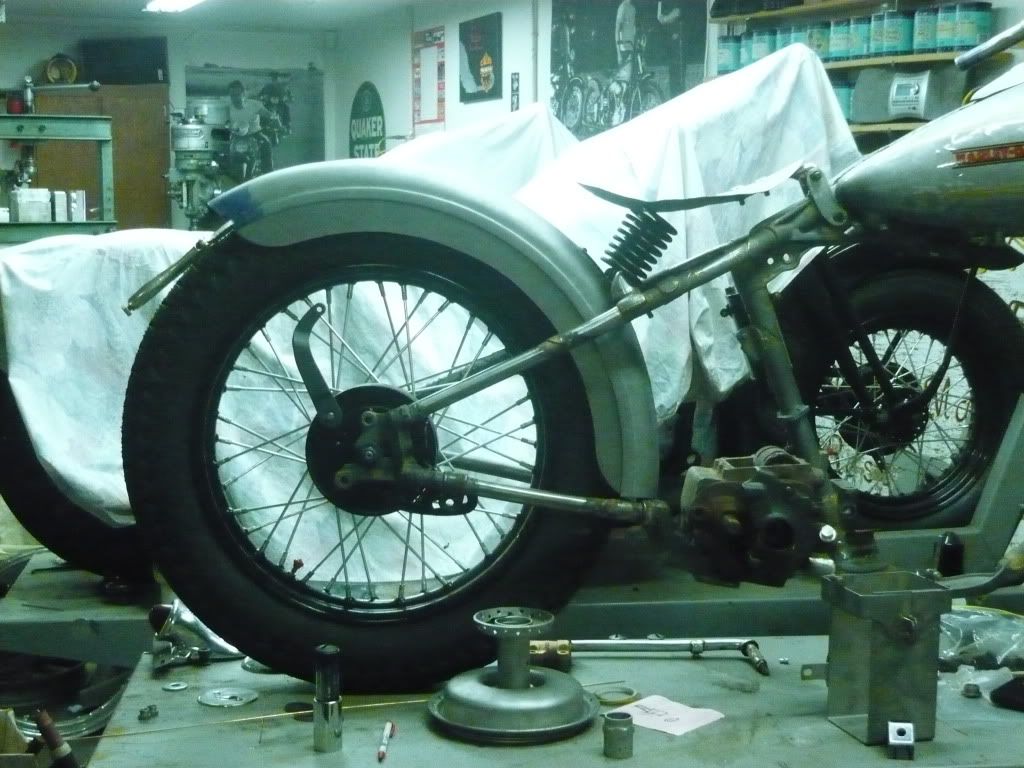
    I started working on the rear fender tonight.

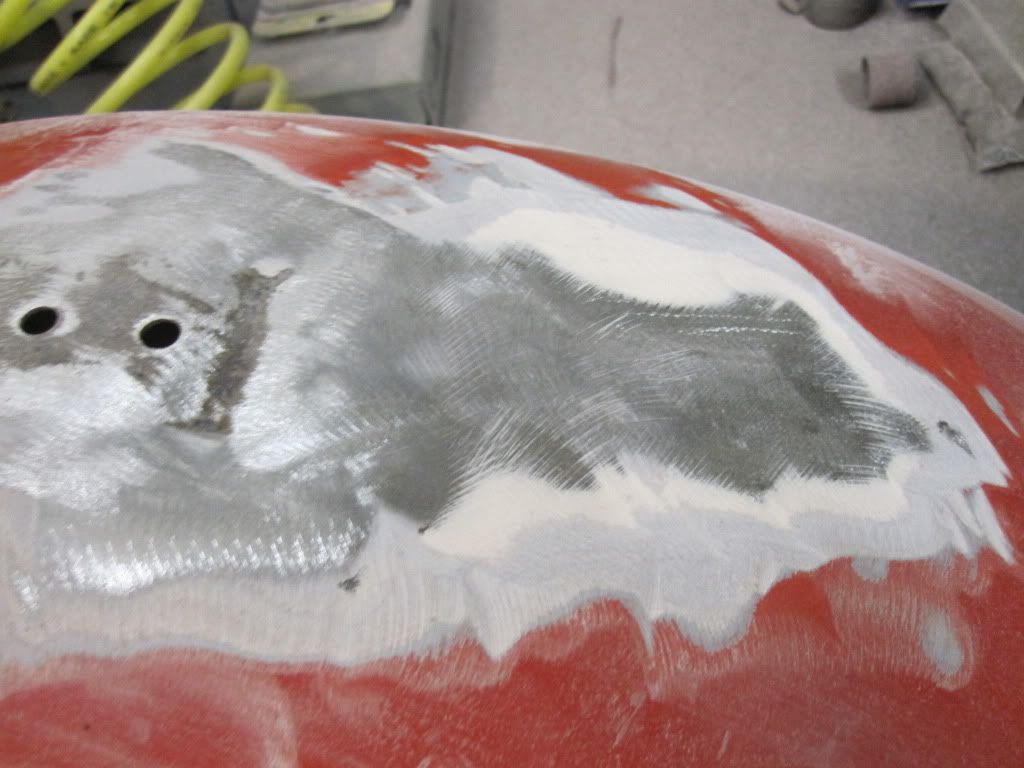
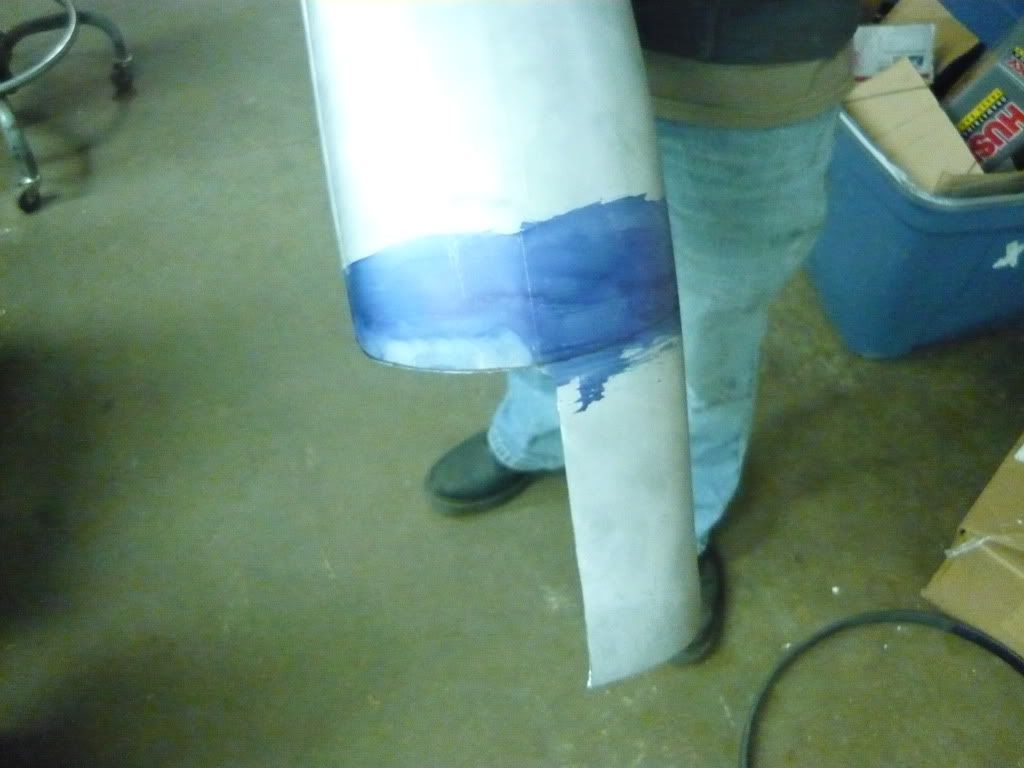
    I first sanded all the paint off, I was surprised at how much bondo there was in some places.


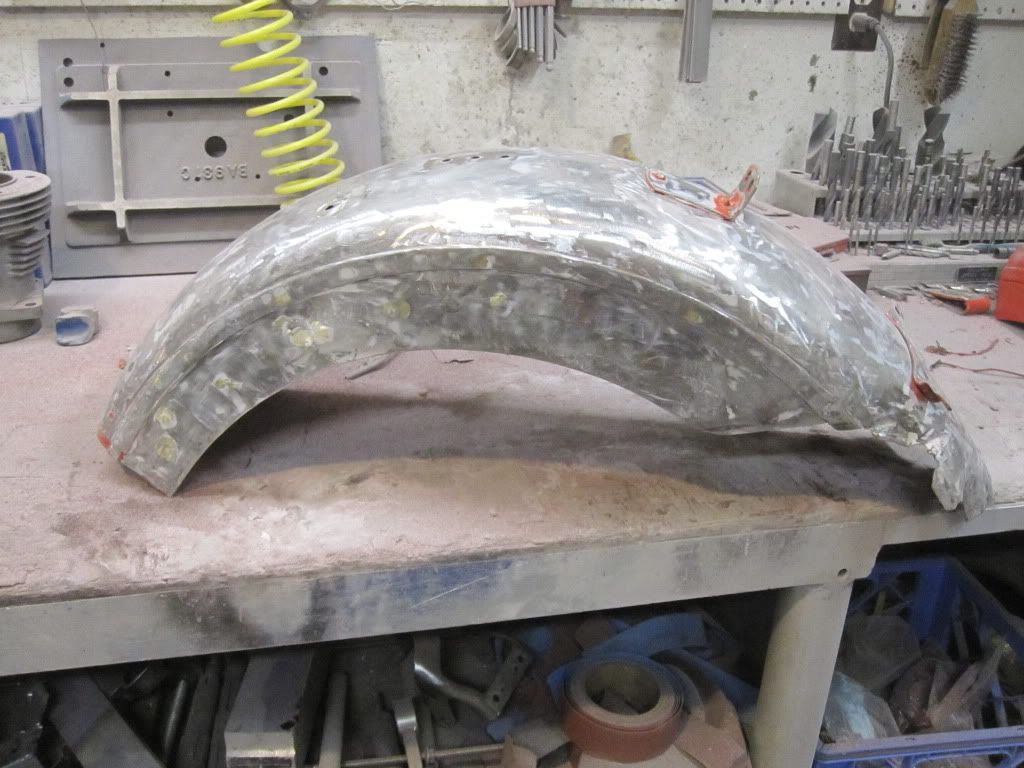
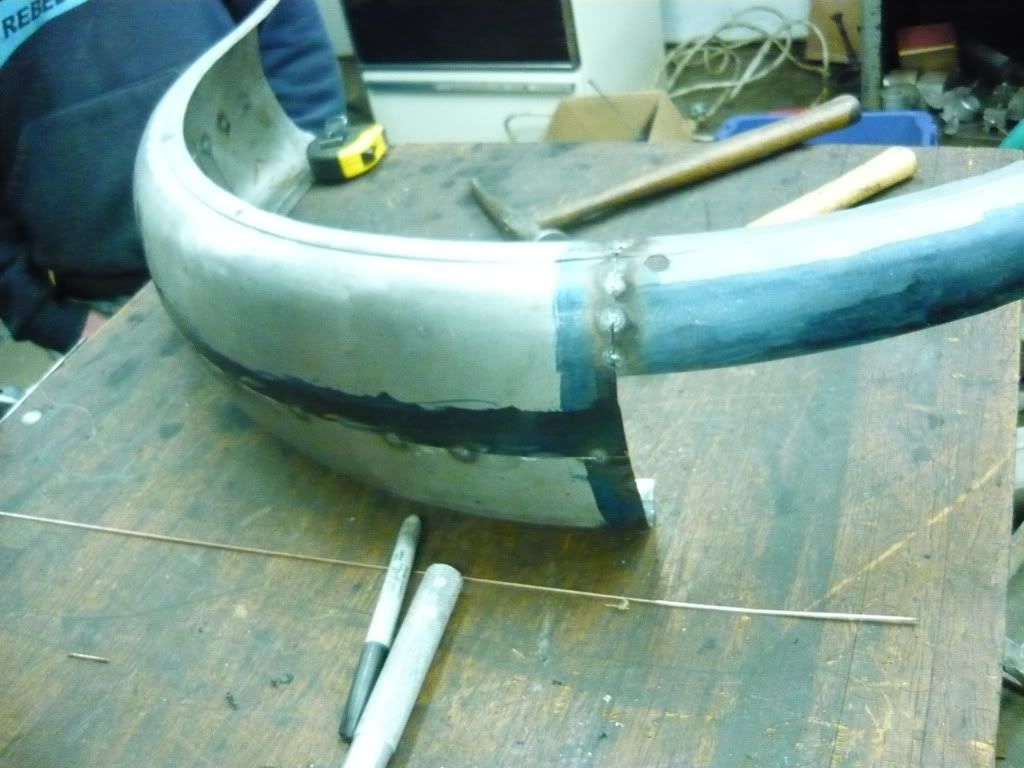
    Here it is after it was all sanded.


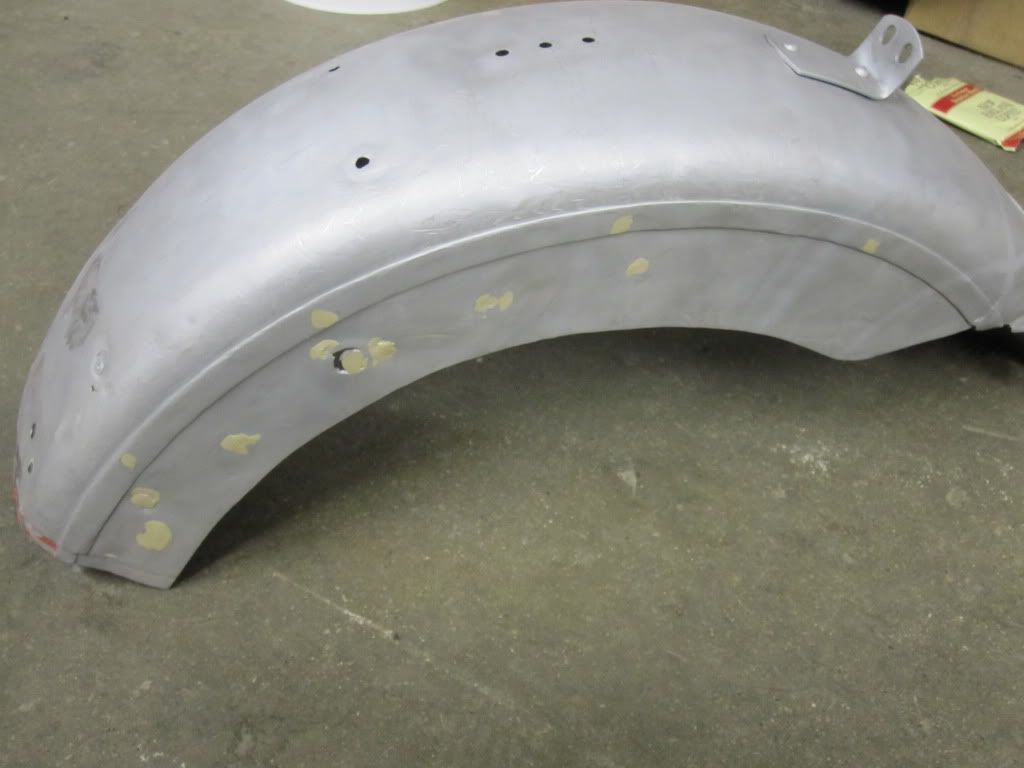
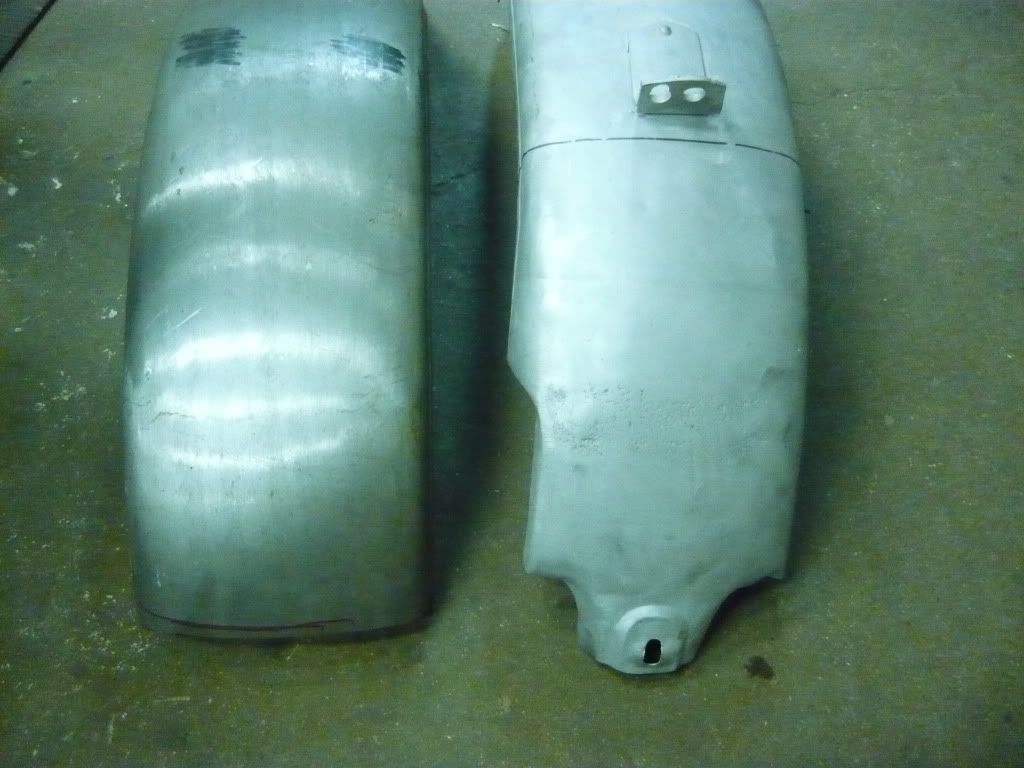
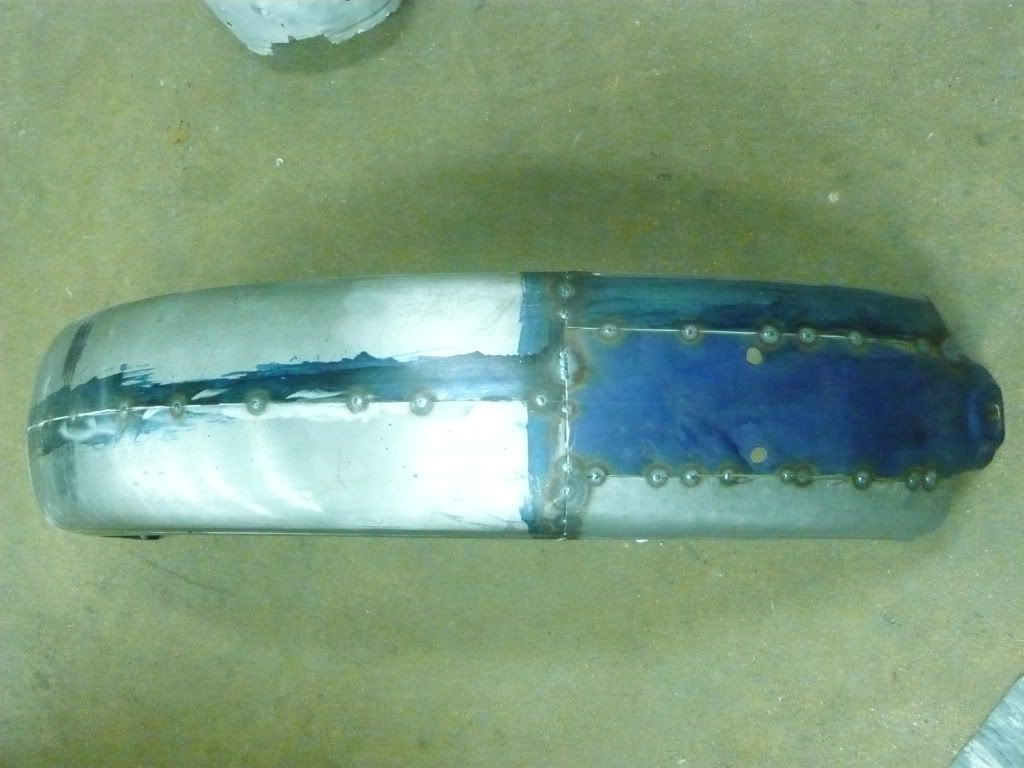
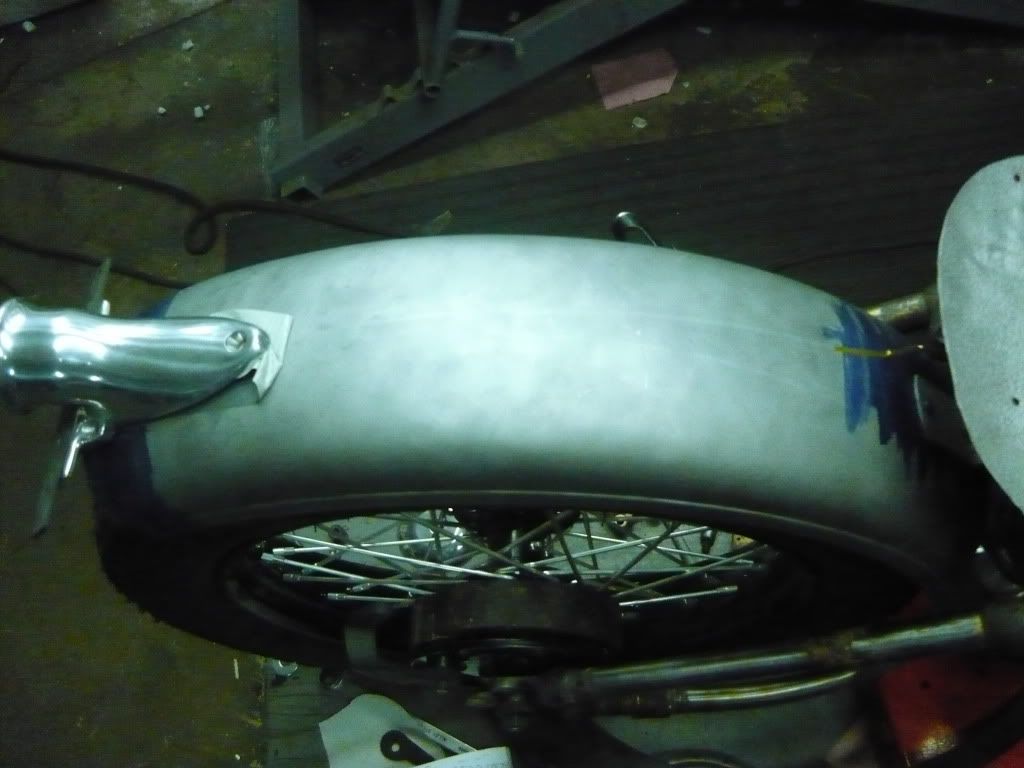
    And this is the fender after I bead blasted it. There are some rough spots but I am sure we can make something out of it.

    Comment


    • #92
      Well this morning after talking with Matt and Carl, we decided with the rot on the fender, that it would be best to use a repo fender and cut and weld the mounting section onto it. The repo fender is on the left and the section we need to weld on is on the right.


      After I got it all cut and we tacked it in place, we set it on the bike to take a look. It looked to wide to me so I decided to section it 1 inch! I cut the tack welds so they were 2 pieces again and started laying out where to cut. Here is the repo fender ready to get chopped.


      Too late to turn back now!


      And here is the mounting section layed out. I took a half inch off each side of the mounting hole but made sure to stay away from the radius.


      A fender that was in 1 piece is now in 8!


      Here it is starting to come back together. The main fender is all tacked together, now it is just a matter of fitting the other section to match.


      There is still a lot of work left but I think it will make a huge difference on the whole bike.

      Comment


      • #93
        Fantastic job in reporting an posting this project. Thorughly enjoying going over the details. Great photos and descriptions of activity. Ryan - I'm envious. Reminds me of working in my father's shop when I was a kid. Suck up all the info and experience you can. Great way to spend 5 weeks!
        Ray
        AMCA #7140

        Comment


        • #94
          Just curious as I don't think you mentioned it. Did you use a die grinder to cut the fender or something else?

          Thanks for the great thread and wonderful information.

          Howard

          Comment


          • #95
            Petri- Ryan used a 1/32 3m cut off wheel to chop up the fender.

            Ryan spent the day getting the rest of the fender ready for welding. Here is a pic of everything tacked together


            Here it is after being welded back into one piece. I set it next to an o.g. fender so you could see what a difference 1 inch makes.


            Here is what it looks like just sitting on the bike. Ryan still has to sand the welds and do a little bit of straightening before we move onto the braces and skirts. Have a nice night!
            A.M.C.A. Board Member

            www.oldbikesinsd.blogspot.com

            www.pre1916scramble.blogspot.com

            Comment


            • #96
              It is snowing really bad over here in South Dakota again. It is supposed to get to -35 degrees tonight with the windchill factored in. Thankfully it is always 65 in the shop! Ryan bobbed his fender today. It turned out well. First he marked the center of the fender, and laid out the part that needed to be bobbed off!


              Then he made a template of it and cut off the other side.


              Here it is on the bike with the tail light taped onto it to make sure the lense is at an angle that looks good.


              I finished up his coil mounts on his frame. I used the existing hole for the grease zerc for the top bolt, and made up a tapped spacer for the bottom mount, It is .427 thick, if any of you plan on doin the same modification to your bike.


              Here is the coil mounted up to the bike!


              Ryan wanted his brake lever perch welded to the handlebar. Luckily we had three and a half cast brake levers. We had an extra perch, so we gave it to Ryan to chop up. Here it is welded to the bar, it is a clean deal.


              We finished the night with a little practice in lay out. ryan is trying to figure out how he wants to paint his bike, here is the initial lay out. What do you guys think?
              A.M.C.A. Board Member

              www.oldbikesinsd.blogspot.com

              www.pre1916scramble.blogspot.com

              Comment


              • #97
                In The Moment

                Ryan, what a great smile! You remind me of what I must have looked like 35 years ago digging my first bike. Thank you for taking me back to the best of days and swinging me back. Your life of fun and adventure has just begun my friend; enjoy the ride, and I hope to ride with you some day which will be an honor. Mark Croft

                Comment


                • #98
                  I should have asked this question before you assembled your valves to the cylinders Ryan.... While I know you checked for sealing, did you lap the valves to the seats with lapping compound ? Paps

                  Comment


                  • #99
                    Not to be of a deterent to your build progress Ryan.... I am a bit concerned over your decision to weld the brake perch onto the handlebar. The brake lever will be under constant use and the gripping pressure on the lever will work against the perch weld points. My concern is the weld points will eventually break loose at the welds themselves or the handlebar material will give way. Paps

                    Comment


                    • Tanks

                      Matt, to answer your question with my opinion on the tank paint design, you've got my vote.
                      Very tastefully done & I've always liked that look. I first became aware of it on the Gee Bee race plane. I wonder where it originated, the Gee Bee or the Bobbers? I saw Delmar Benjamin fly a Gee Bee in Cleveland years ago, very cool, but we're talkin' bikes here right?
                      Any thoughts Ryan on paint color? You guys are doing a great job. Not only on the bike, but entertaining us old guys with the updates. We're getting lots of snow here in Cleveland too Ryan. Happy trails, Bob
                      Bob

                      Comment


                      • Originally posted by Lonewolf_51 View Post
                        Ryan, what a great smile! You remind me of what I must have looked like 35 years ago digging my first bike. Thank you for taking me back to the best of days and swinging me back. Your life of fun and adventure has just begun my friend; enjoy the ride, and I hope to ride with you some day which will be an honor. Mark Croft
                        Thanks for the kind words. I am sure we will cross paths at some point and be able to ride, the would be awesome!

                        Originally posted by Paps View Post
                        I should have asked this question before you assembled your valves to the cylinders Ryan.... While I know you checked for sealing, did you lap the valves to the seats with lapping compound ? Paps
                        The cylinders had already gotten a valve job done, but to be sure everything was done correctly, we did a thorough check and all turned out good.

                        Originally posted by Paps View Post
                        Not to be of a deterent to your build progress Ryan.... I am a bit concerned over your decision to weld the brake perch onto the handlebar. The brake lever will be under constant use and the gripping pressure on the lever will work against the perch weld points. My concern is the weld points will eventually break loose at the welds themselves or the handlebar material will give way. Paps
                        Thanks for the concern but a lot of thought went into this to make sure it would be strong enough. If any of us thought it would be unsafe we would have not done it, but I will be sure to keep an eye on it as I put miles on just to make sure.

                        Originally posted by bobdo View Post
                        Matt, to answer your question with my opinion on the tank paint design, you've got my vote.
                        Very tastefully done & I've always liked that look. I first became aware of it on the Gee Bee race plane. I wonder where it originated, the Gee Bee or the Bobbers? I saw Delmar Benjamin fly a Gee Bee in Cleveland years ago, very cool, but we're talkin' bikes here right?
                        Any thoughts Ryan on paint color? You guys are doing a great job. Not only on the bike, but entertaining us old guys with the updates. We're getting lots of snow here in Cleveland too Ryan. Happy trails, Bob
                        Thanks. I didn't want to go overboard with the design, just something basic and I think this fits the bill. I am thinking of going with black and the scallops being silver. Then maybe a gold pinstripe inbetween to match the decal.
                        Sorry to hear about the weather but we can't complain too much, I was still riding a week before I left!

                        I started working on the battery box that I will be using last night. The tin box was pretty rough and corroded so I cut it out and a new one is on the way.


                        It was a lot easier than I thought it would be to get out. I started by drilling out the spot welds but found it just easier to cut the sides out with a cut off wheel and then just cave the box in away from the frame. Here it is all taken apart.


                        All the mounts need redone. There had been repairs done to all of them. Instead of messing with trying to fix them, I decided it would be best to make new mounts and weld them on. Here is the top mount.


                        I measured off a repo battery box and made the new mount and then cut off the old one. Here they are next to each other.


                        Here is the battery box with the mount cut off.


                        And here is the new one after I tacked it in place.


                        I am now working on the front mount and then I will redo the fender mount

                        Comment


                        • Ryan made up some skirts for his fenders today.
                          Here is the piece of steel that he used


                          First Ryan cut the radius to match the lip on the inside of his fender.


                          Then he followed the curve 2 inches from the radius. Here it is mocked up on the bike, it is a little long, and needs to be trimmed on the bottom. It turned out well.
                          A.M.C.A. Board Member

                          www.oldbikesinsd.blogspot.com

                          www.pre1916scramble.blogspot.com

                          Comment


                          • Really looking good guys, this thread is a lot of fun to read. I'm a +1 on the paint idea - it'll look great! I really like it that you're fixing a lot of parts, not just buying new ones. Keep up the good work.
                            Last edited by dommi7; 01-08-2010, 02:51 PM.
                            Ralph

                            Comment


                            • I don't know if you're fishing for paint color opinions Ryan; my opinion of black and silver is, it's too Mercedes Benz. I think a bobber, chopper, or cut-down should be colorful. I think your layout is very nice however. I also love what you did with the rear fender valances.
                              Eric Smith
                              AMCA #886

                              Comment


                              • Ryan,
                                I like your idea of incorporating a decal color into the pinstriping. I noticed your other bikes have flat black paint. Just as food for thought, have you considered the black parts, frame, etc. & the black fender & tanks in satin finish with the silver in gloss?
                                Your doing great work.
                                -Bob
                                Bob

                                Comment

                                Working...
                                X