I wouldn't worry about the chipped threads, Harry!
The nut is only an assembly aid to squeeze the shaft into the flywheel. The taper should hold it firm, like a nail in oak.
Roller wear is reason to replace a pin.
The welds look scary to me. But it ran like that?
...Cotten
PS: It looks like my edit to my last post didn't stick. Wonder what I meant?
-
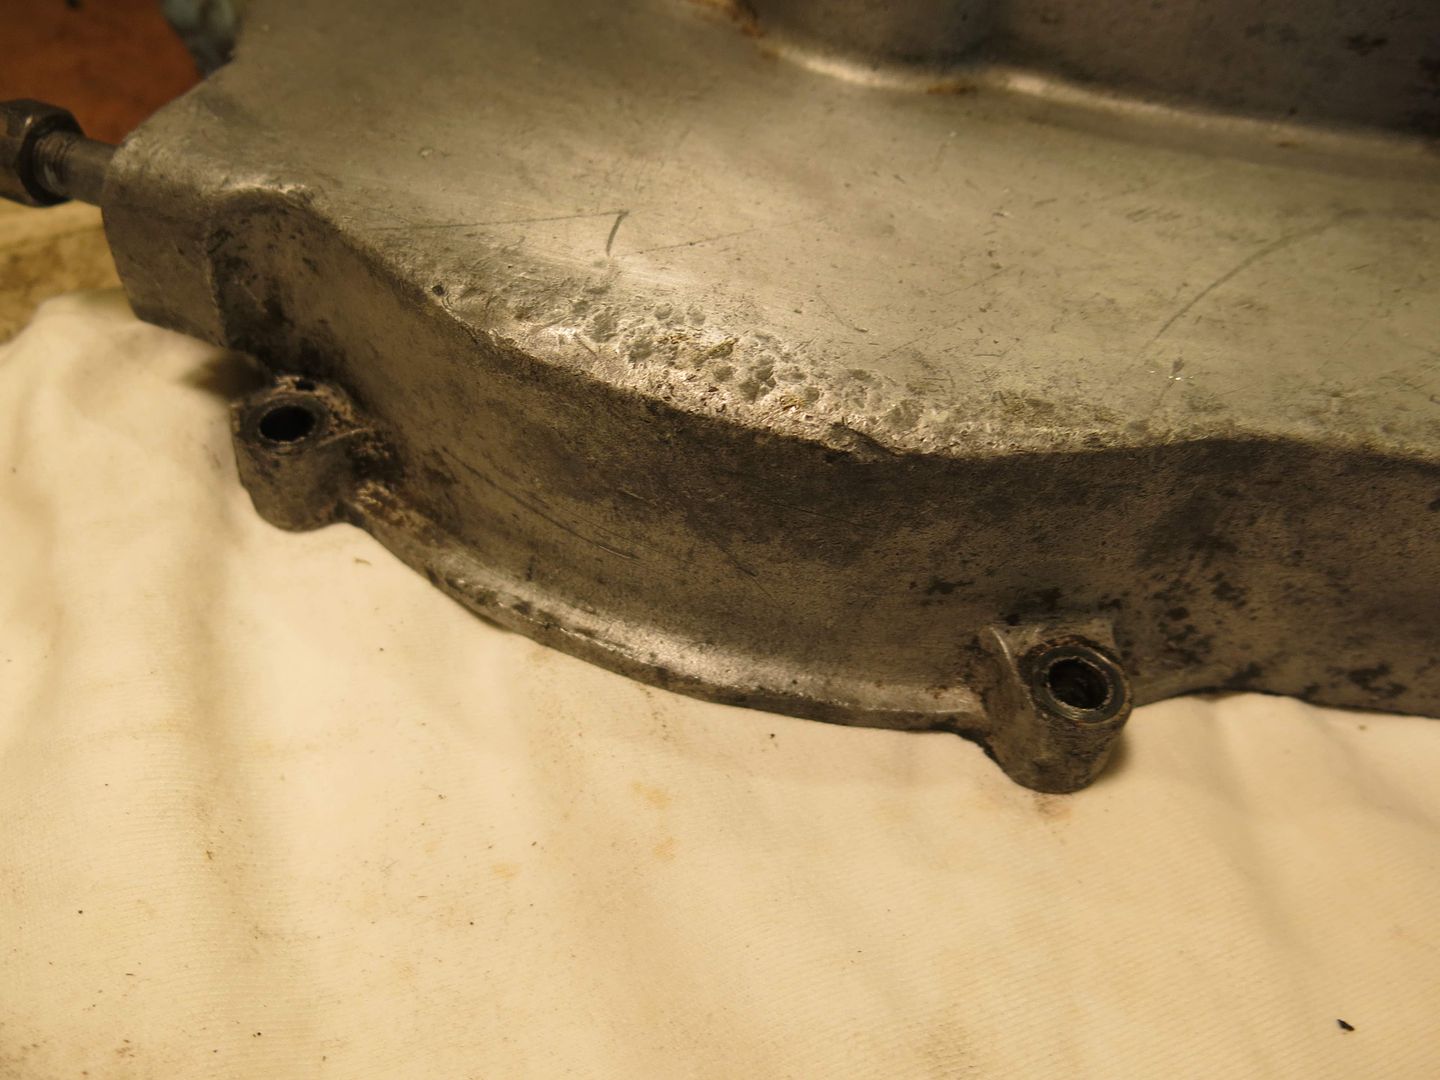
And I have a decision to make regarding the cases. There's some pitting on the bottom, it probably sat around in the mud for a while, and I'm leaning towards coating the inside of the cases with Glyptal. I know there are differing opinions on the use of a coating so I'll have to weigh the factors, I think the main reason to use Glyptal on these cases is because they're so pitted they may be more likely to leak somehow?
 Last edited by pisten-bully; 04-27-2020, 03:57 PM.
Leave a comment:
-
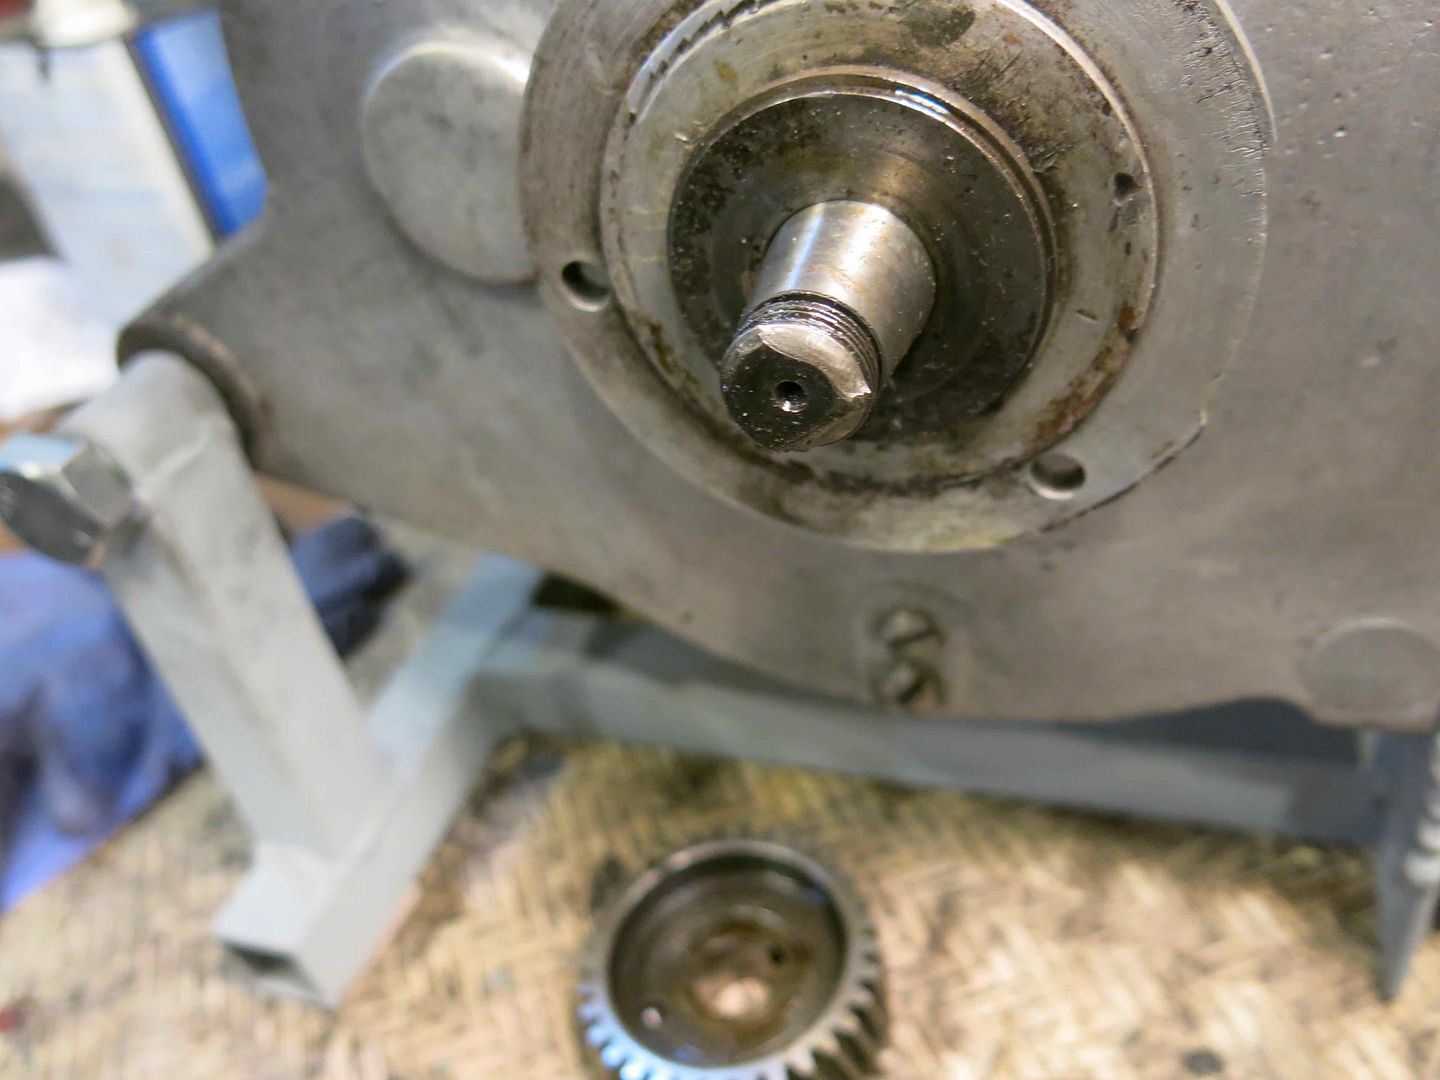
I took time today to open up the motor today, it's been used! The drive gear came off and that's when I noticed the end of the drive shaft was chipped a bit, the nut still threads on fully but it may require a new shaft:
Cases split easy enough:
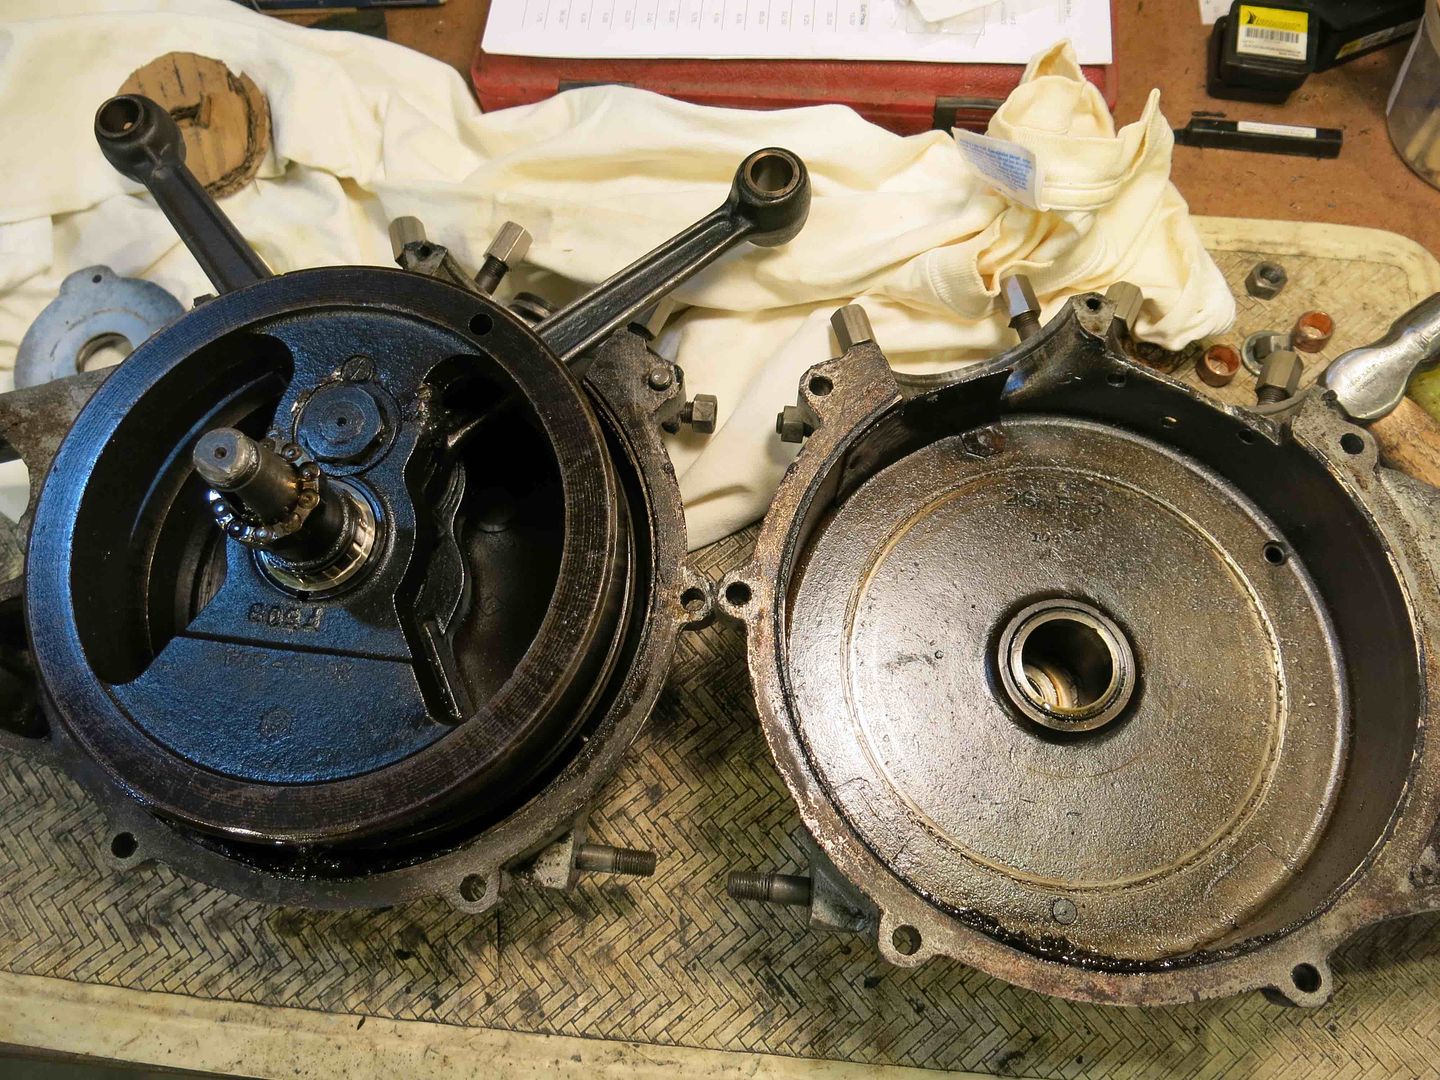
And revealed some welding on the drive side flywheel:
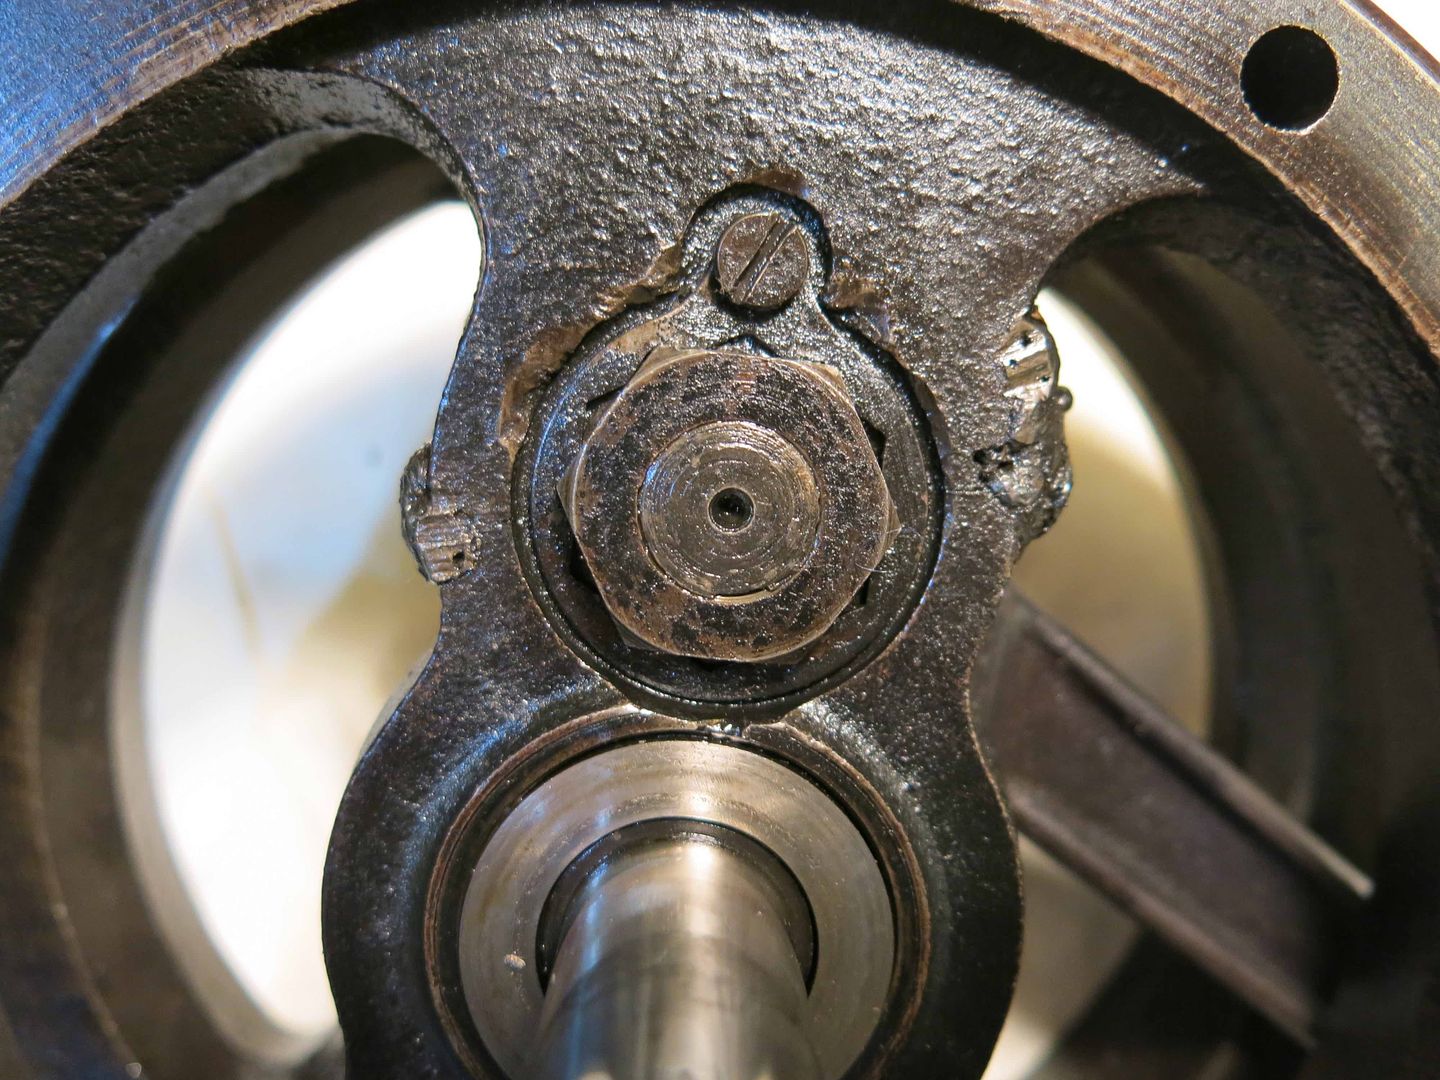
So the next step is to clean everything and take a look at those welds, I hope I don't need a flywheel!
I am hoping to have Danny Weil do the bottom end for me if he has the time. The top end I can do myself mostly, hoping to use the existing two-ring pistons as pistons for the 37 c.i. Scout motor are not being made as far as I know.Last edited by pisten-bully; 04-27-2020, 03:57 PM.Leave a comment:
-
That is my favorite MC license tag, bar none! I always thought, if your symbol is a polar bear, you must be hardy to ride a motorbike. Funnier that they only need a few numbers ;-)Originally posted by pisten-bully View Post
It's too late for you now, but I have oft run into oval rims. My trick is to take the oval out in the press to make them slightly more round. It cuts down the frustration. I cut blocks to fit the shoulders and then start pressing until they are round enough to proceed. They spring into shape, though I'm always a bit hesitant to press near the weld.
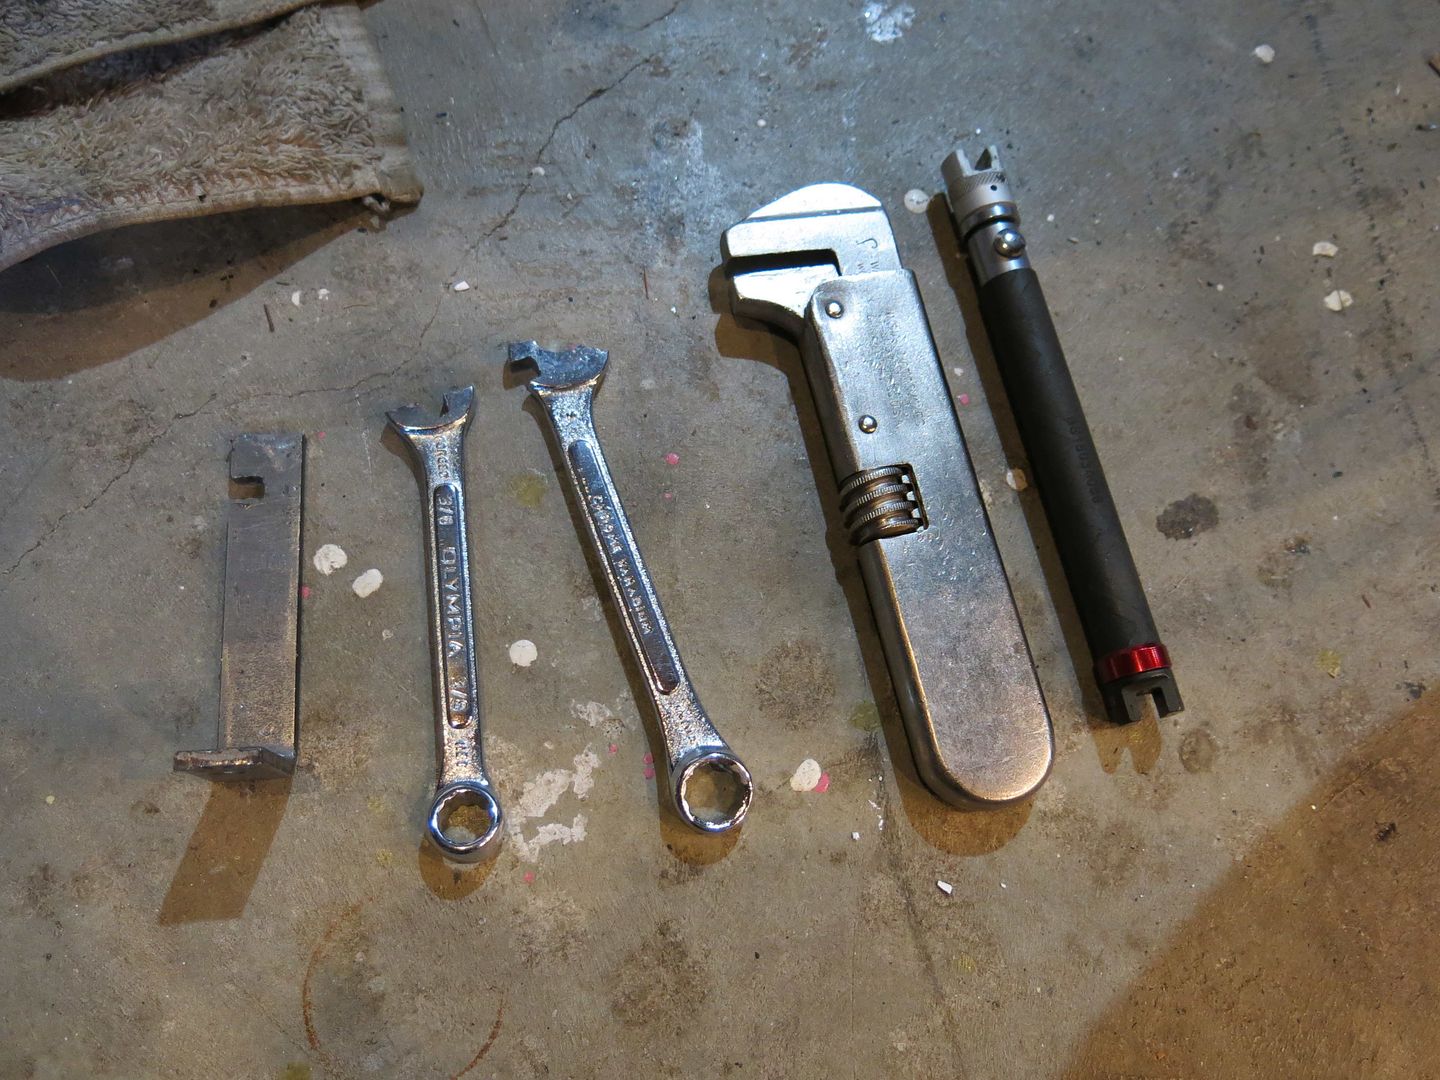
I dig all your home made wrenches!Leave a comment:
-
Wow Harry.
I have a nearly identical wood block (but its cedar).
And a certainly identical rug (but more stained).
Bolting your state plate over it should keep its outline. If not, use a rat-tail file!
...CottenLeave a comment:
-
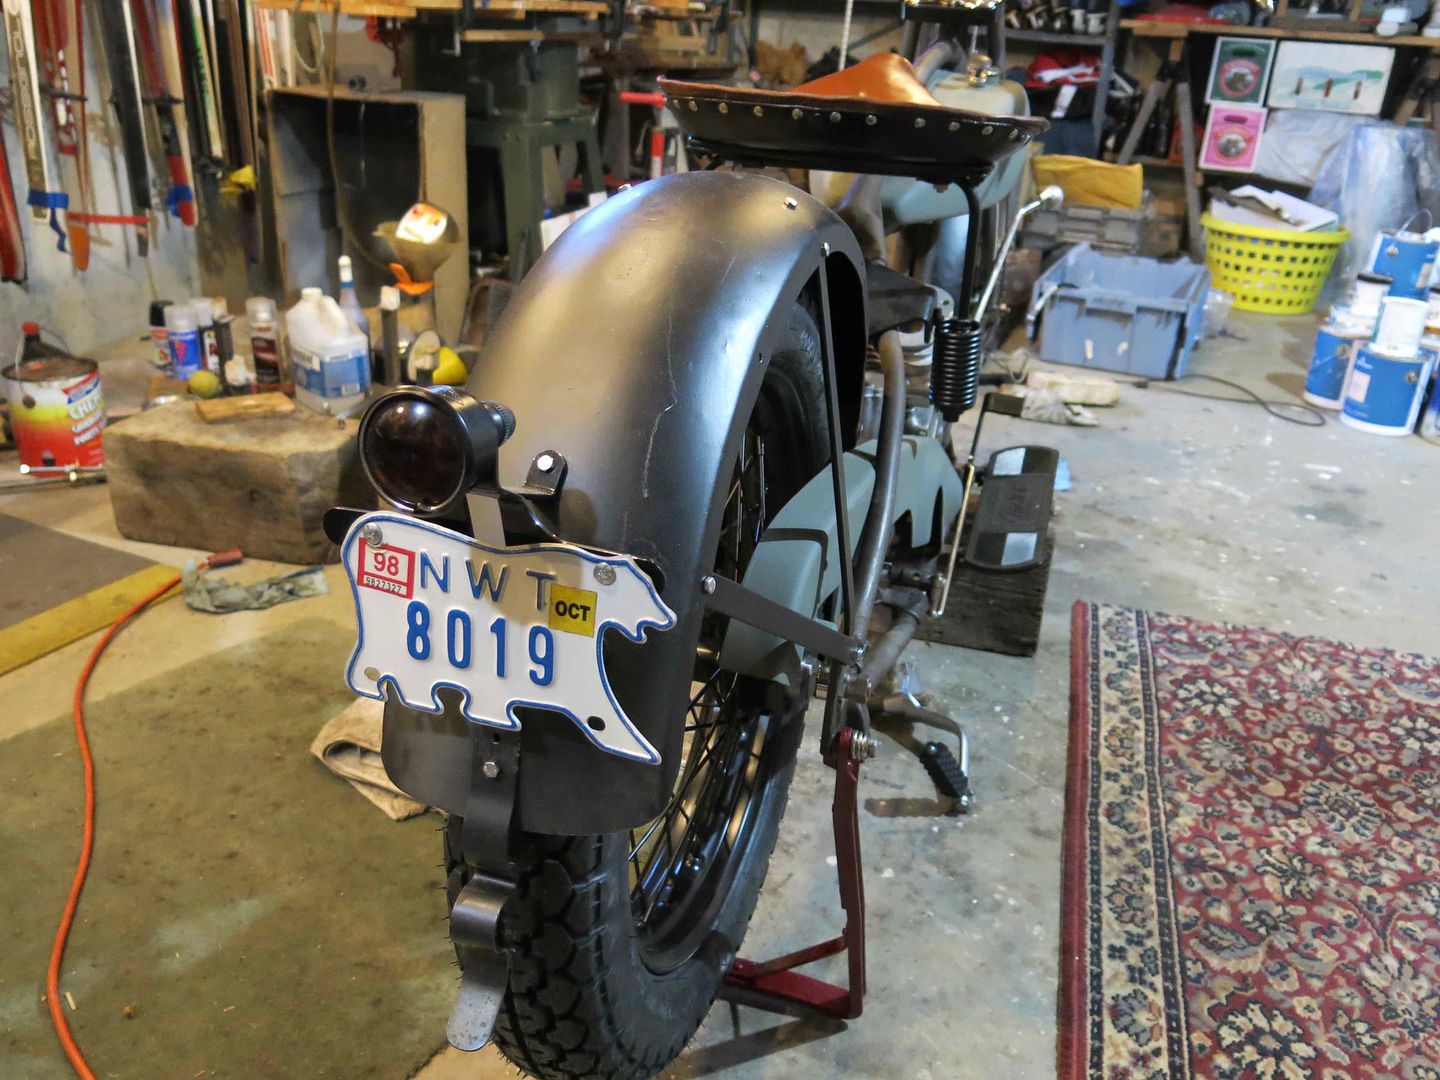
Had a fun thing show up in the mail from one of my customers the other day, so onto the 101 it went! I may have to move there because the license plates are so cool ;-)
Leave a comment:
-
Great work Harry! Thanks for the pics. Enjoy following the progress. All too often original parts are scrapped because repops or replacements are the "EASY" way out. Nothing beats the satisfaction of restoring an original part that many would deem junk! Keep up that relentless perseverance.Leave a comment:
-
This is awesome Harry, love all the detailed pics its very helpful for future referenceLeave a comment:
-
Thanks Eric! I�ve done a few wheels before but nuthin� like this front wheel! It was oval, not round...and not slightly oval either...I almost caved in at one point and gave up: loosen two sides, tighten the other two sides, repeat...repeat...repeat with little movement until finally things started to move!Originally posted by exeric View PostLeave a comment:
-
Great pictures, and descriptions, Harry. I always save original spokes and nipples and go to pains to save them when I break down an old rusty wheel. I love the tools you made, and I have done the same thing out of necessity. You have shown much of the grief, and victory of lacing, and truing your own wheels and it's worth the effort. When I first got into old bikes, I took a wheel to an old line H-D dealer in the early '70s to have it laced an trued, I was shocked when he said the bill was $60. With indignation, I pulled up my big boy pants and said I would never pay that outrageous amount again for that service. Of course I would gladly pay $60 all day long today, but I'm glad I persevered and learned some of the nuances of the wheel building art. In my limited experience, Indians, H-Ds, and Excelsiors with laced in front brakes are the hardest to do. I love your build, and thanks for sharing it with us, Harry.Leave a comment:
-
By the way, if anyone were to ask me when you should paint your spokes, I would now suggest to paint them AFTER you build the wheel and true it up!Leave a comment:
-
One thing about Covit-19 is that now there's time to work on the bike. I've been chipping away at a bunch small stuff and decided it was time to true up the wheels and mount the tires.
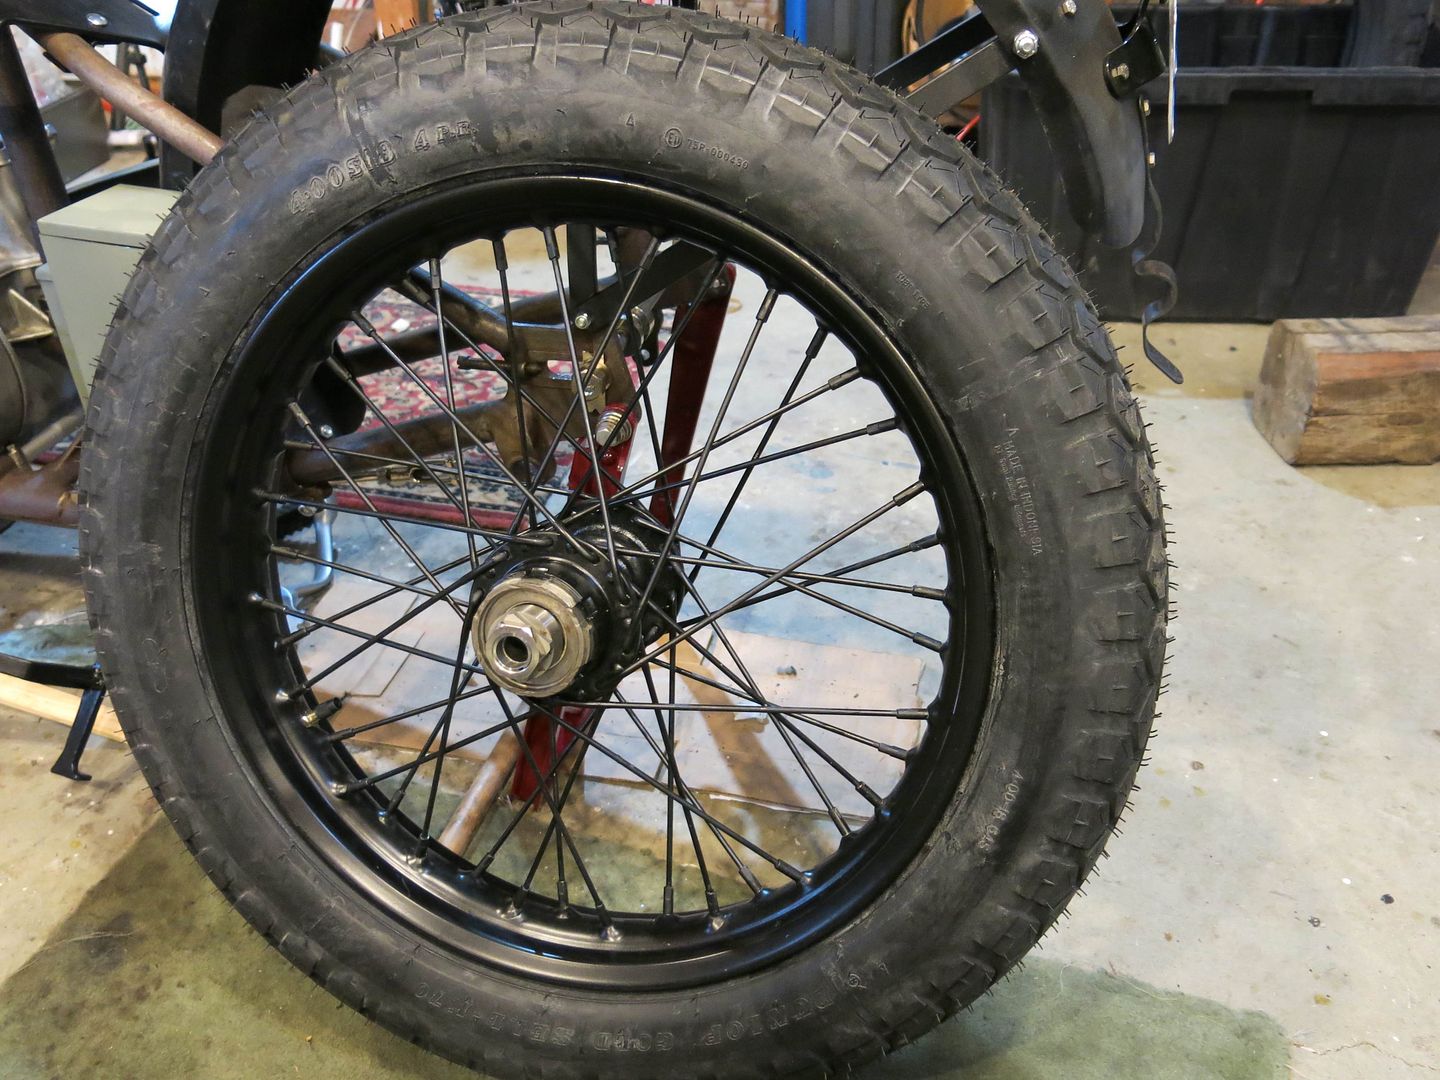
The rear wheel spun fairly true and all I needed to do is make some small corrections to the side wobbles and then torque the spokes. I cut off any of the spokes protruding on the inside and mounted the tire and tube by hand (really, it was two hands and two feet to get it on!)... but all in all the rear wheel was not that big a project:
Now for the front, a whole different ball game! I don't have a truing stand so I rigged up pointers, both for side to side trueness and radial trueness:

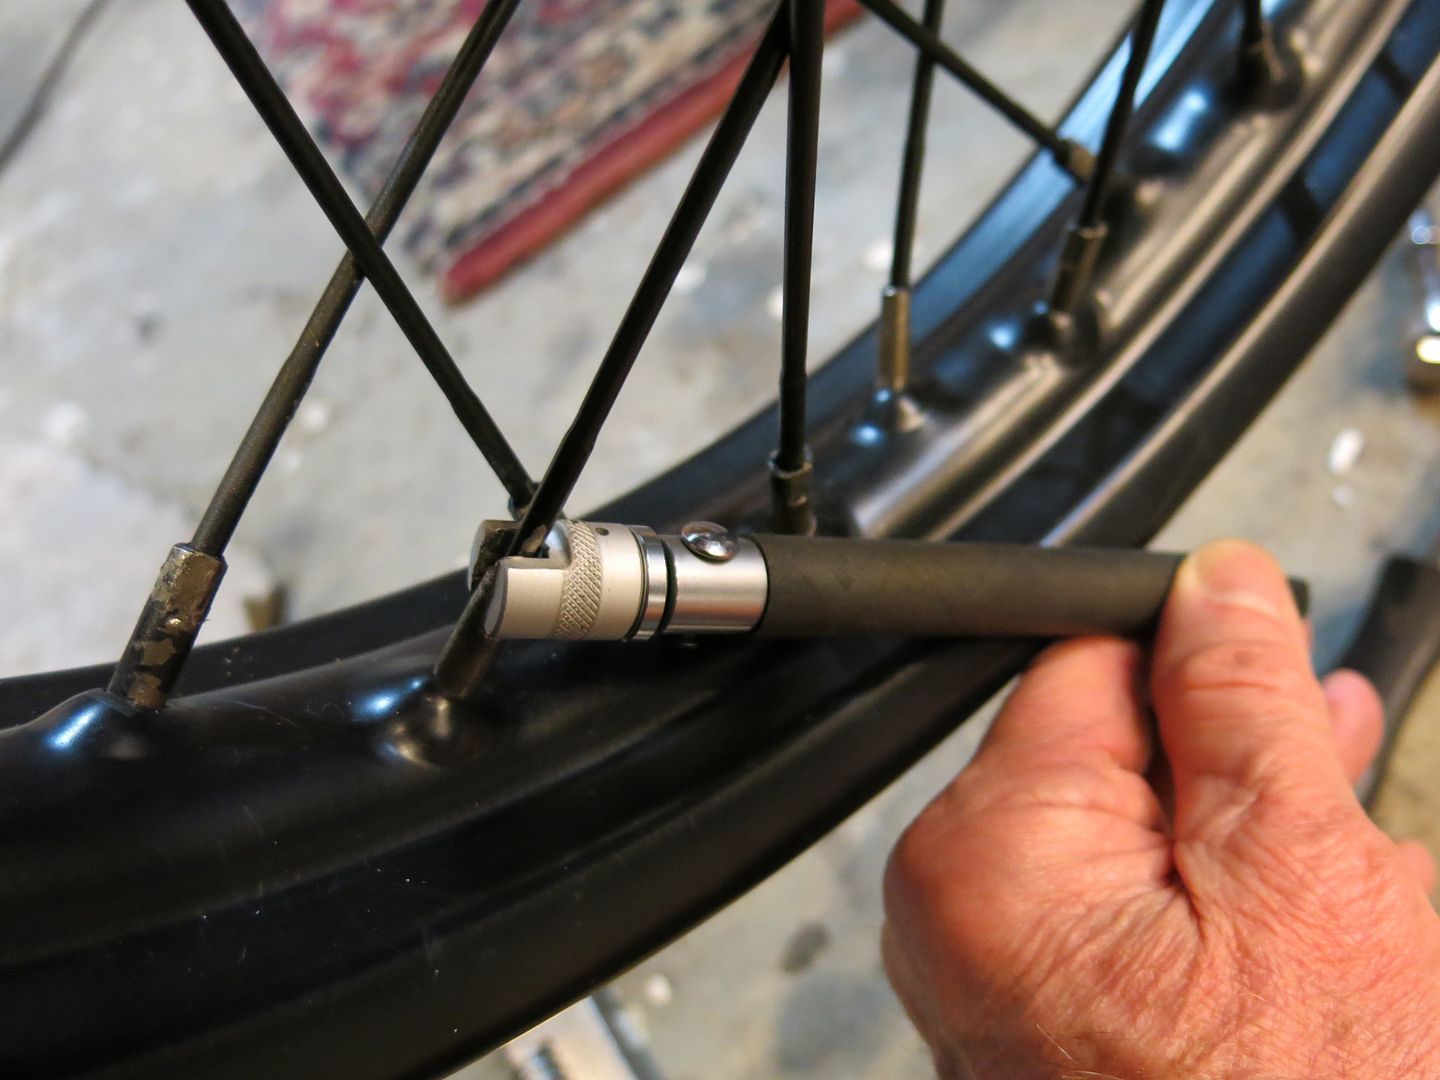
This is when the fun began....the front wheel was way out radially, a 1/4" or more in two spots opposite each other. To get this wheel round instead of oval required what felt like thousands of half turns on the spokes. And the biggest issue I had is that the nipples have only two flats on them, so when you turn the nipple and your wrench contacts the adjacent nipple and stops your turn, I found that the adjacent nipple on the other side was in the way so that the wrench wouldn't go on until I turned the nipple a few degrees.
So I made a few wrenches for the nipples:
I spent a whole bunch of time truing up the front wheel but I finally got it, thank-you Covit-19 Last edited by pisten-bully; 03-25-2020, 01:43 PM.
Leave a comment:
-
Thanks JTR, I actually bid on some little wire clips that go on the rear fender!Originally posted by JTR249 View PostLeave a comment:
-
Thanks Eric and Damon! Eric, you're right about enjoying the motorcycles. I'm on my own schedule, no pressure of a future Cannonball like Kevin, Dana, and others to get it done... so when I get a chance to do something on it, it's there. And maybe it's good therapy, too, since I'm working full time, some pretty long days in the winter, too!Leave a comment:
Leave a comment: