Hi Kevin,
You may not have time before the cannonball start but that broken part looks like it could be repaired by boring out the slotted piece and brazing a new one into place. The new slotted piece looks like it would be simple to make on a lathe and a mill. That way you can put the other part back on the racer.
Like I said it might have to wait until you get back if you dont have the time now.
John.
-
I never did make it to a bike shop, but I did do a little on line research. The thing is, even if I do find a gooseneck that fits my forks, the clamp would have to have a removable top rather than a P clamp, since my handlebars have a welded crossbar. Also, the clamp would have to be 1-1/8 inch since that's what the knurled part of my handlebars is:

My conclusion after my brief scan of the internet is that I can probably find a mountain bike gooseneck that could be made to work. They have mountain bike fat bars that are 1-1/8 in in the center section. The gooseneck would probably a two part arrangement made of anodized aluminum. But I just don't want to rig my bike together like that, so I decided to rob a part off of the racer. I'll have to find another to replace it eventually. I'll probably weld the ears back onto the old one too, and save it for a spare, since it is 100 or so years old. Here are the broken one and the pretty one:

And here it is with all the old parts put onto the good gooseneck.

I haven't gotten the handlebars remounted yet, but I did replace and grease the steering head balls. I also put new leathers in the hand oil pump and fixed a couple of oil leaks. More to come.
Kevin
.Leave a comment:
-
Nice catch! It would be interesting to see if you're able to source one at a bicycle shop with the correct thread pitch and wedge.Leave a comment:
-
character building ,lucky you took the time to pull it apart , RobLeave a comment:
-
Two steps forward, one step back.

The handle bars were wobbly, wouldn't tighten up. Two of the three fingers were broken off of the steering stem wedge. It's an easy fix. I'm glad I found it now. I think I have a spare, if not I can probably get parts at a bicycle shop. Otherwise, I'll gin something up.


Kevin
.Leave a comment:
-
I've forgotten who I bought this kicker from, maybe it will come to me. It was either someone on this forum or the other one. What I like about it, once I got it cleaned up, is that you can faintly see the military green paint. How cool is that.


At some point, however, apparently a large Doughboy must have given it the boot and perhaps he forgot to retard the spark before he did it. In any case, the kicker arm was twisted and had to be straightened. I did my best to apply the heat in an area that the paint had been rubbed off of. Here is the before:


And here is the after:


On a related note, I finally managed to fabricate an original style decompression link. It's that little rod that runs behind the exhaust pipe and connects the spark advance linkage to the decompression lever.

The way it works is, before you boot the kicker you rotate the right side hand grip outwards. That first retards the timing, and then lifts the exhaust valves. As you kick the starter you rotate the right side side hand grip inward which first allows the exhaust valves to close and then advances the timing. It sounds like a lot going on, but it's actually a very natural motion and it results in much less stress on the kicker mechanism and no kick back.
Kevin
.Leave a comment:
-
Thanks. I'm going to hold me pride until I prove them with a ride across the USA. Yes, they are expensive to make, even not counting the value of my time. We made enough for both engines that I'm working on plus one spare set for the Cannonball. I wouldn't necessarily be opposed to making more sets once they are proven, but this is a hobby for me, not a business. After the Cannonball I am going to focus on making my own exhaust cam followers though. I've only done the intakes so far.Originally posted by BoschZEV View Post
Kevin
.Leave a comment:
-
A man after my own heart. I'm sure you felt justifiably proud of your accomplishment when you took the final results from the envelope. The only problem, though, is now all the owners of old Indians will be contacting you to buy copies and will be upset when you tell them either 1) you're not in business to make more, or 2) how much they would cost for it to be worth the time it would take.Originally posted by Shaky Jake View PostLeave a comment:
-
Here are the new intake cam followers just back from the heat treater a few weeks ago:

It took an Engineer (me), three machinists, and a heat treater to get to that point. I reverse engineered these from original parts using radius gauges, traditional measuring tools, and AutoCAD. I worked with one CNC machinist, Gary, to make three sets of prototypes. I installed each prototype part in the engine and tested it with a degree wheel before tweaking the design and making the next prototype. I believe that the third and final prototype is as close to original as you can get in terms of valve action. They don't look original because the originals were forged, and only the wear surfaces were machined, but the dimensions and orientation of the critical surfaces are very close to those of the originals, so I expect them to perform like new originals did. Once the final prototypes were finished, Gary got out of the business, so another CNC Machinist, David, stepped up to machine the final parts from A2 steel. David added a small indexing hole to the parts to ensure accurate and consistent orientation during machining. They were things of beauty when a they came out of Davids machine. The parts were then sent out to a heat treater with a vacuum oven and hardened to Rockwell C60, which is consistent with the hardness of old the original parts, as well as modern cams and lifters. A third Machinist, Bob, made new shafts and finish honed the holes to match. It was a lot of work, yes, but at the time I started on theses there were no new replacements available, and the old ones that you could find were either very worn, or had been repaired multiple times. I'm happy with the results.
Here's a picture of them hanging in the cam case with one cylinder one and then two cylinders on:


You've got to love the color of that A2 after vacuum heat treat. It's somewhere between amber and gold.
I wanted to throw in this picture of the moto-van in the body shop. These old Sprinter vans have a known problem of rusting around the windshield. Even though this was a Kentucky vehicle and never driven in snow or salt (and I don't drive it in winter) I was starting to see some rust around the windshield so I took it to a local body shop and had them pop the glass out and repair the metal. It should be good for another 20+ trips around the sun.

Kevin
.Leave a comment:
-
I got to take several short runs through the countryside today, and spend time in the shop in between runs, fixing little things and making adjustments. The clutch adjustments are getting pretty close. The transmission and linkage are working pretty well. The carb is getting close to being dialed in, and I've reworked the carb linkage and it's working must better. I've got the automatic oiler tweaked to the point that I can take a 10 mile run without a noticeable change in the oil level. I just need to take some longer runs and fine tune it. All in all I'm feeling much better about it than I did at this time yesterday. Yesterday Patience was being stubborn, today I feel like she's on her way to being sorted. Once I get to the point that I feel the bugs are worked out and the oiler is dialed in, I'll put her back on the rack and tear the front end apart. She's got a bit of a wobble and I need to check the bearings and brakes. That's it for today. Sorry, no pictures, just a quick status.
Cheers,
KevinLeave a comment:
-
.018 - .020 on the top ringOriginally posted by hairynob24 View Post
.020 - .022 on the second ring
.020 - .060 on the oil ring
Kevin
.Leave a comment:
-
Backing up a bit to cover the details.
While I was cutting those purdy valve seats, I noticed that two of the valve guides were tighter than I like. These engines like to be built loose. Tight valve guides will stick. So I broke out the handy dandy Sunnen Honall and gave them a go.

Then the valves go in and the springs, retainers, and keepers go on.


Of course the ring gaps must be set, and the cylinders are pretty much ready to mount.

Kevin
.Leave a comment:
-
Kevin,
Congratulations on the start up, sounds good!! Bet you're excited to get riding.
Yes, Hans did run straight synthetic 2 stroke oil in the crankcase. We had a very lengthy discussion about this and I tried it in the Chief for a while. It ran incredibly clean, not a speck of carbon build up. I decided to go with a conventional oil because with the sidecar, the engine runs very hot and that thin oil made the timing chest clatter, a lot! It sounded like Chinese whore house! (I can only assume). It still is a noisy timing chest when it gets hot but its better with conventional oil.
GeneLeave a comment:
-
This happened tonight. I had to share it. I still have a ton to do.
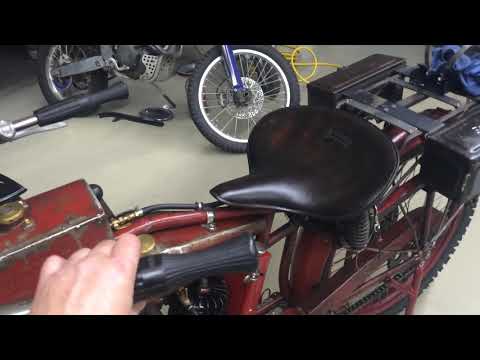
Kevin
.Leave a comment:
Leave a comment: