Ah-ha! Thanks, Tom.
regards,
Rob
-
I was just reading thru Uncle Franks Q&A from 1937 and in there they list the float settings for the various HD and Indian carbs of the time. The give a Schebler Deluxe float setting as 7/16".
regards,
RobLeave a comment:
-
No more drooling!!!
Well, it appears I have licked the last piece of the drooling carburetor saga. The last problem was gas spewing out the throat and onto my floorboard via the air cleaner. I figure lean angle was playing a major role, if not the primary role.
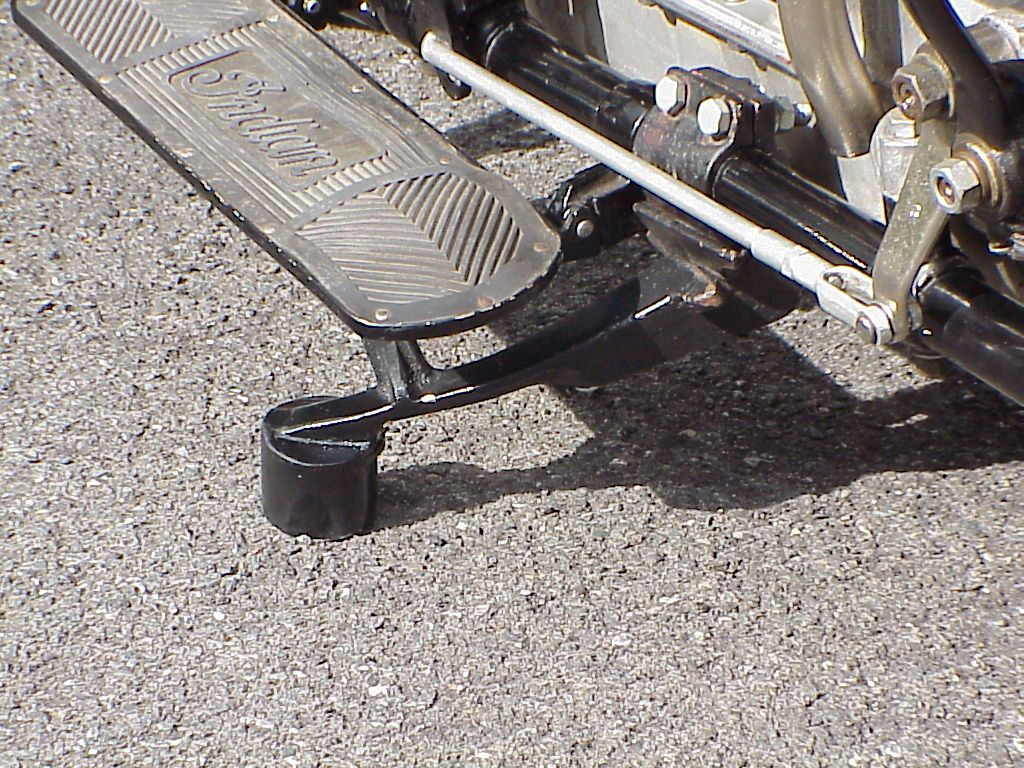
So, today I welded a 1-1/2" thick foot extension onto the foot of my repop stand. That did the trick. Took the bike to get inspected, stopped to show it off to a few friends, parked it, started it, parked it, started it... no a dribble, no drool, not a drop of gasoline to be seen.
Here's a pic of my corrective orthopedic shoe on my side stand. Note my pucked floorboard mat from repeates gas soakings.
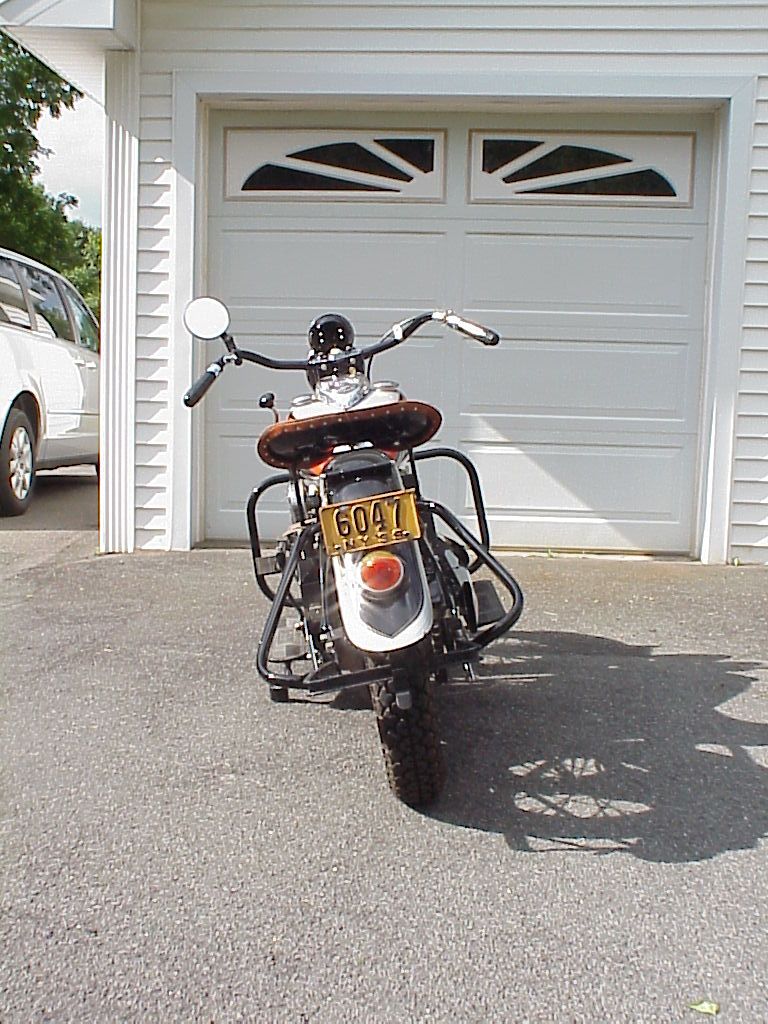
Here's a pic of the new lean angle with that added shoe.
I'm not done with the stand yet. I swear I can see it flex. So, I'm going to weld a strengthening gusset between the new foot and existing web of the leg.
Thanks for all who helped as I worked thru the issues.
regards,
RobLeave a comment:
-
I considered that, Tom. Having you mention it gives me more confidence this is possibly at play. Right now the carb is clocked such that the pivot point is just about dead forward, relative to rider position. As you know, I have very little side slop with a 0.001 clearance to the pivot shaft and about 0.005 side clearance to the bowl at the pivot. I've held the bowl in various positions to make sure the float is not dragging. I even dropped the float high 1/16" to 5/16" to give a little more room for the fuel level to stay clear of the top of the bowl.
The fuel running out the filter, which means out the throat of the carb, could this be related to the carb body being distorted and the "smile" under my venturi?
regards,
RobLeave a comment:
-
Rob!
I am handicapped when it comes to Fours, as I have never had one in my shop, except on the bench.
This lean angle thing may involve how the bowl is "clocked" upon the body.
And since there is no detente nub upon the body to catch a notch in the bowl lid, there is side-slop to consider as well.
(I prefer to rotate the valve as close to the choke thumbtab as possible, after the Linkert fashion.)
Unless you have the entire carb removed, so that you can suck upon the inlet while the assembly is inverted, the position of the bowl will remain a possible issue.
....CottenLeave a comment:
-
As a follow up to the follow up, the thicker Greer rubberized cork top float bowl gasket just barely weeped enough to wet the outside of the bowl at the front of the float pivot point. So I cut a new gasket, this time from Interface Solution N-8094 paper material which is 0.062 thick. I also put the bowl on a flat plate with 240 grit emery and sanded it dead flat.
I also suspected that the pivot screw, although brass and snug, might be weeping a tad so I cut a small gasket from 1/32" paper to go under the head.
Kept the o-ring inside the bowl and thin paper gasket at the nut along with the thin paper gasket on top of the cover. This seemed to be the magic combination Carb stayed bone dry.
Now my only issue is the lean angle. Even with the new stand, it is better, but still too much. Starting the bike on the side stand resulted in gas running out of the filter like crazy. So, I'm going to weld a 1-1/2" extension to the foot of the repop stand to see if this cures that problem.
regards,
RobLeave a comment:
-
Follow up on drooling carb
Although not my thread, since I've done such a great job of highjacking it, I figured I might as well post the follow up info on how I made out with the carb issue.
Although ordering new gaskets from Greer's, I ended up using a combination of hand cut and manufactured components.
I installed the new foam float from Cotten onto my repaired float arm.
Installed a new float needle and seat from Thomas Fickau.
Cut a 1/16" rubberized cork gasket for the float bowl to cover surfaces.
Cut a 1/32" paper gasket for the cover to carb body surfaces.
Used a Viton o-ring for the internal bowl to carb stem surfaces.
Used a plastic (black, not sure if type of Nylon or Delrin) that was on the carb originally for the nut to bottom of bowl surfaces.
Conrad Lytle rebuilt both my petcocks with new stems.
Reassembled and put gas in the tank. So far, carb is bone dry. Bowl is very cold so a good indication that it is full of gas. I left the petcock open (only filled one tank) and left the bike on the side stand. No trace of gas whatsoever. Knocking on wood as I type this, but I think I have the drooling carb/flooding engine issue solved.
Thanks to all who helped with suggestions, comments, and referrals for parts.
regards,
RobLeave a comment:
-
Auto Zone sells it but does not stock it. Mr. Gasket offers it, too. I thought about hobby stores after posting. Never thought about fabric stores.
Greer's gaskets are rubber/cork and 2.2mm thick.
Regards,
RobLeave a comment:
-
Rob!
My wife brings home Portuguese cork sheet in two thicknesses from the fabrics store in the big city.
Look for the finest grain you can.
But frankly, I get most gaskets pre-cut from Fickau Prototypes.
I appreciate the pic; hope I can view it when I get home.
I am not aware of any Schebler soft valves, and not really shopping for any. Mr. Fickau's exact reproductions are admirable.
I did encounter my first Schebler "Grose Jet" though, just this week!
....CottenLeave a comment:
-
I did not even think you could buy straight cork anymore. I have a roll in my spares, but it is old and brittle. Guess I should take better care of it. Now I'll be on a quest for pure cork gasket material
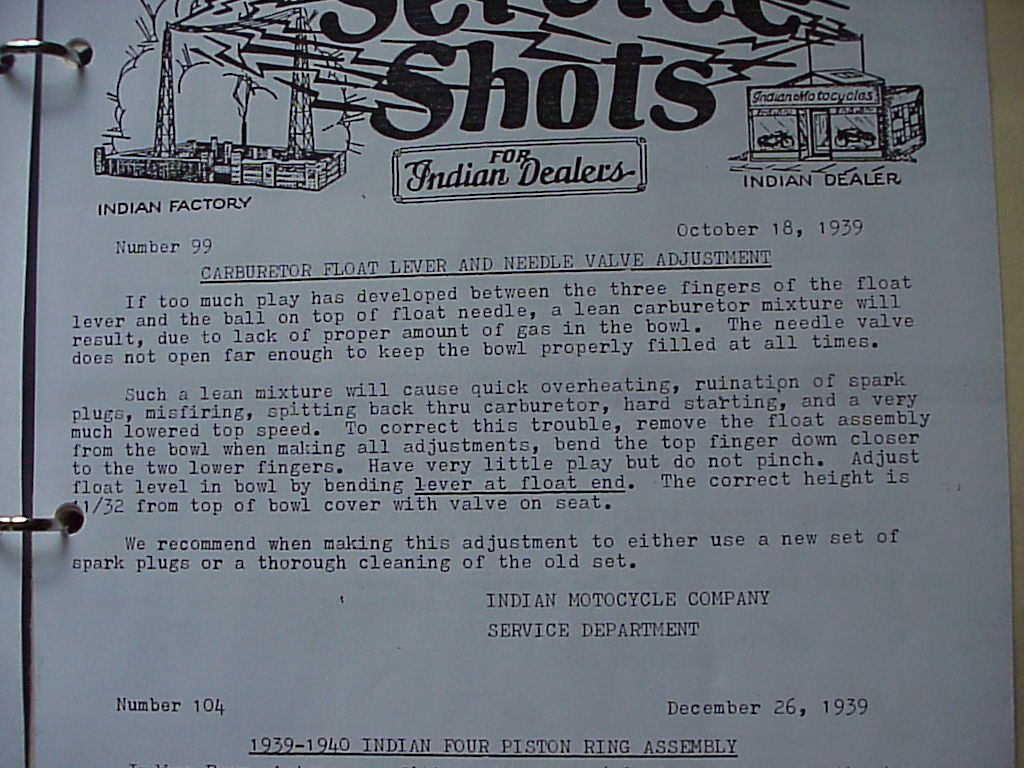
The Indian Four Cylinder News, Vol 13, No 1, from Spring 1978 featured the 439 Indian. It contains a collection of info on that model. In it were excerpts of Service Shots and that float setting was one of them. I got a reprint of the issue from Chuck Myles Indian.
My scanner is not compatible with my new computer (damn HP won't update their software) so I had to take a picture of the section. Here it is.
Does anyone make a viton needle and seat for the float bowl?
regards,
RobLeave a comment:
-
Rob!
The Rider's Handbook refers to Linkerts, of course.
The 1940 "beanpot" Scheblers have been cited at �" as well, so the October '39 service shot is a bit of an enigma; I do not believe I have a copy.
There were two styles of "tin-lid" bowls, early and late, and I would appreciate anyone's references on these settings, as there seems to be conflicts.
And yes, cork/rubber composites are a problem in modern fuels.
I use straight cork; It is hardly satisfactory either, but more compliant than paper.
Some literature prescribes "caulk" upon the top of the lid, however, I cut thin paper as you did.
....CottenLeave a comment:
-
Tom,
Just realized that I never answered your question regarding float height setting. I have two resources that provide float height settings.
In the Riders' Instruction Book, which according to the note hand written on the cover, is for all models from 1938 thru 1951, it does not call out the carb type or model specifically. It just has a section on carb adjustment and says that the float should be set 1/4" from the top of the bowl with the float valve closed.
The other resource is a Service Shots bulletin No. 99 dated 10/18/39 that says the float should be set 11/32" from the top of the bowl cover with the valve on it's seat. I measured my cover/gasket thickness and subtracted it from the 11/32" and got 1/4" from the top of the bowl. This was with a gasket I cut from cork/rubber sheet gasket that is about 1/32" maybe more. I can measure if you like. The new gasket I got from Greer's is more like 1/16". So, if the Greer gasket is the correct thickness, then that would make it 3/32" from the top of the bowl. I found mine set at 1/4" and that is where I set it when I put it back together yesterday. Actually a tad more than 1/4".
Something I noticed when I pulled the bowl back off the other day is the cork gasket I made swelled from the gasoline. I would think that's a good thing as long as it is captured by the cover lip. But after sitting on my bench for a day, it shrunk significantly to the point that I would not be able to reuse it or even use it as a pattern to cut another. Makes me wonder what would happen over the winter if I ran the bowl dry and then let it sit. It might shrink to the point it would pull out from between the cover and the top of the bowl.
regards,
RobLeave a comment:
-
Problem solved. Rather than sand the float or crush the pivot tube, I replaced the pivot tube. My pivot pin measured 0.095" and a number 41 drill is 0.096. So, I knew I could make a new pivot bushing. I rummaged thru my coffee can of pin reamers and found a 0.096" reamer. Now I was set.
Machined a new pivot bushing from brass, made it 0.020 wider (0.005 clearance to the bowl) to remove side play and after removing the old bushing, soldered in the new one. Slicker than pig snot. Float sits in the middle of the bowl with near zero side wobble.
For guys doing this for the first time, use a small LED flashlight thru the center hole of the float to light up the bowl under the float. Gives you a clear view of the clearance on each side of the float.
Pressure tested my petcocks today. Even the one that did not leak, bubbled a bit when tested. So, I'm going to send them off to Conrad Lytle and let him rework them. I'll see if he pressure tests them when he's done. IMHO that should be the final test they have to pass after a refurb.
In the meantime, I found a few more nits to play with. Have the tanks off so gives me room to fix those few other "issues". Need to do some research too. I think I'm missing a thrust bearing in the speedo cable housing.
regards,
RobLeave a comment:
-
Rob!
A DURABLE float can be sanded without issue if your patience fails,
but you shouldn't have to...
Its OD was based upon NOS examples, but it is thinner to account for its increased buoyancy. A little more won't hurt a bit.
What float level setting did you find in your literature?
The petcock is critical of course, as no floatvalve can ever be expected to be absolute. They are designed to run open.
....CottenLeave a comment:


Leave a comment: