Looks like pivot repair is on the to-do list for today. I have two issues. One of the petcocks I rebuilt with o-rings yesterday leaks at the seat. It did not leak before so I assume I just have to index it one or two threads. I think I'll remove it and pressure test it to get the right seal position.
Float is definitley dragging on the side of the bowl. I wish the float traded a bit of depth for a smaller OD. I went back out in the shop after posting yesterday and the smell of gas was heavy. My lift was covered. Glad I had not changed the oil yet. It's shot now for sure.
regards,
Rob
-
Thanks. I was thinking about how to solve the issue.
I wonder if I could drill the jaws to provide a nice uniform squeeze on that pivot bushing. Not sure I have a reamer that size. Need to go check my coffee can of reamers my Dad brought home to me from a garage sale about 25 or 30 years ago. I know it's full of very small reamers. I was thinking of making a tiny bushing, but that could be an exercise in frustration.
Thanks,
RobLeave a comment:
-
Rob!
Since new levers are scarce,
I ground the jaws of a pair of "vise-grips" to closely match the pivot portion of the float lever.
A gentle squeeze closes the hole partially, and a reamer makes it sweet again, taking up much of the side slop and wobble.
....CottenLeave a comment:
-
I realize I've completely hijacked this thread. My apoligies if I've stepped on the original poster's toes.
My gasket arrangement worked fine. Had to snug up the bowl nut a bit to stop weeping there. I was hesitant to go too tight since a 1 inch wrench provides very little feel for dealing with soft threads.
The carb still drools, but not from gaskets. It is out the breather hole on the high speed needle passage. It's not the lean angle as the stand was on a 2x6. I suspect the float needle is not sealing well or the float is rubbing the sides of the bowl. I tried to assure that was not the case, but the side to side wobble in the float arm is sizeable.
regards,
RobLeave a comment:
-
I got my new float from Ed over the weekend and installed it today. Also cut a new bowl gasket from cork rather than use the gasket I cut from paper last week. I did a stack up of clearances and installed the float bowl with a thin paper gasket on top of the cover as well. We'll see if that stops the drooling.
My concern was the cover top might be without a gasket so the bowl is vented. But then I found that the bowl vent is thru the passage for the high speed needle valve. Hopefully, it was not drooling from there. That would mean the fuel shut off valves and/or the float valve are not working properly. I cannot imagine that the bike leans so far to the left that the fuel level can move to a point that high.
I think part of the shutdown procedure will be to shut off the fuel valves with the engine running so I lower the float level a bit before parking it.
When I dug into the float bowl, I also found that the float was loose on the arm, which may have also contributed to a higher than normal level.
regards,
RobLeave a comment:
-
Thanks Tom. I just went out and using a strip of paper, which is about 3 mils, I inserted it into the rectangular opening at the 6 o'clock position on the venturi and then tried to run it up and between the body and the OD of the venturi. For both right and left tries, it only went up about an 1/8" or so. So, that tells me the remainder of any clearance is 3 mils or less.
I'm riding in the Motogiro this weekend. Starting time is 8am tomorrow morning. So don't take a lack of response over the weekend to any other input as a lack of interest.
regards,
RobLeave a comment:
-
Rob!
The venturi would ideally be a slip-fit, with no daylight around it, at the rear anyway.
But venturies suffer from distortion over time, even more than die-cast bodies, and even Linkerts are far from immune.
By nature, the potmetal moves, like old window glass.
Venturies tend to shrink on the OD, and expand on the ID.
Nobody cares if the ID increases.
My procedure has been to install them as tight as possible.
In just a year or so upon the shelf, they can become slip-fits!
On to the cover detente, the larger carbs had a nub that located the cover onto the body, presumeably for gasline alignment, but it is missing on the 1" Four carbs, and maybe others if I look...
....CottenLast edited by T. Cotten; 05-03-2013, 04:06 PM.Leave a comment:
-
Thanks Tom. You have me convinced that it is more than just an ethanol thing.
I'm curious, are the venturis pressed into the carb body or does the nozzle hold it in place? I suppose the separate venturi was so that one carb body would fit multiple size applications by just changing the venturi in final assembly.
I thought I knew the answer to this next question, but now I'm not so sure. There is a small cutout on the ID of the sheetmetal top. It looks like a locating notch. There is no mating male lug on the bottom of the carb bowl flange. There is what appears to be a casting seam and it does seem to line up with the cutout when the top aligns with my fuel line. But the lug is so shallow that is really seems of little value. Should there be a heavier lug to engage that cutout or perhaps a pin pressed into the bowl flange? The gaskets for the top of the bowl have the same cutout, yet are on the bottom of the sheetmetal top so will never see that casting seam/lug. Is something missing from my carb body?
regards,
RobLast edited by Snakeoil; 05-03-2013, 03:50 PM.Leave a comment:
-
Rob!
Usually I swage the original venturi oversize, and then cut it precise for the new body bore size, although not all original venturies survive extraction, much less the swage process.
My luck with POR-15 has been only to test my local fuel, as it is one of the first samples to degrade, even in the mildest of years.
And Aerogloss does little better than my choice of VHT epoxy for paint, which is far from adequate.
Please remember that many great products are truly gasoline-proof.
But other stuff comes out of the pumps!
....CottenLeave a comment:
-
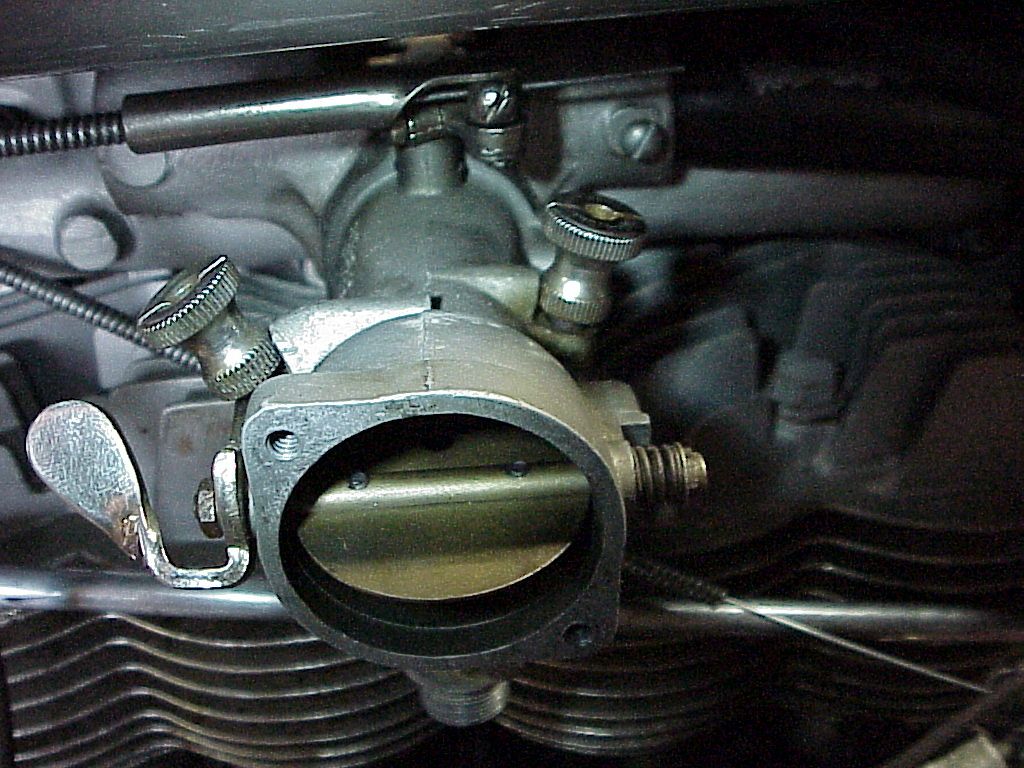
When I first peered into that carb I thought that the "smile" around the venturi was odd. When you say "resize" the venturi, are you talking a repair to the existing piece or machining a new one from scratch with different dimensions?
You asked if my bore was round. Judging by the clearance seen in that throat, I assume that over time, these castings go oval due to creep. Is the fix to bore them round and then fit a new venturi?
I wonder if POR 15 paint would hold up to the modern fuels? Or how about the paints they make for RC models. They claim those paints are fuel proof and that includes nitro, which would probably eat most other paints.
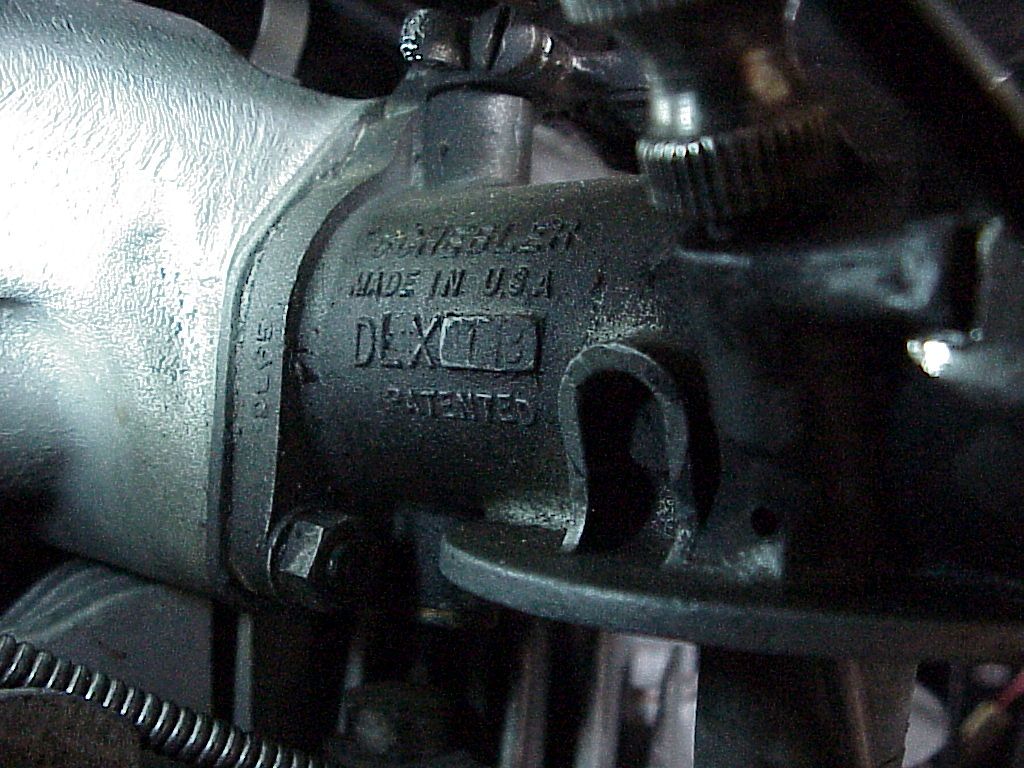
There is some what looks like original paint remaining on the side with the markings and the tin top has paint on it, but not much.
regards,
RobLeave a comment:
-
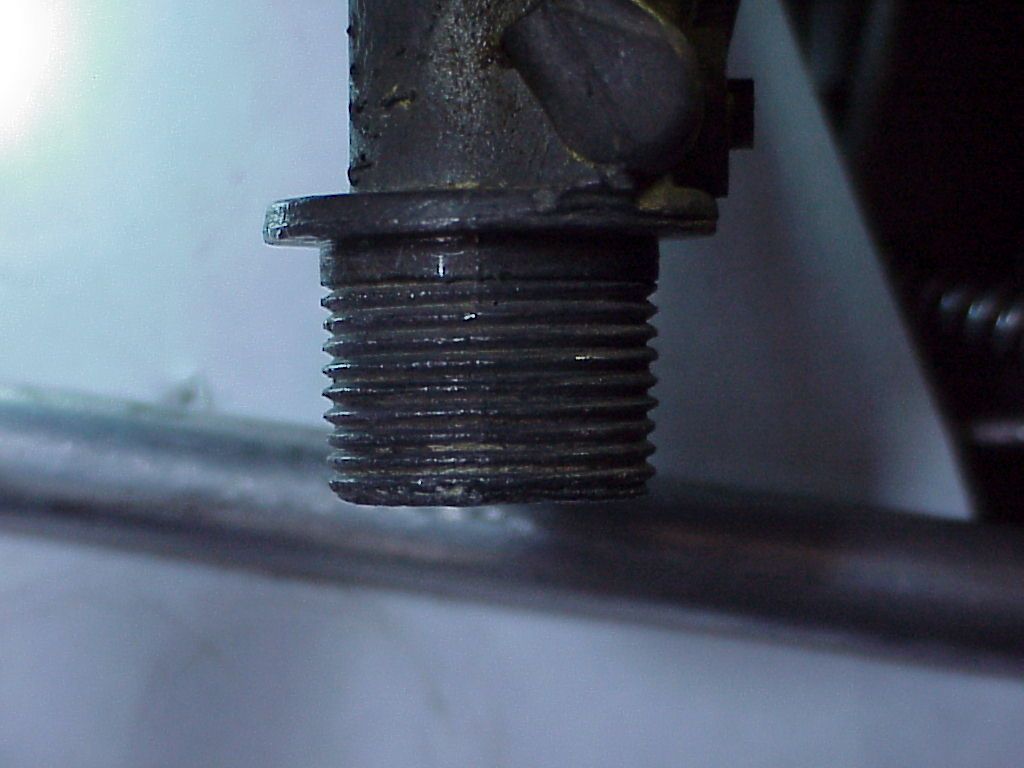
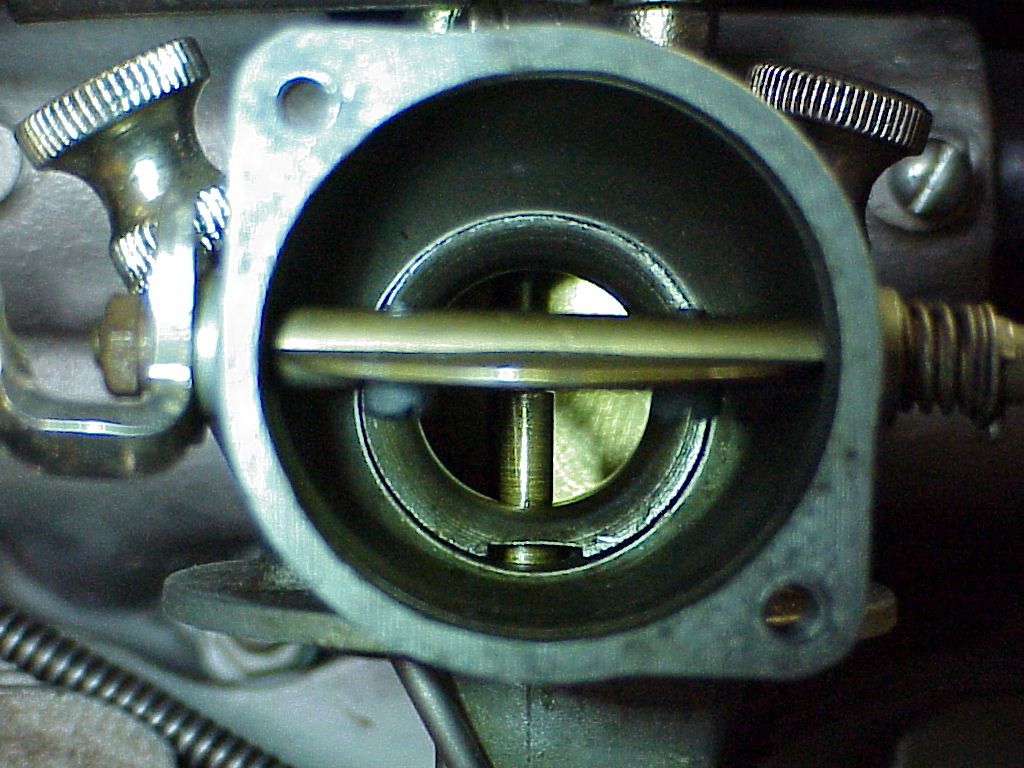
Rob!
Your bowlnut threads look pretty decent!
I really cannot judge a carb from photos,
but the "smile" on both sides of the nozzle vent is an indicator that the venturi needs to be re-sized, as virtually every one does.
Fuel-proof black enamels are getting rare or extinct, so I don't blame Mr. Truax for skipping it.
The problem hounds me constantly.
Some years ago, I tested JBWeld along with other sealers and paints in 95% ETOH 5% H20, and it was unaffected, as were other products proven to suffer in ethanol fuels.
Its not just the ethanol.
Its the combination of many additives that give fuels their digestivity.
And you never know what's going to be in next season's summer blends.
JBWeld survived well through years of extremely digestive fuels, however, for the last two seasons, fresh JBWeld has shown the sort of degradation you mention in my tests.
Seasoned JBWeld was unaffected.
Folks, USA fuels are not nearly as bad as they were, inspite of ethanol, for now... .. .
....CottenLeave a comment:
-
Tom,
Keep in mind that this bike is brand new to me and these ancient carbs are also a totally new experience as well. Until the Indian, my oldest carb was an Amal Monobloc.
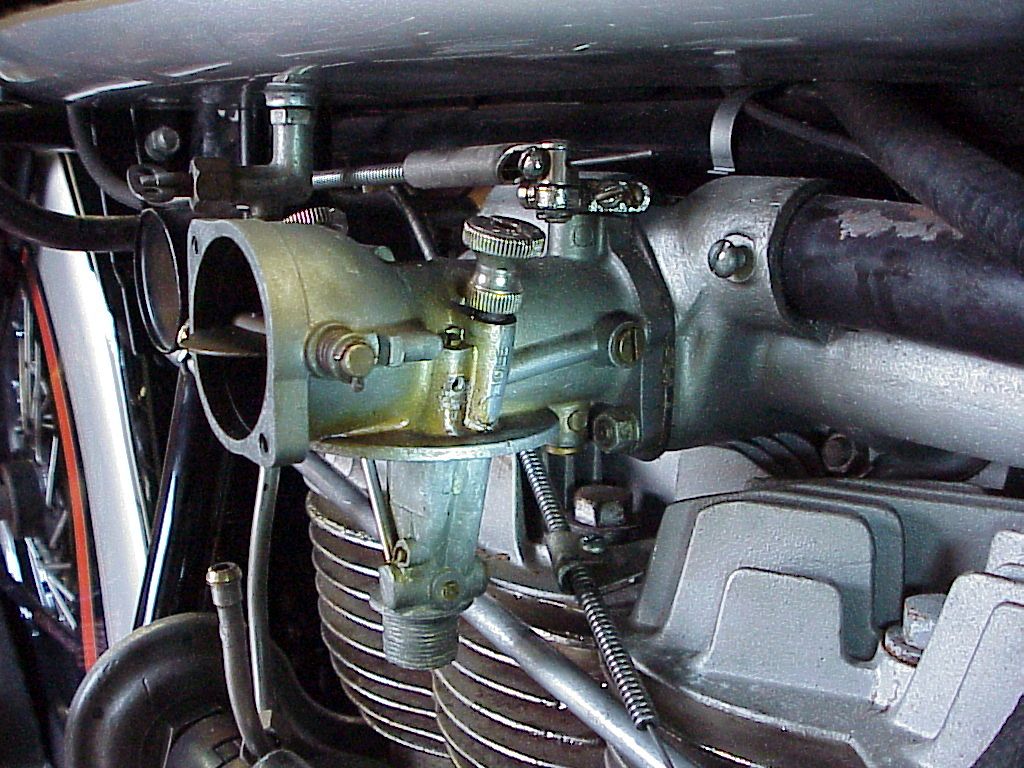
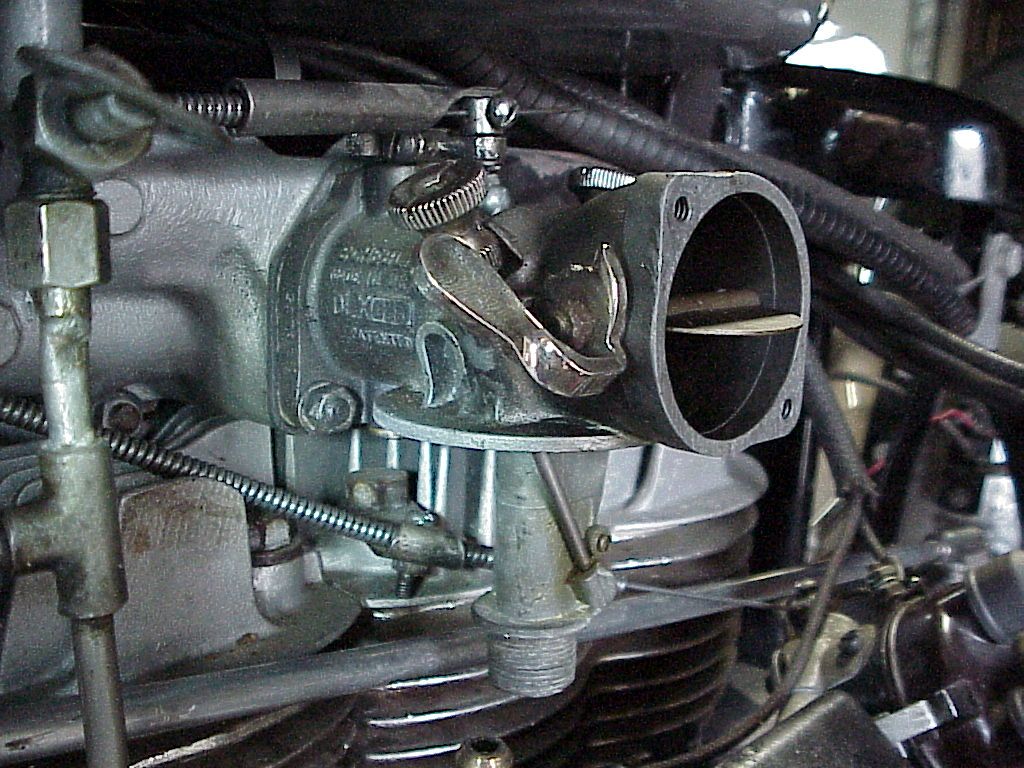
Here are some pics I just snapped of the carb, which is mounted on the bike. This engine was rebuilt by Irv Truax. He actually did it twice, once as a full rebuild and then again as a check since it sat for almost 10 years after he rebuilt it without ever running. He said he runs them on a test stand before he gives them back. So I assume Irv went thru the carb, although I never asked him that specific question when we spoke. I plan on going out to see him and buy him lunch so I can pick his brain a bit. He was really helpful over the phone the one time we did speak, which was just before Sandy hit and he was prepping for the worst.
Pics of the carb.
Regarding epoxies, I have already tested JB weld and although it does not dissolve, it gets soft when immersed in either E10 or pure ethanol. When you take the sample out, it rehardens. It gets rubbery, but not gooey.
I normally test expoxies for the effects of fuel for at least 30 days in sealed containers. The epoxy I used to repair the float was tested a couple of years ago and had zero effect from fuel. I will however test a new sample that is now hard and will report back in 30 days. My experience is if it is going to be affected, it will happen within 2 weeks. Of all the various products I've tested, those affected showed worst case within 2 weeks and a further two weeks in the fuel had no further effect.
regards,
RobLeave a comment:
-
Rob!
Yes, I machine DURABLE floats for Ed.
There are many fine epoxies on the market, however fuels are the problem, and changing constantly. The last couple of seasons of my local Shell P4gas degraded fresh JBWeld in tests, although samples that were cured beyond six weeks still survived quite well.
So please allow any goober to sit for a long time before exposure.
If the float you weighed has a porous surface from machining, (such as my DURABLEs), then you can expect some fuel to reside in the outer layer of closed cells that have been cut open. But as you found, at 20 milligrams, it would be minimal.
Have you put a dial indicator in the bore?
After cleaning the venturi, is there daylight around it?
....CottenLeave a comment:
-
Thanks Tom. Do you make those floats that Ed sells? I see he has TC as a code next to them and on the phone mentioned your name. I tried to find contact info for you, but struck out. Ed has one in the mail to me. I also repaired my crack with an epoxy I know is okay with today's fuel. I tested it, and made another blob to test again.
I actually weighed the float before repairing to see how much more it would weigh with the repair. It weighed 37.7 grains before the repair. This morning I weighed it with the epoxy hardened and it weighed 34.4 grains. At first I thought my scale went nuts. But then I thought that the float may have absorbed some fuel. So I set it in the sun for a few hours and weighed it again. This time 34.3 grains. So, they apparenty do aborb a slight amount of fuel.
Repair is strong, probably stronger than the foam. But I'll keep it as a spare.
Is my bore round? I'd have to say yes. Carb actually looks quite nice. I'll snap a few pics of the carb and post here. If there is anything special you would like to see, let me know. They're pretty simple. Reminds me of a RC engine carb only much bigger.
regards,
RobLeave a comment:
-
Rob!
Just for clarity, Jim Walther did not make the thread repair shown in my previous photo.
Beware with your new float that it too, will be quite brittle.
Is the carb bore still round?
....CottenLeave a comment:


Leave a comment: