Announcement

Collapse
No announcement yet.

101 Scout... going to take a while

Collapse
X
 
  • Filter
  • Time
  • Show
Clear All
new posts

  • That is beautiful work. So glad you were able to find such a talented craftsman to save an iconic 101 motor case. Danny Weil is also such a craftsman, so you're in good shape, Harry
    Eric Smith
    AMCA #886

    Comment


    • That is GORGEOUS work . . .and really makes me want to get good at alloy welding!

      Thank you for sharing!

      Comment


      • Originally posted by Shaky Jake View Post
        Yay. I love a bitsa-build.


        Kevin
        I like my new catch-phrase for the day bits-build. You should know Kevin.

        Cheers

        Mike Love

        Comment


        • Originally posted by pisten-bully View Post
          Thanks fellas! I complained about myself on another forum about jumping around the project from one thing to another without focusing on finishing a specific thing before starting another. But at this stage I think that's working for me...I'll eventually zero in on an area and focus on it (e.g. frame...or motor...or sheet metal), but for now I'm still in the "exploratory" phase!
          Honestly I think the jump around approach is most realistic. You start something and get to a point where you discover you need a part. Do you stop there until you can proceed in a linear fashion? No you jump to another sub-project of which you have a list of or you just look over the project and say "What's Next?" Loving this build thread.

          Mike Love

          Comment


          • Originally posted by pisten-bully View Post
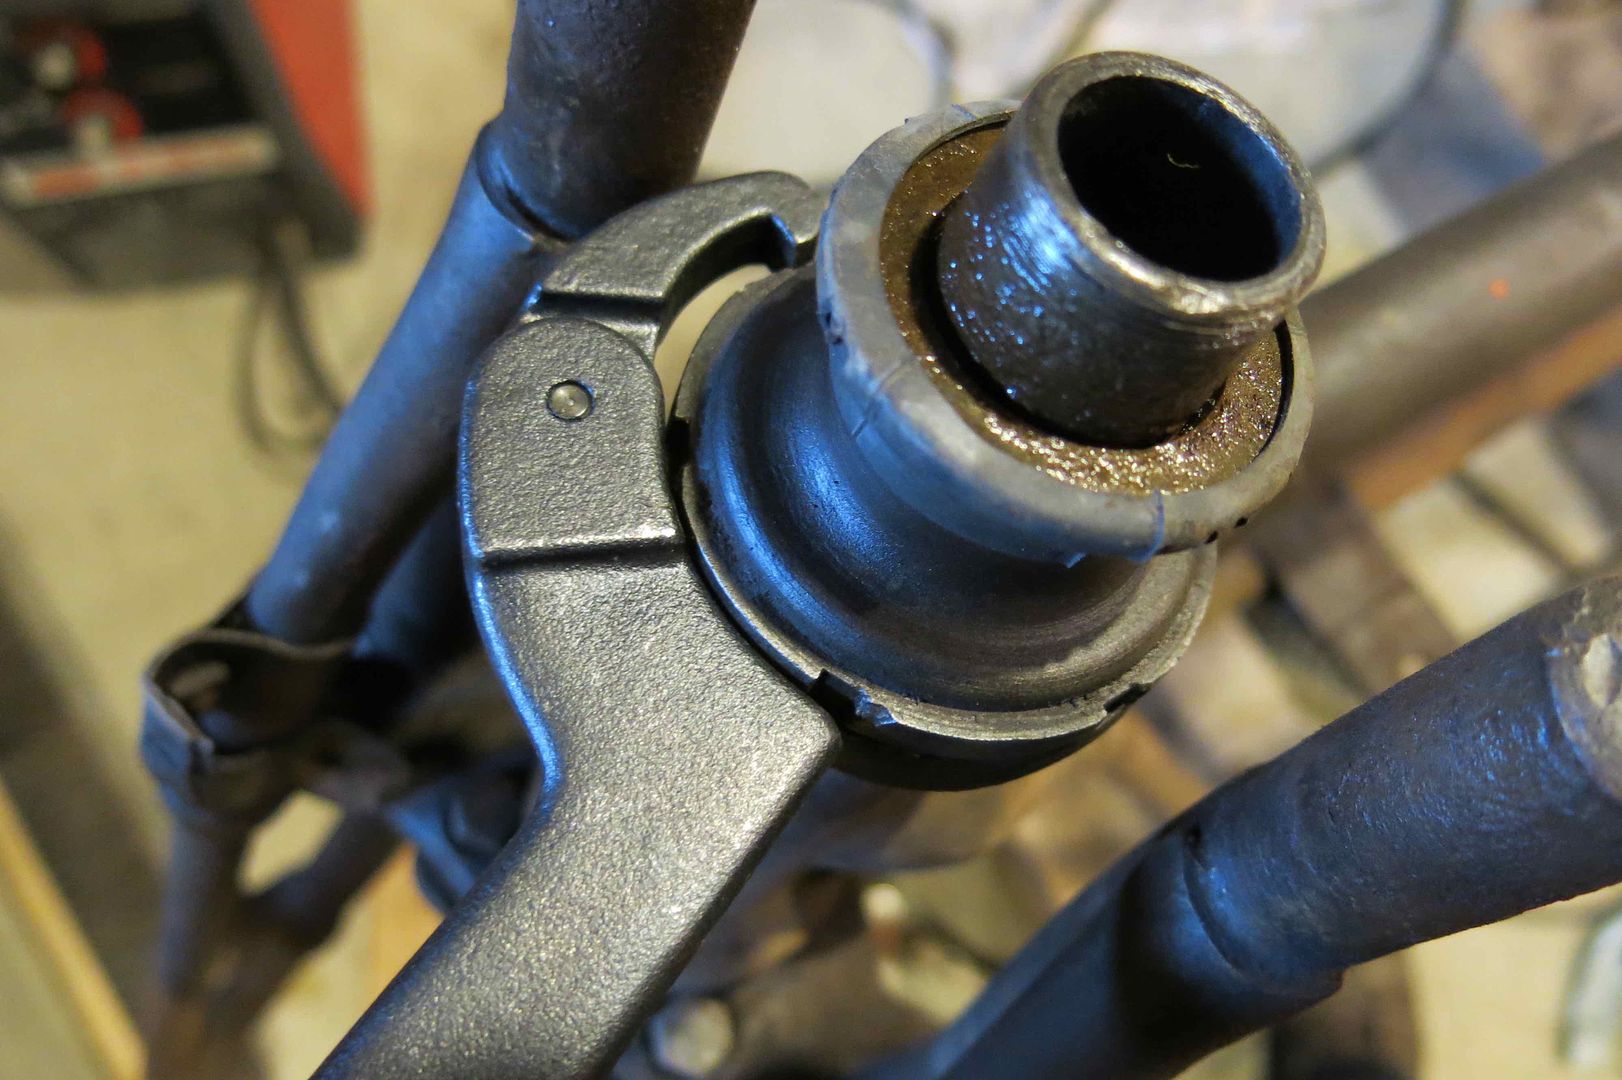
            Not much to report (things got very busy with work... the paying kind) but I did acquire a new wrench. I like tools, I've got three sets of them (warehouse, home, shed) but I didn't have a suitable wrench for removing the head adjusting cone in order to remove the forks. I used a strap wrench until the strap started to shred, so then I bought this beauty, an adjustable hook spanner :


            Worked great and now I have another tool! Got it from ZORO.com. Their item# GO494155, $27.84 (it's marked PROTO, mfg #JC472) Should work on my bicycle, too!
            Thanks for quoting a source and part numbers.

            Mike Love

            Comment


            • Originally posted by exeric View Post
              Thanks for the pictures, and text, Harry. What you're doing is my favorite part of messing with old motorcycles. I hope you're having fun.
              And to use the controversial vernacular of the day I "Like" what Eric said here. the "favorite part of messing with old motorcycles" and it is what got me hooked on old ones, though my old bikes are much younger by comparison. If I have time and I can't find a way to work on an old motorcycle project then its going to be an old blacksmith's sledge or some sort of something old, rusty and in need of TLC.

              Mike Love

              Comment


              • Originally posted by pisten-bully View Post
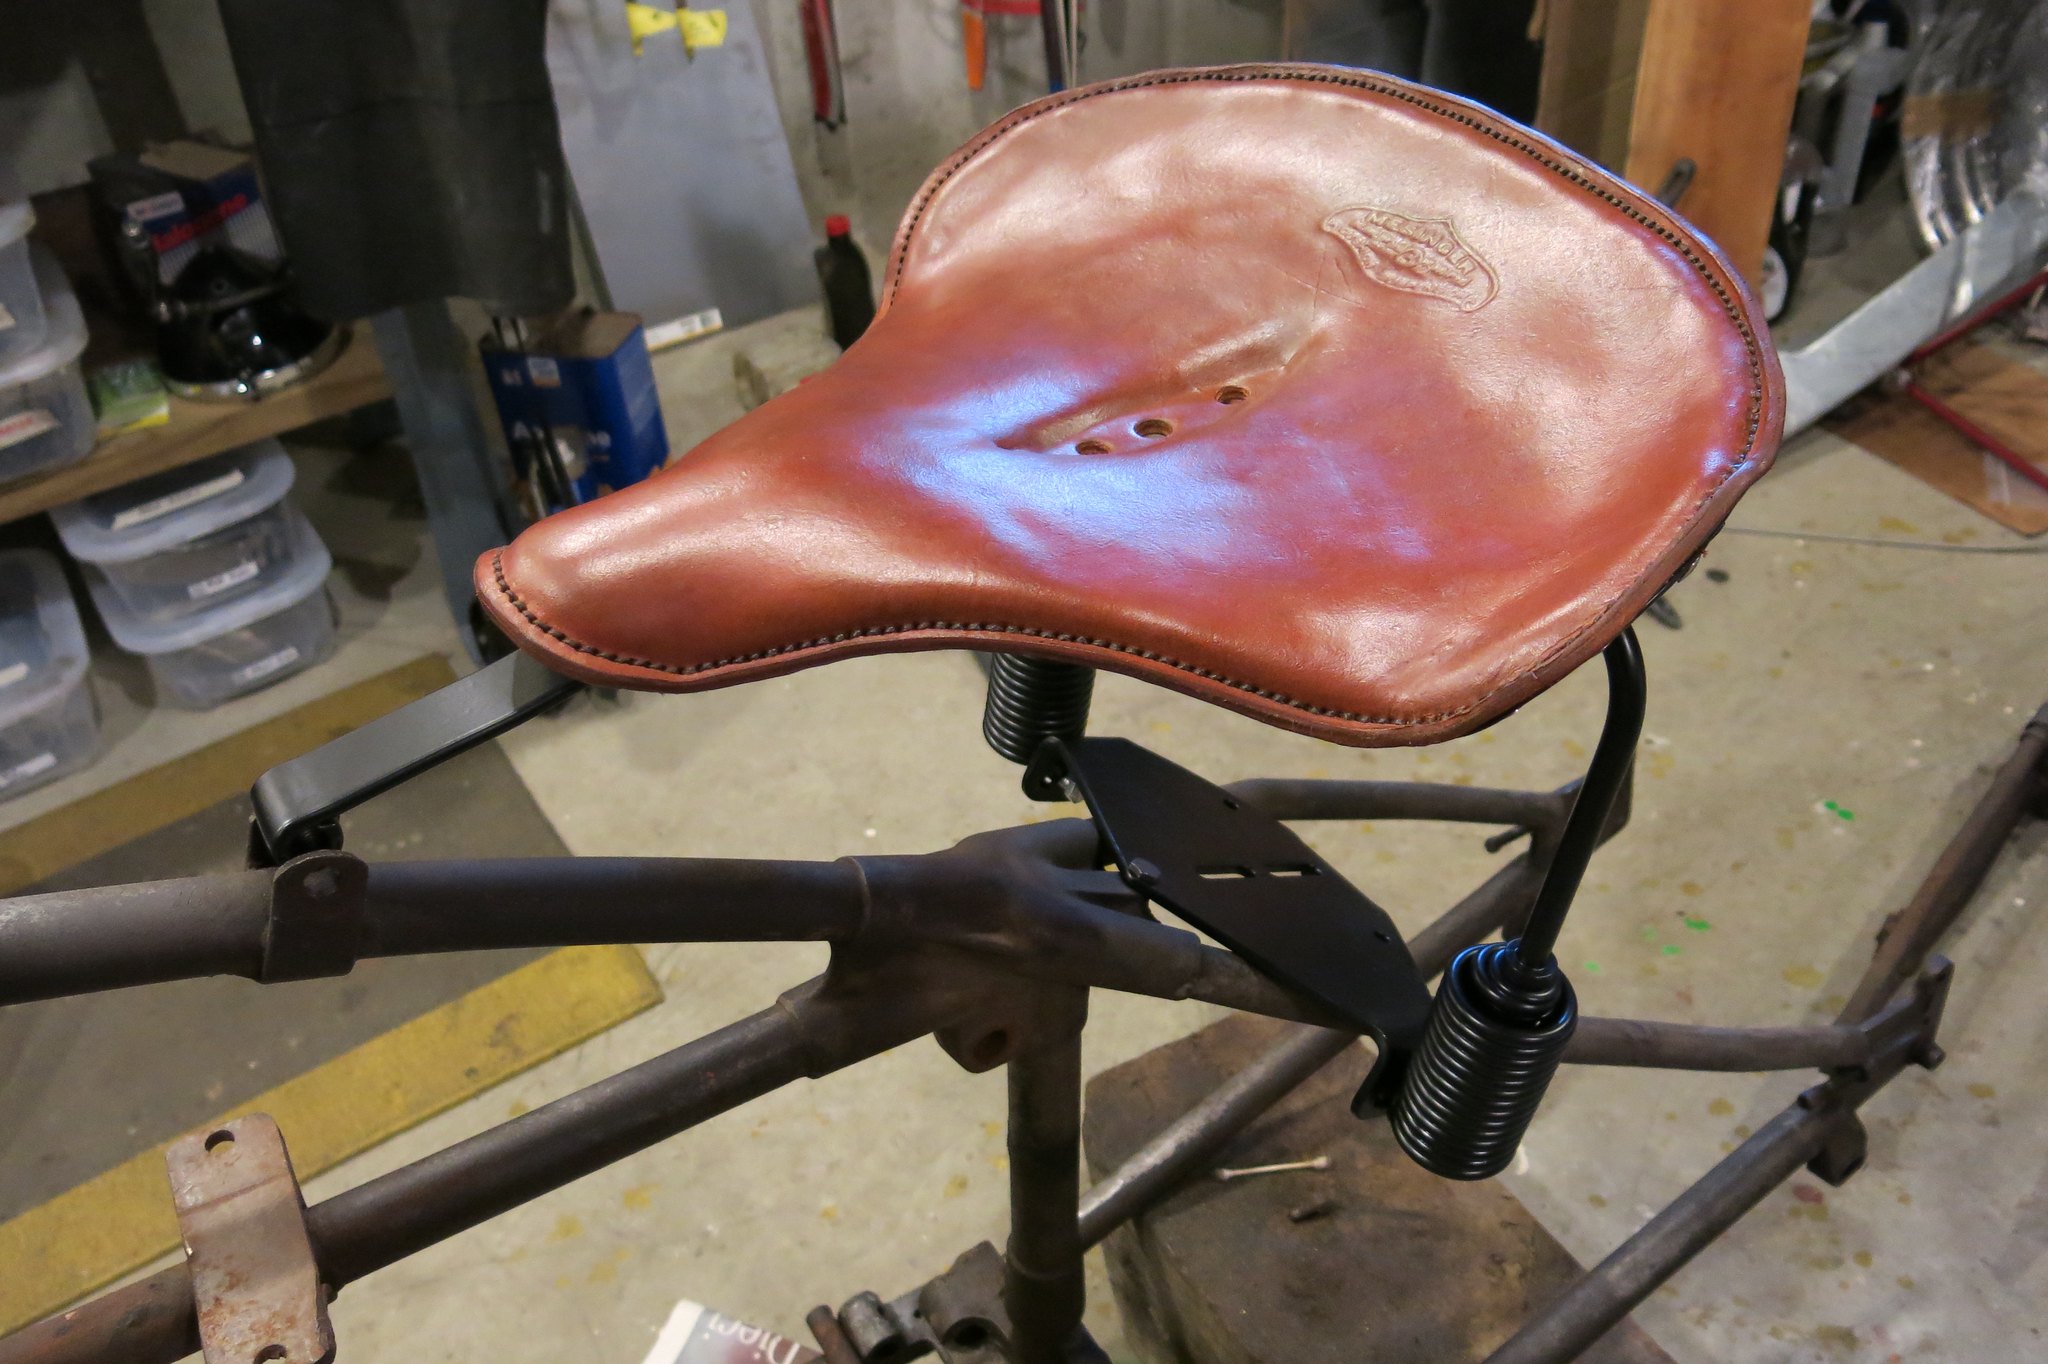
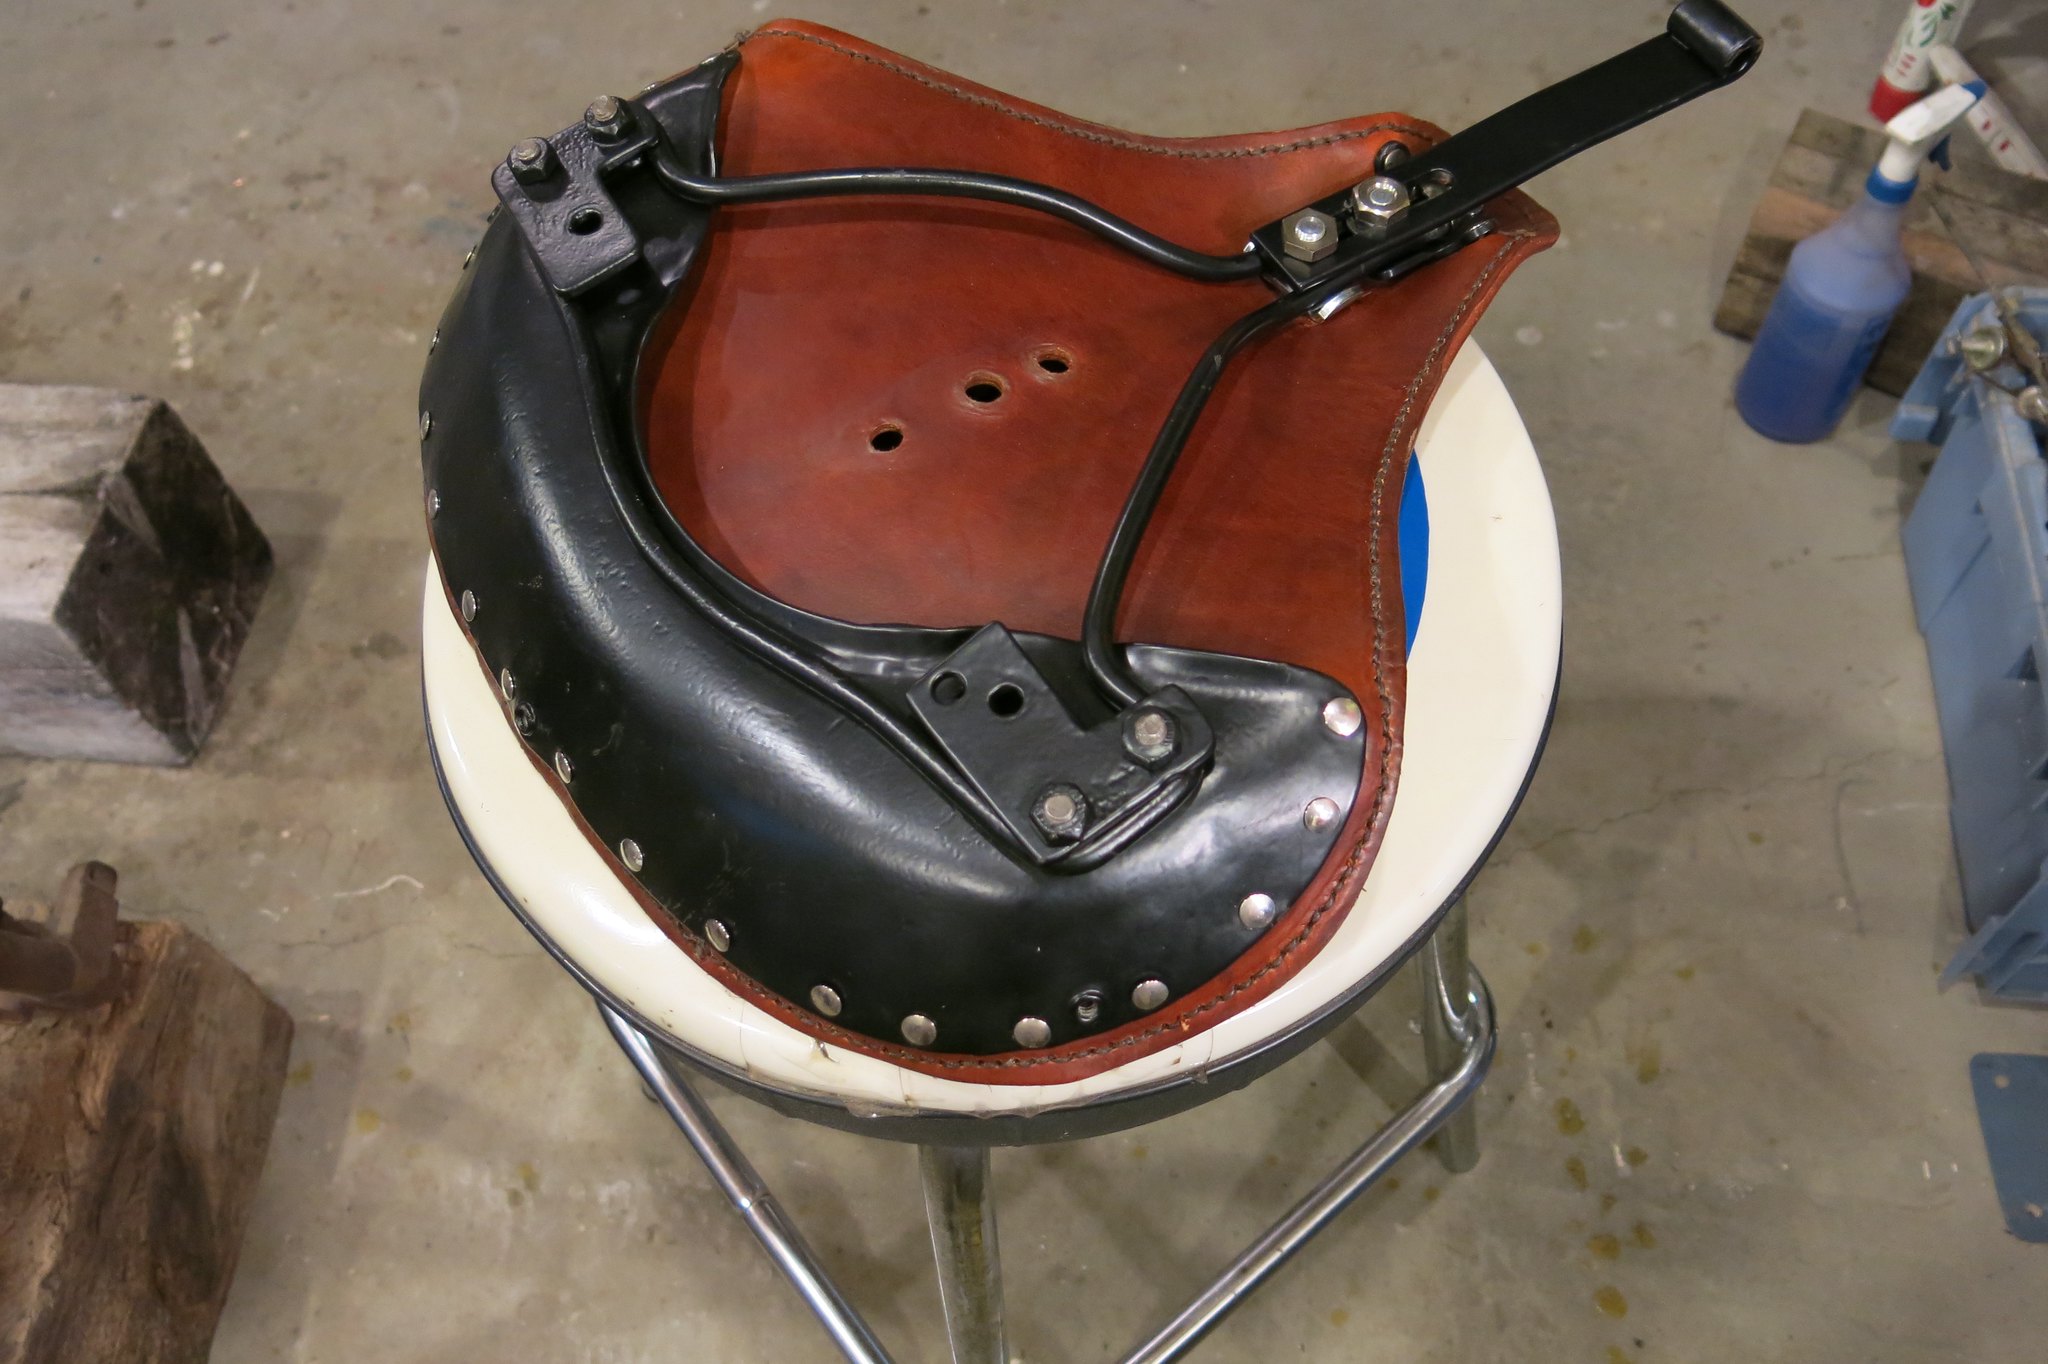
                I went for completion on one item to show myself some progress! The saddle was pretty much an incomplete skeleton so I worked on that first (last year...)

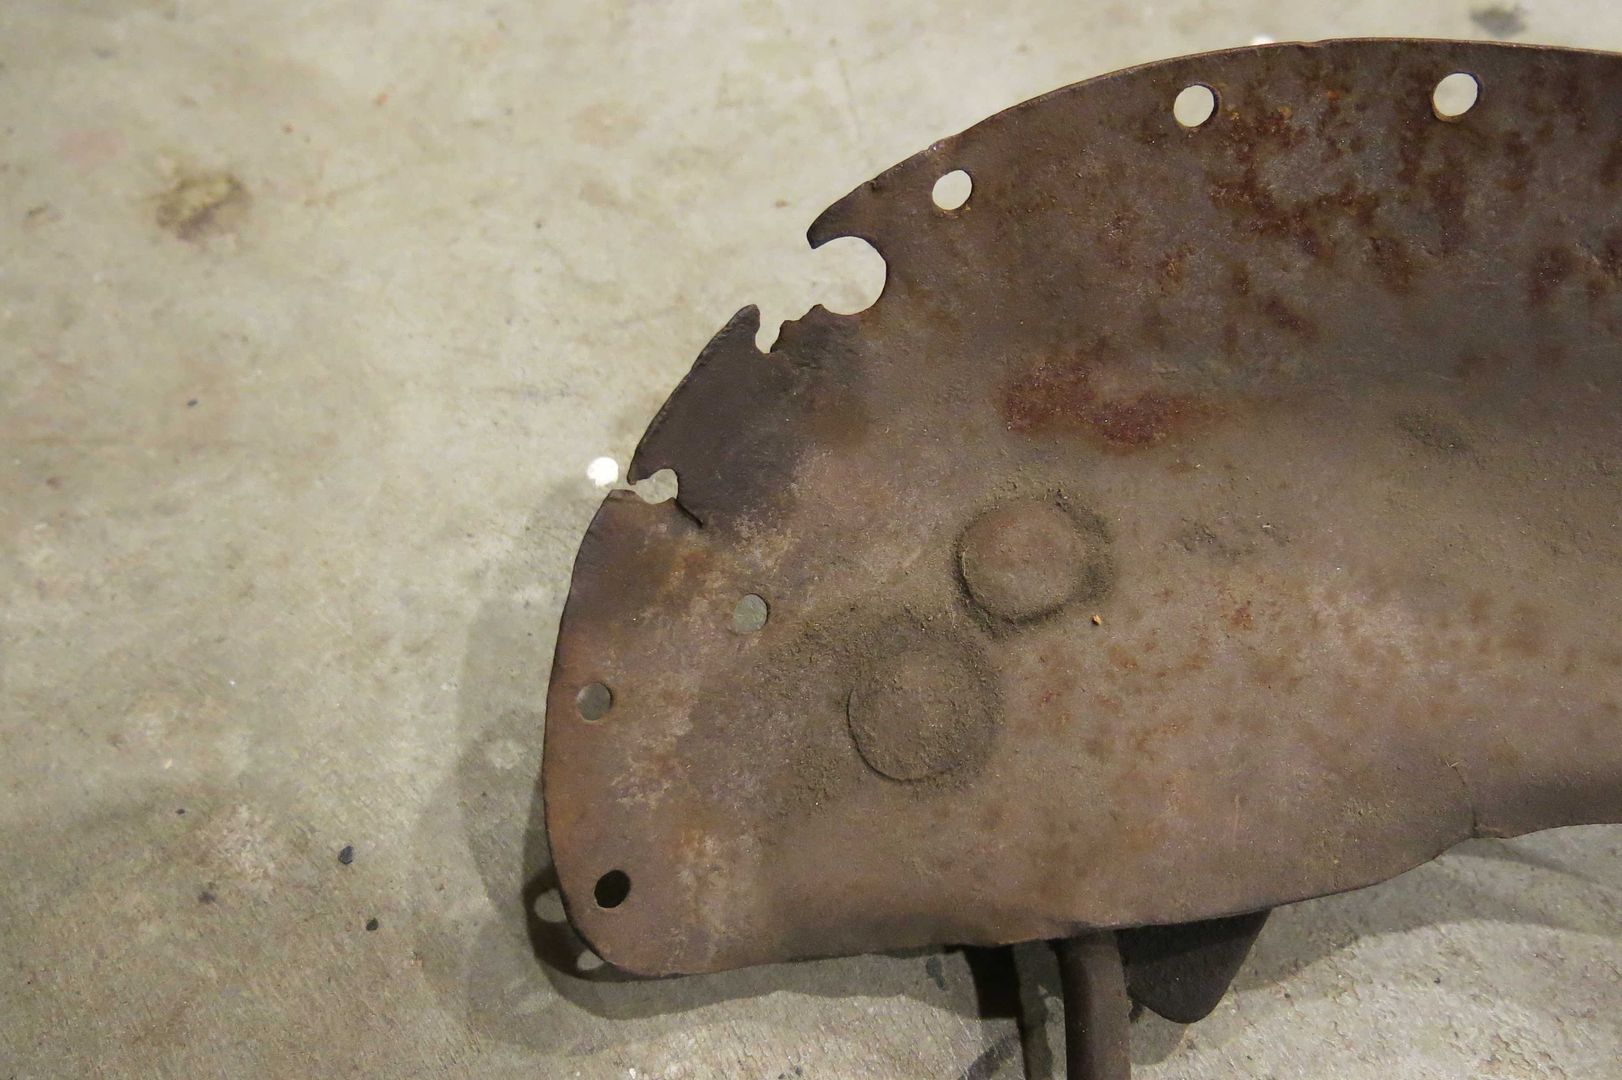
                The pan was in trouble, some cracks and blown out holes:


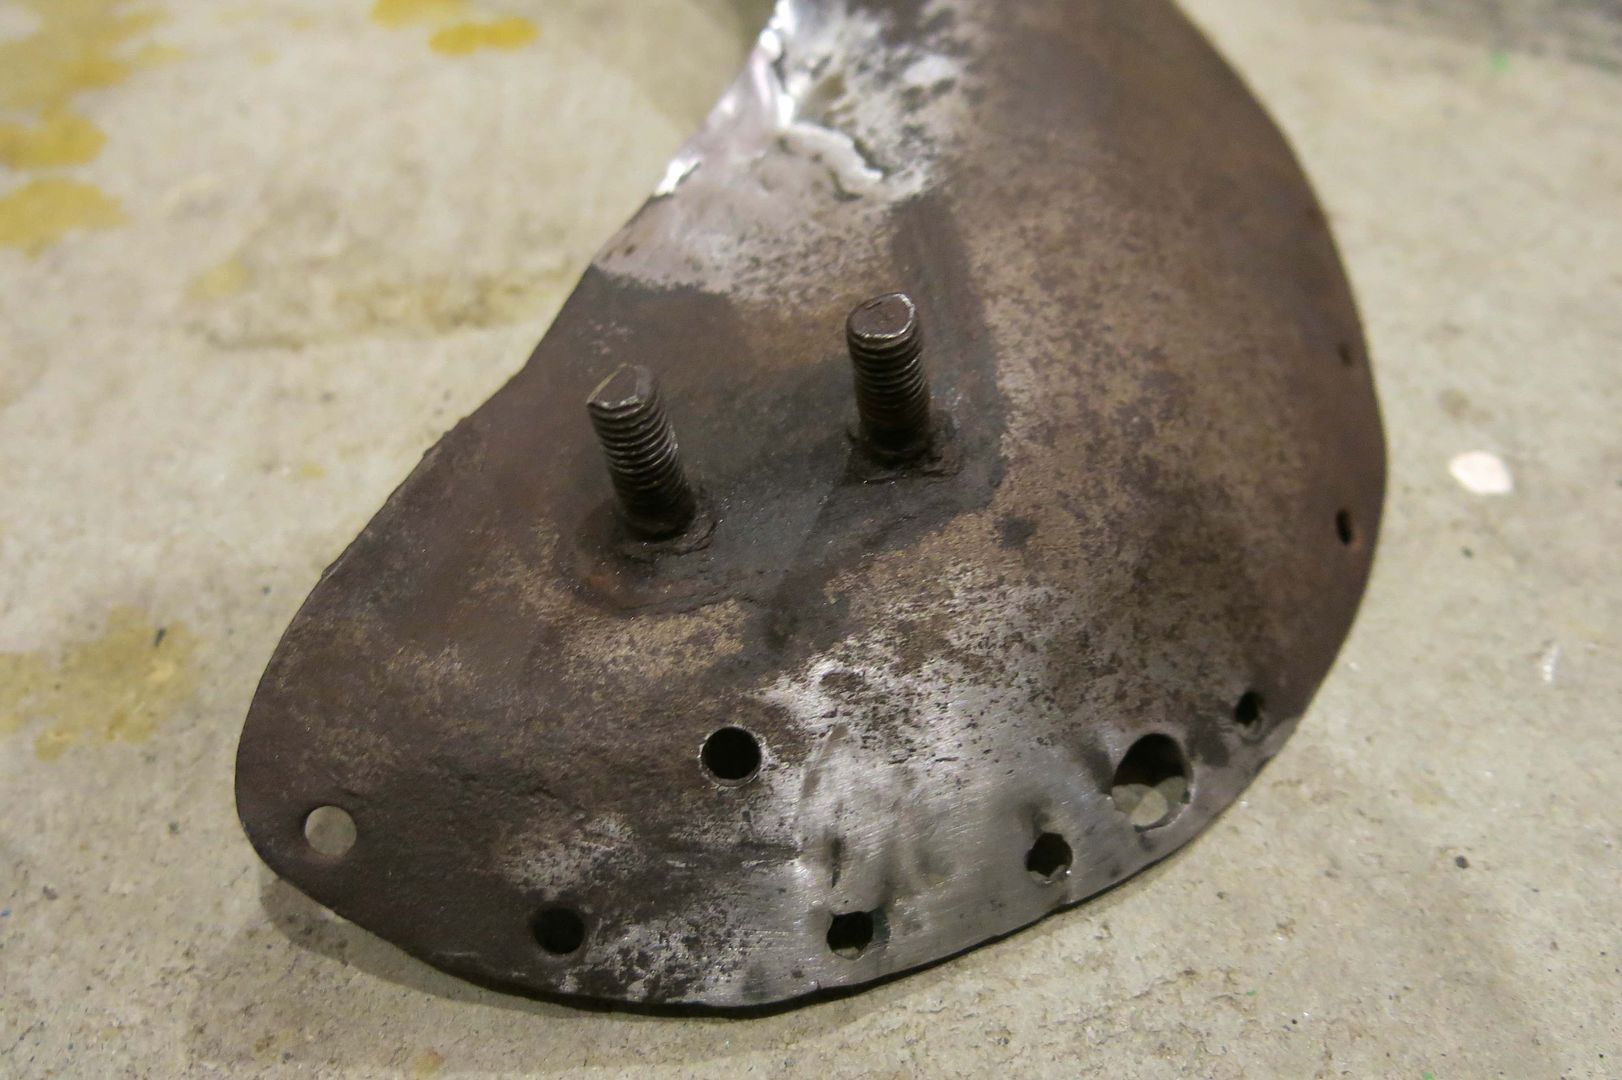
                So I did some welding up of the holes and cracks, and fabricated a missing threaded insert for an optional Mesinger back rest (which I don't have)


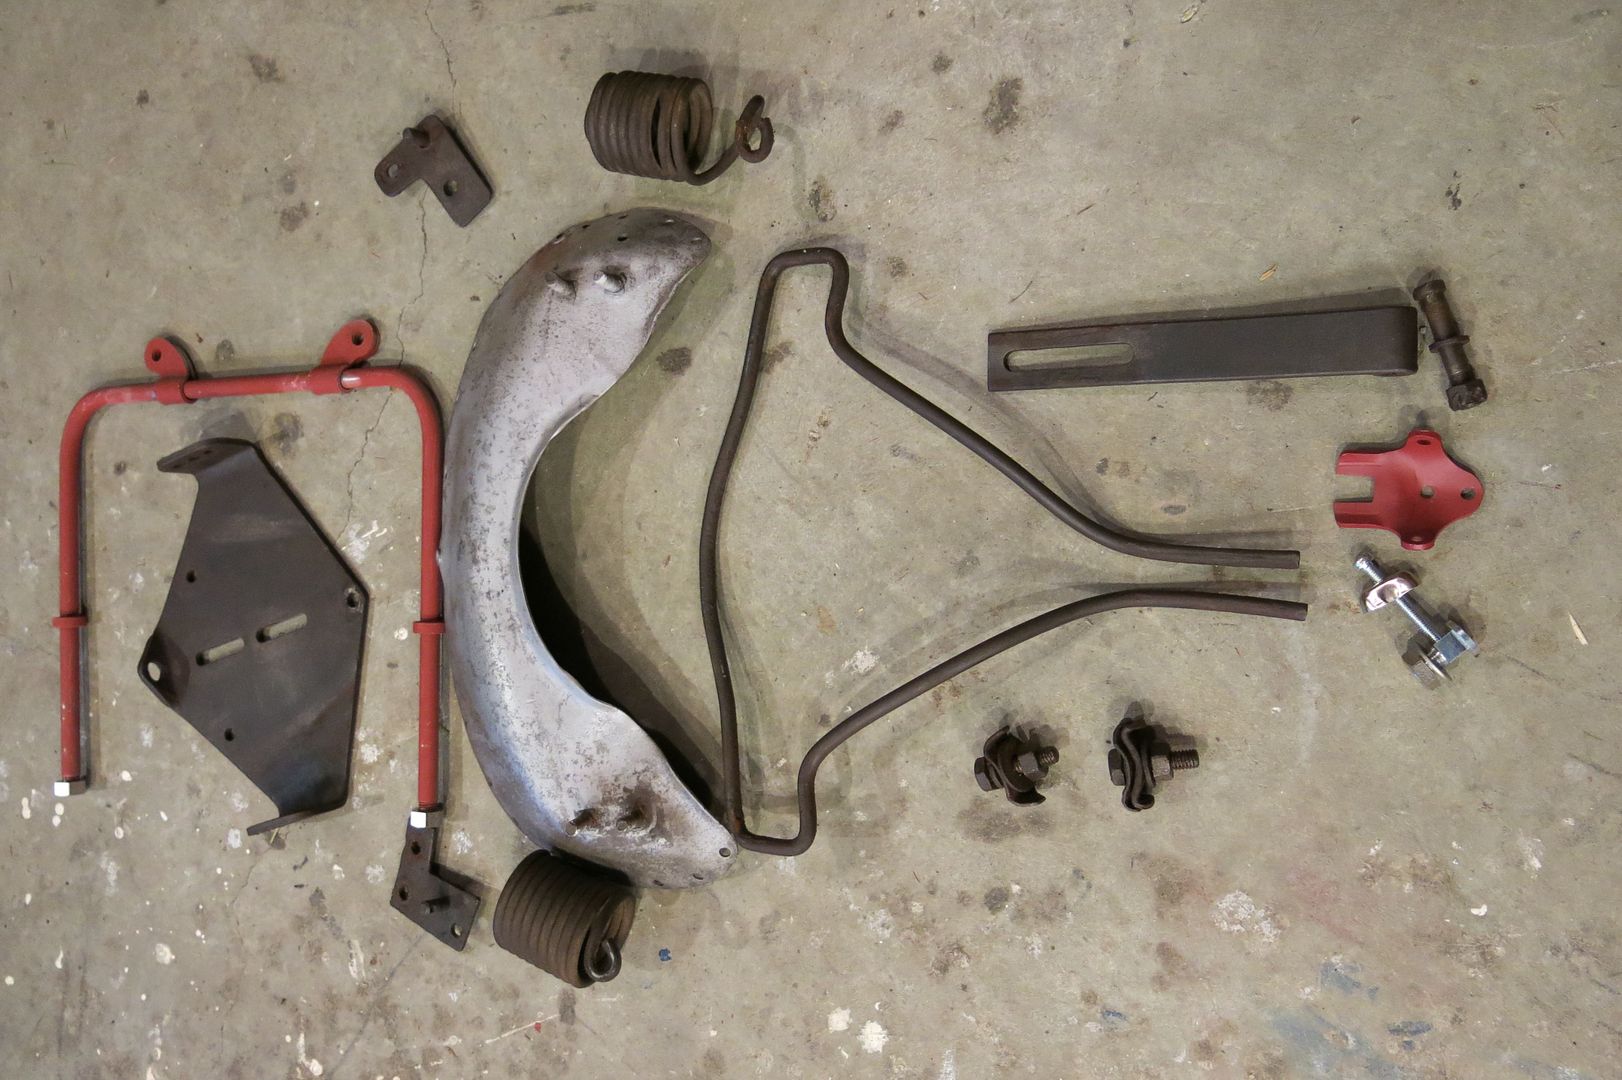
                I also needed a few parts (there's a bunch of parts in one of these seats!), but the few missing parts were available through Walker


                ...and sent the seat off to Michael Paquette of Worsham Castle... I am quite pleased with the results, thanks Michael!


                Since I can only guess, did the saddle maker sew up the saddle after riveting the pan to the bottom leather?

                Mike Love

                Comment


                • Originally posted by pisten-bully View Post
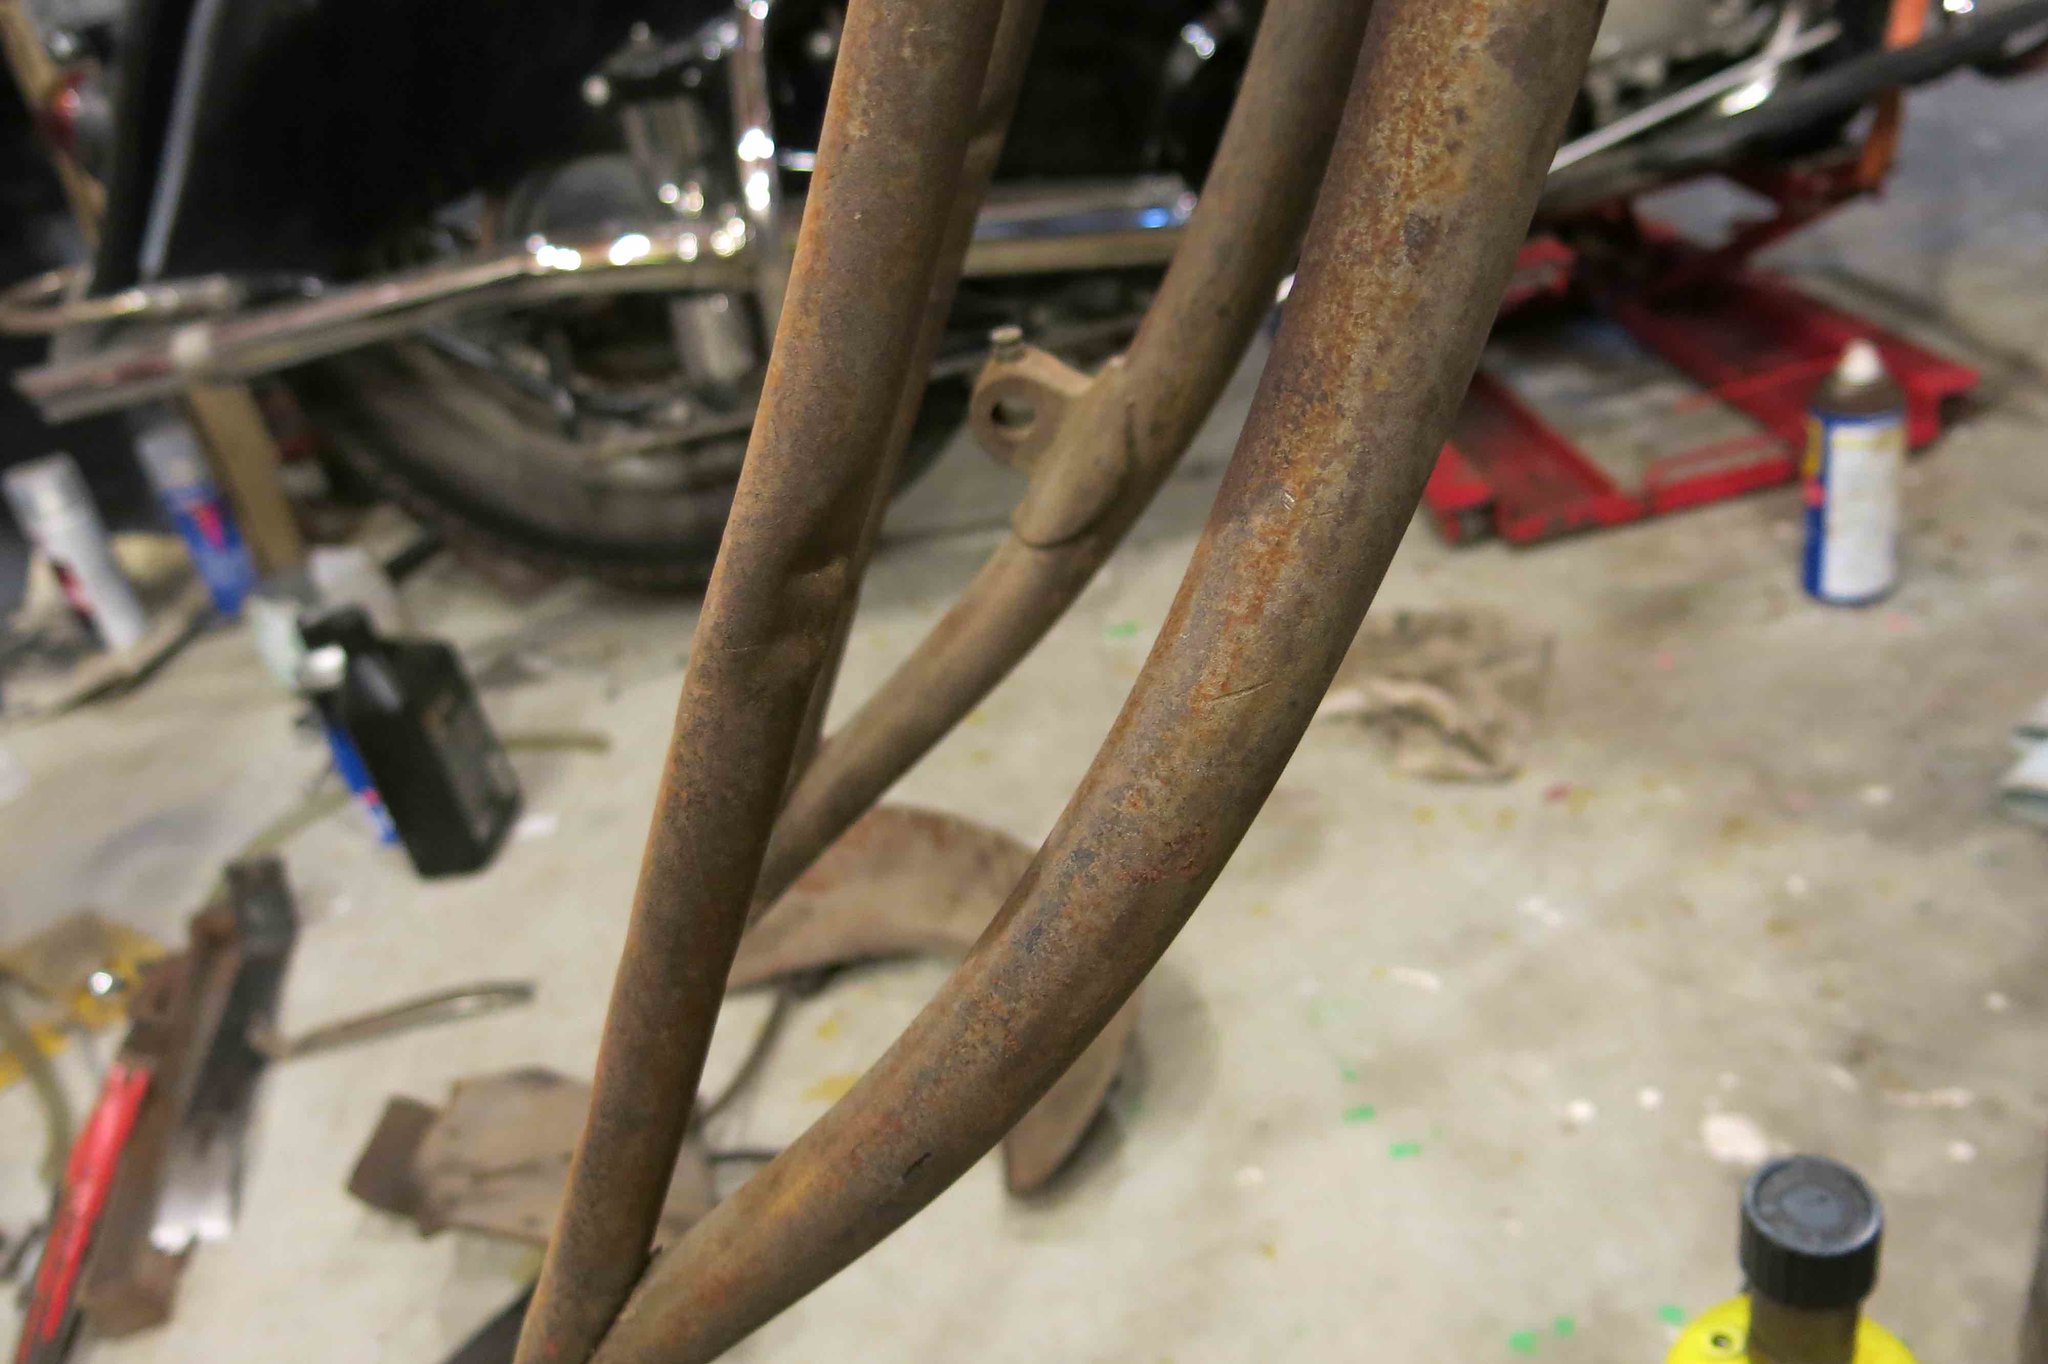
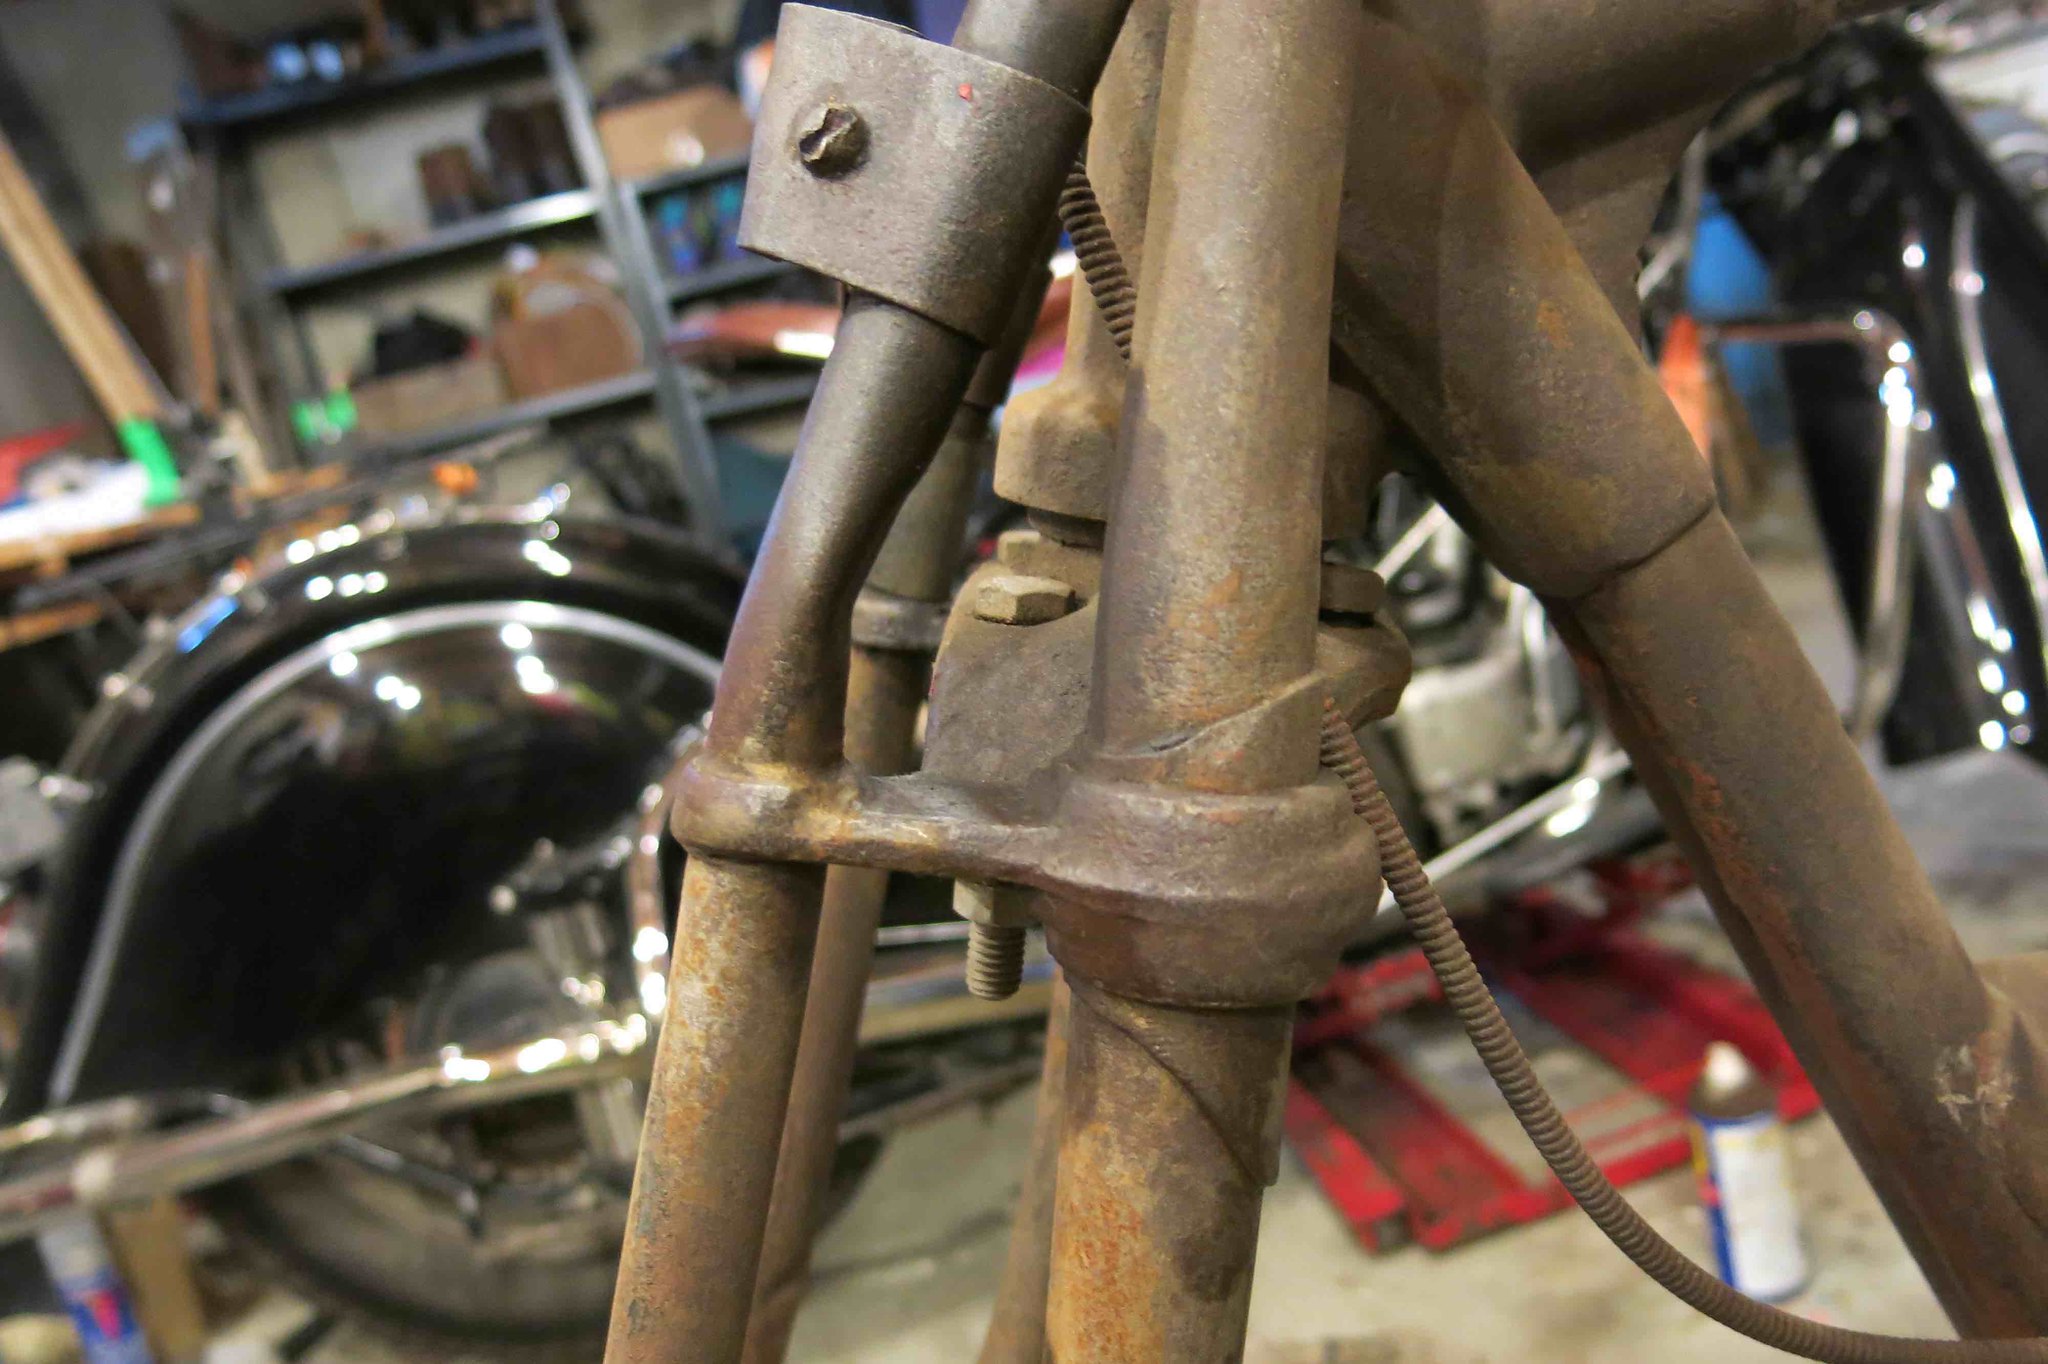
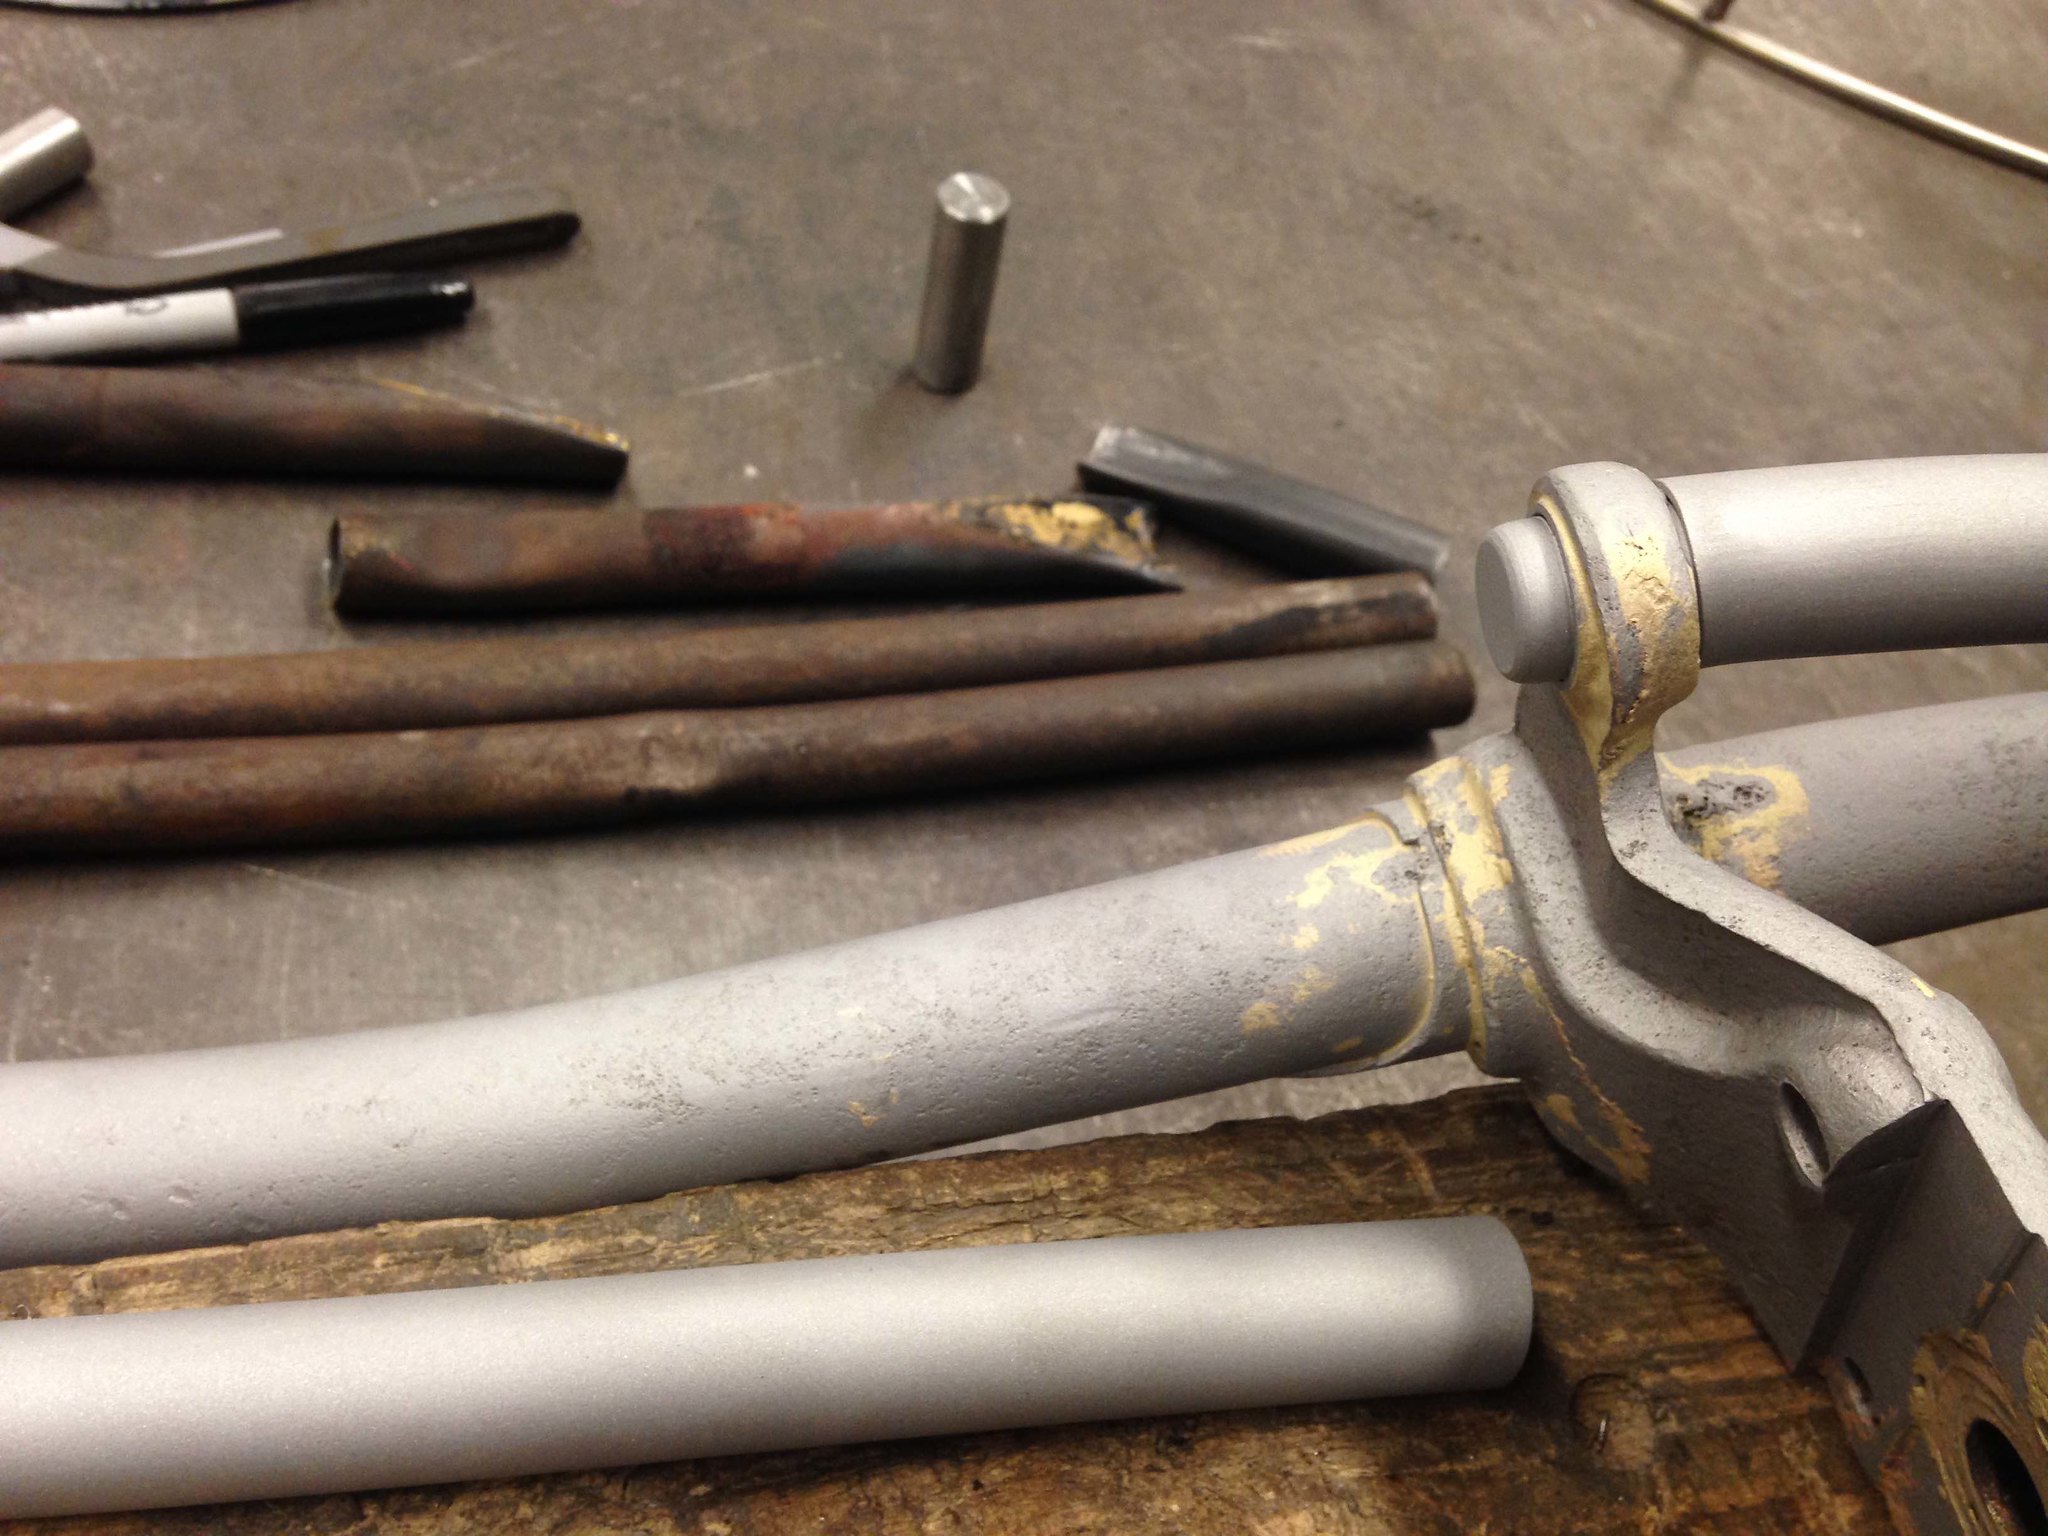
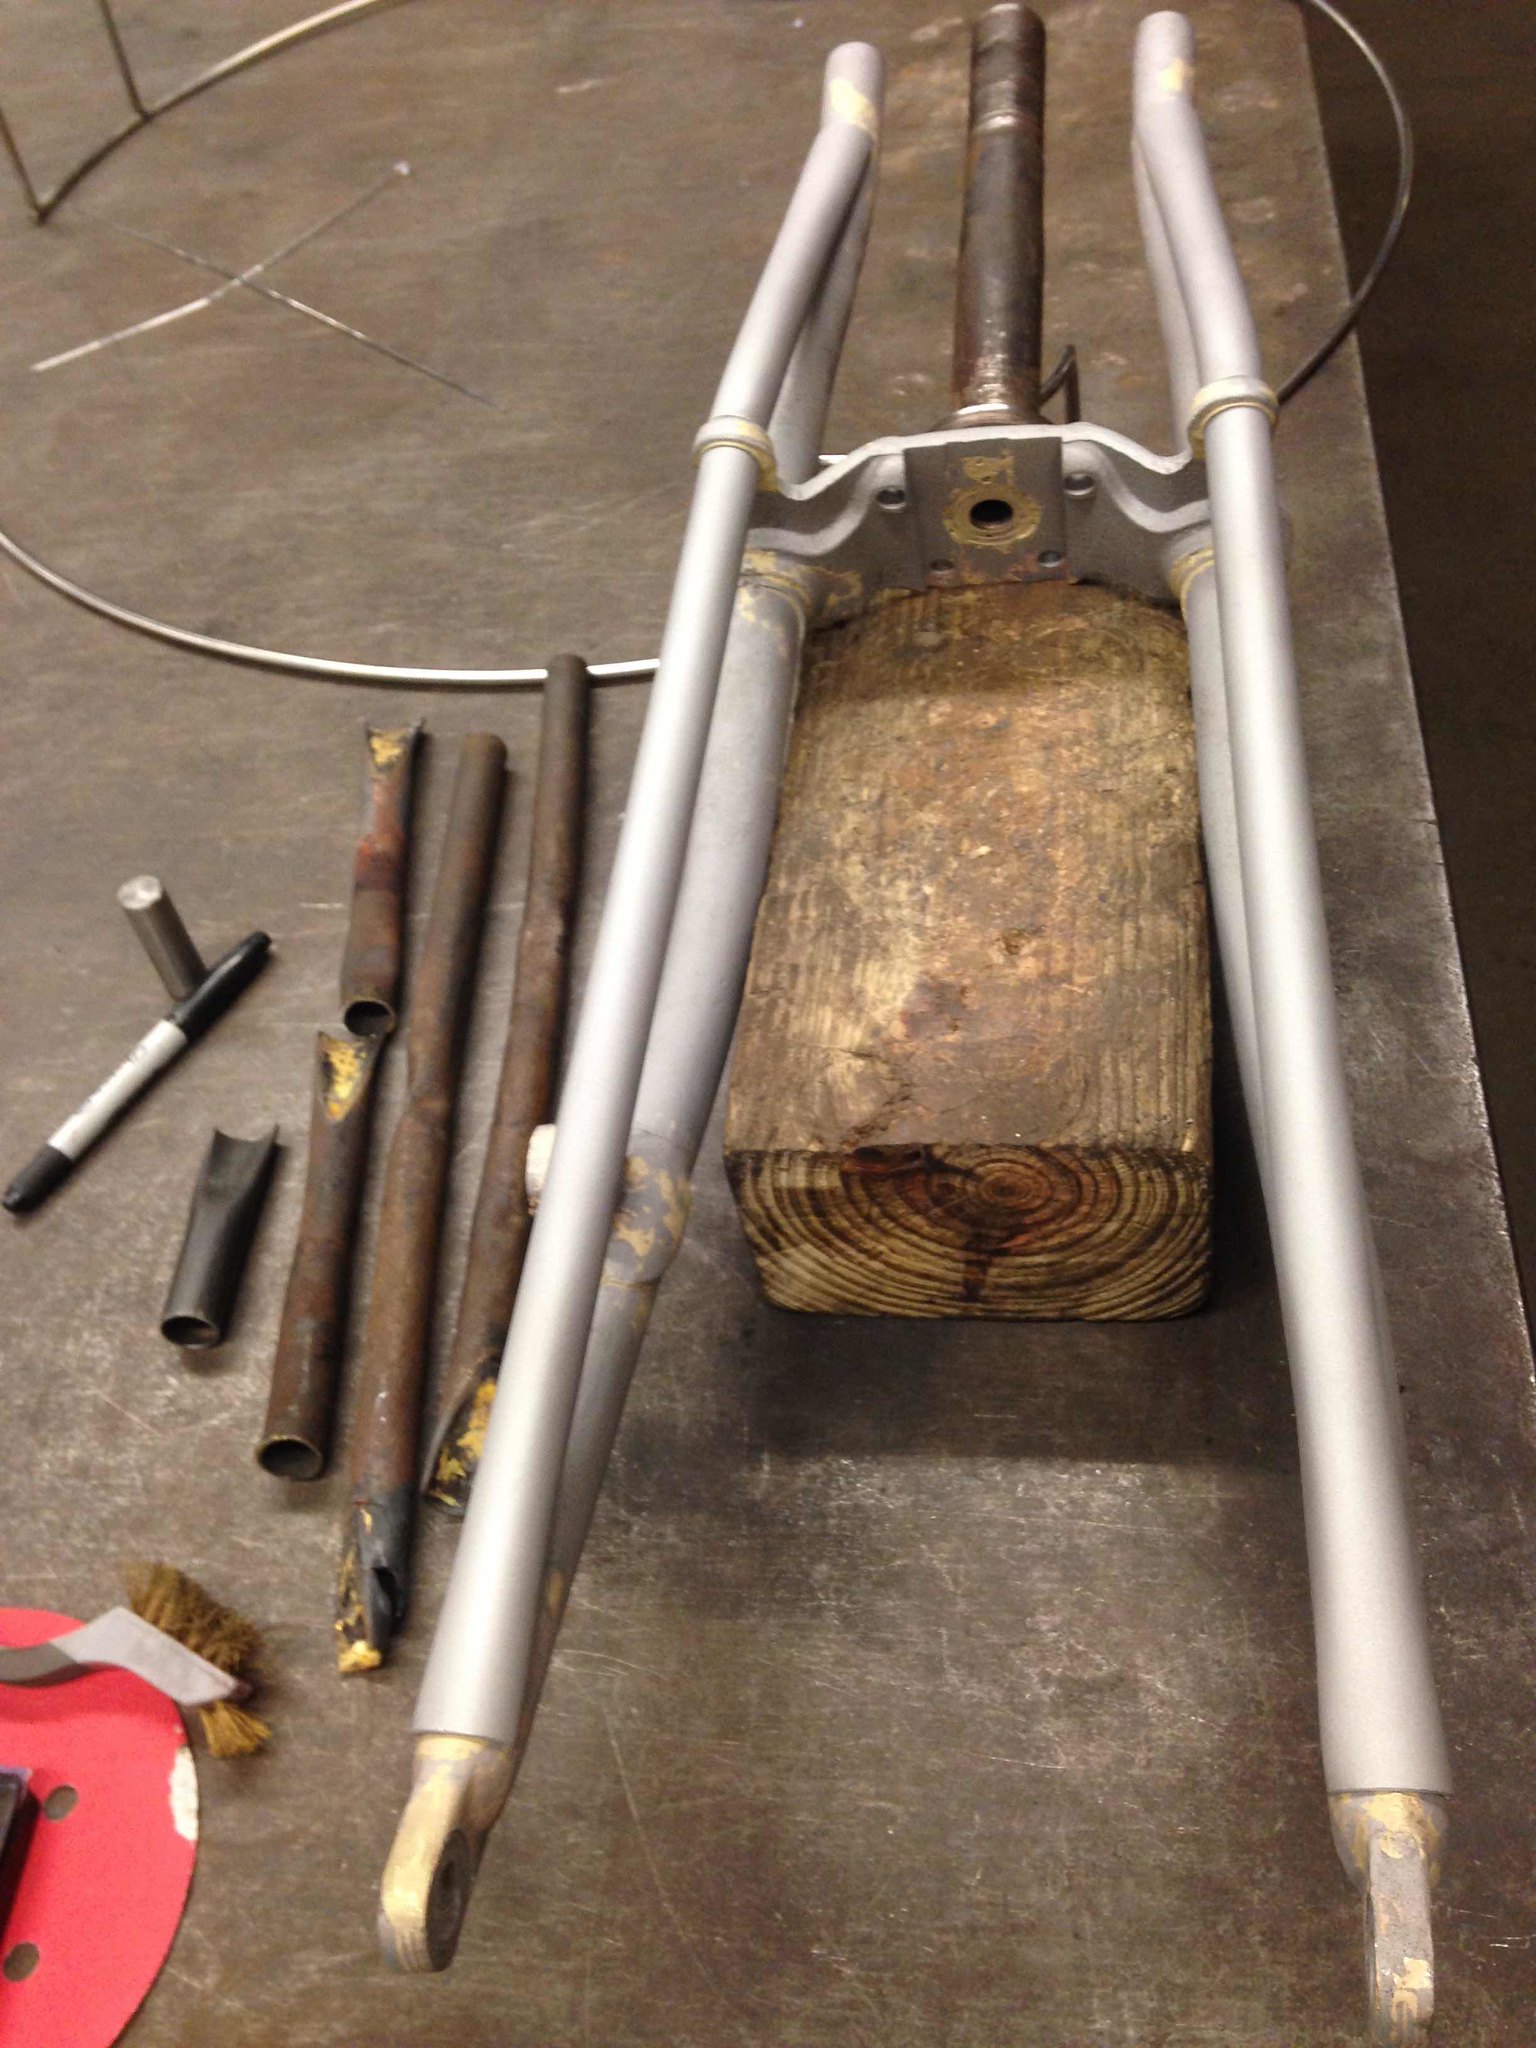
                  time to deal with the fork, the front stays were dented in multiple spots on both sides and I investigated straightening the existing tubes, but when it all was said and done I wanted a set of forks that were properly braced. The fellas at Race Metalsmiths took a look at the fork and came up with a plan, a few of the many dents in the stays:


                  Brothers Scott and Mitch convinced me that replacing the tubes was the best way to go. The old tubes were cut off and solid slugs were brazed into the casting for the new tubes to slide over and be brazed in place;


                  Mitch made a die so that the crushed tubing on the lower end, where it's brazed to the main fork, matched up perfectly with the original crush:


                  New tubes were made that matched up exactly with the old ones that were cut off, they used 4031 chromoly tubing... should be safe forks!


                  One of the things I struggle with is the decision to do it myself or let someone else do it. The guys at Race Metalsmiths know their stuff and are sensitive to matching new fabrications up to original. Lots of things are beyond my pay grade so I let the pros do it!
                  This is one of the most interesting and learning parts of the member bike build's - what are the thresholds for keeping work or contrasting it out. If you all that document the builds in the Member Build Threads many of us would get this perspective accept through cause and effect - which is one way to learn but most frequently no the most cost effective way.

                  Mike Love

                  Comment


                  • I see I haven't posted anything since September! Been busy... sold my company and rode my Chief 7500+ miles, and now the Chief is coming apart for some drivetrain work. BUT, for the 101 I have changed direction slightly. I intended to have Danny Weil rebuild my motor, but he understandably is a bit gunshy about using a repaired case, I don't blame him, he has great knowledge about these motors and it would be a real bummer if it broke while he was doing the work. He suggested that I acquire another case half, and thanks to Dkgoz I obtained a different right side case with no cracks in the side. Dave's case does need a fair bit of work, however, and being that I really have my mind set to try and use the original case I decided to show it to a local machinist, same fellow that repaired my front fork. Mitch has done several old bikes but his main business is machining small production runs for manufacturers. So we went over the repairs for about an hour and he's confident he can make it work. He's got lots of work so this job will take a while. If he's successful then I'll do the assembly of the motor and send the case back to Dave. If he runs into problems...then I'll regroup and go from there!

                    Meanwhile, with my new employment status I've also decided to finish the body work and painting myself. I'm still going!
                    Pisten Bully is Harry Roberts in Vermont.

                    Comment


                    • Congrat's on the sale of your company! And your new "employment status".
                      As usual your build pictures have been great. Good luck with the case repair and body work and paint. I did the body work on my Chief and was reminded how much I hate body work!

                      Comment


                      • Wow, you really are doing it right, and it shows. The fork repair looks great, the brazing looks original. I know the number of hours it represents. Keep up the good work!

                        Comment


                        • Still waiting for the case to be be finished and I've spent a lot of time on my Chief, but I've also been on the 101 project lately prepping the body and frame for painting, I've got no schedule so that's good! Fender stays need to be riveted, both front and back and I've already riveted the chainguard plus the chain ring on my Chief...doing it all by hand with a ball peen hammer so it's slow work. For the fenders I needed 7/32 rivets due to the holes being worn, and finding a way to hold the fender while setting the rivets puzzled me for a while... then I rigged up a strap from the rafters to hang the fender so that the factory head of the rivet was resting properly on the steel plate "anvil" so I can properly peen over the shank:
                          hanging.jpg

                          almost finished on this one:

                          inside.jpg

                          the outside, truss head rivets are what I used:

                          outside.jpg

                          Still going!
                          Pisten Bully is Harry Roberts in Vermont.

                          Comment


                          • ...on my rear fender fit, there's a gap I cannot get rid of between the fender and the seat spring mount:

                            gap.jpg

                            there's one bolt that holds the fender to the seat spring mount and obviously the connection was under stress, the hole in the fender for the bolt was all blown out, I patched it up:

                            repair.jpg

                            and I've seen mention of the stress at this point on the 101 Association forum, but I don't have a good idea on how to deal with it. I can't move the fender forward since it's mounted to the battery tray, and there's not much room between the fender and the battery box anyway:

                            battery box.jpg

                            So if anyone has dealt with a fit problem like this before...I'm all ears!
                            Pisten Bully is Harry Roberts in Vermont.

                            Comment


                            • Great work Harry! Sorry I can not help with your rear fender clearance issue but just wanted to post that your doing great work.
                              AMCA # 3233

                              Comment


                              • Harry,

                                I have the same gap on my 101:

                                3F6F5435-3D7F-44C8-A6F7-27CC78885AB8.jpeg

                                the previous owner had a stack of washers in there, but I’m not a fan of that idea. Was going to go to McMaster Carr and get a piece of rubber a little thicker then the gap and use as a spacer, the black will blend in and the rubber should conform to the curve of the fender. Just a thought.

                                Joe


                                Comment

                                Working...
                                X