Announcement

Collapse
No announcement yet.

1939 EL build (Yes I know, "Not another Knucklehead..")

Collapse
X
 
  • Filter
  • Time
  • Show
Clear All
new posts

  • #31
    Still going

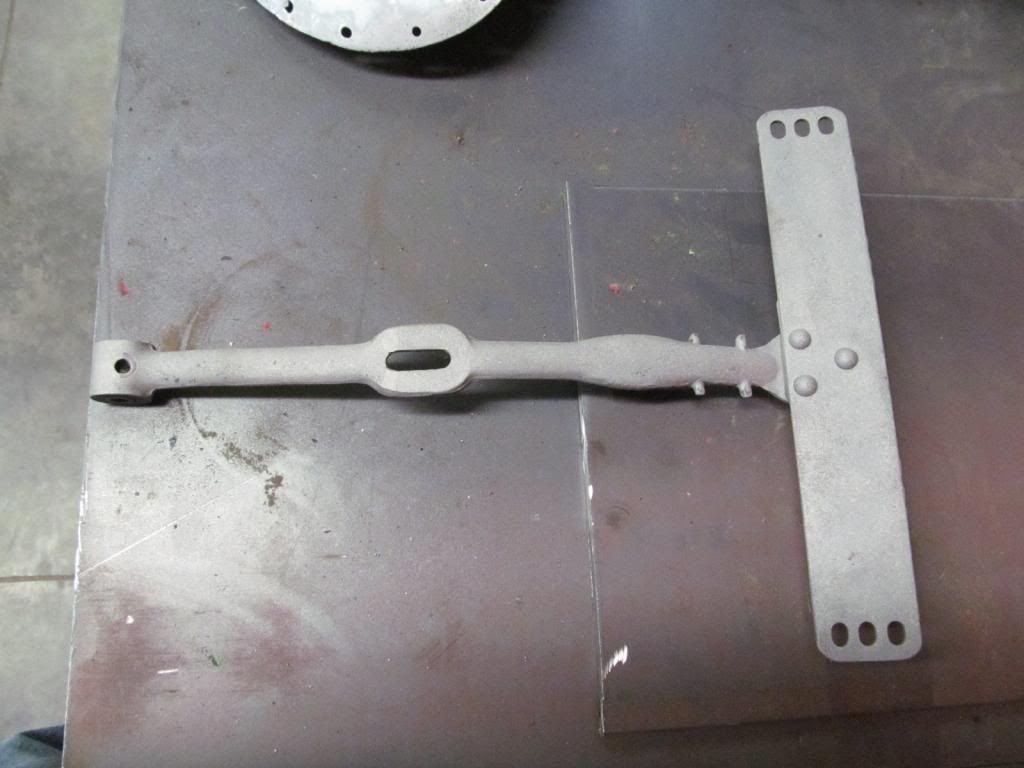
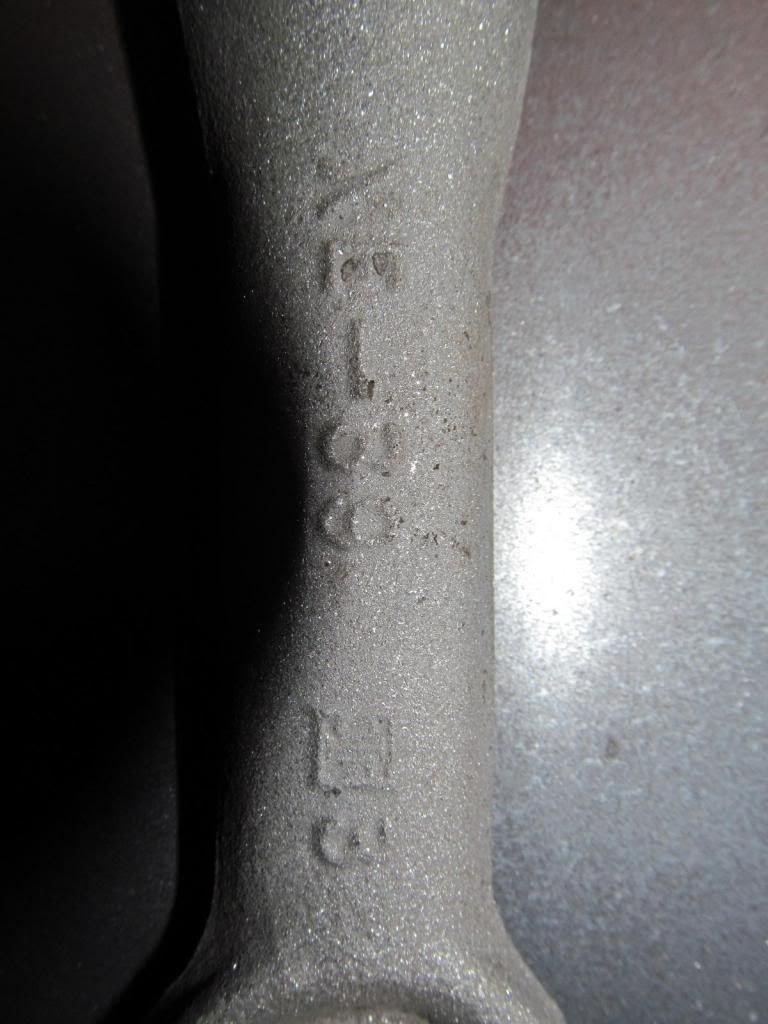
    On to a seat t. Not much work here just digging it out and curious about casting mark. The "3" what do you think? Ok for a 39 Knuck or throw it in the pile and keep looking.

     photo IMG_1111_zpsba395ef7.jpg

     photo IMG_1112_zps612b1947.jpg

    Another question and I know what Mr Palmer says in THE book but I have to ask.
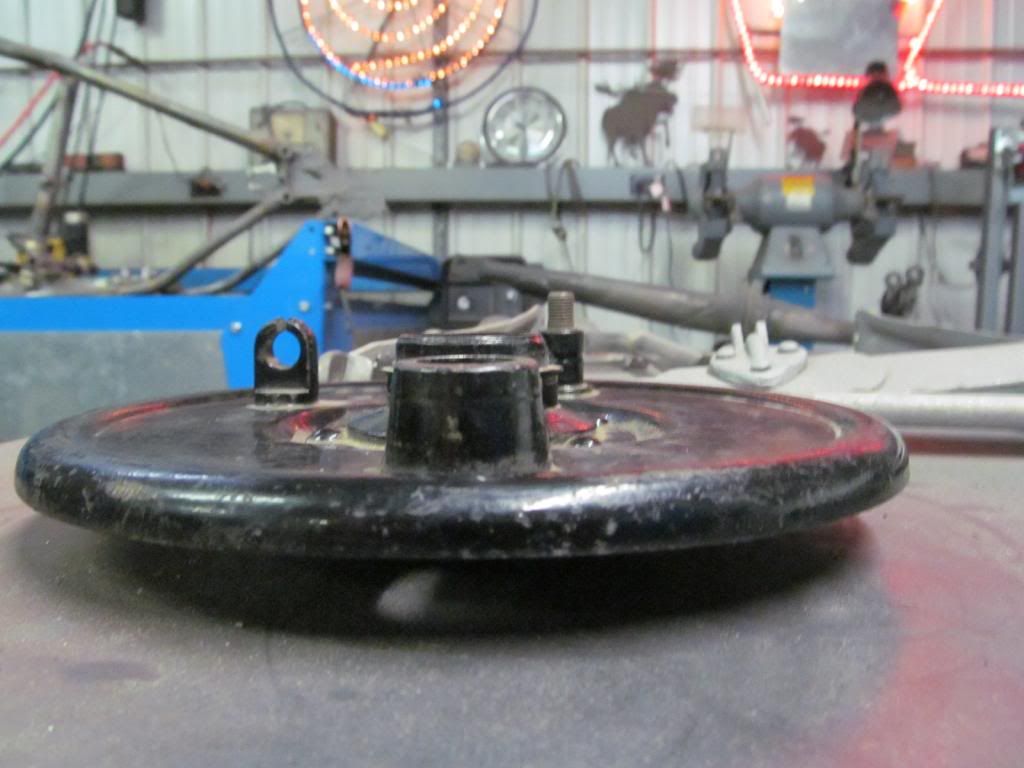
    Rear brake backing plate, 9 rivets, correct for 39? probably not......

     photo IMG_1117_zpsa8ebd870.jpg

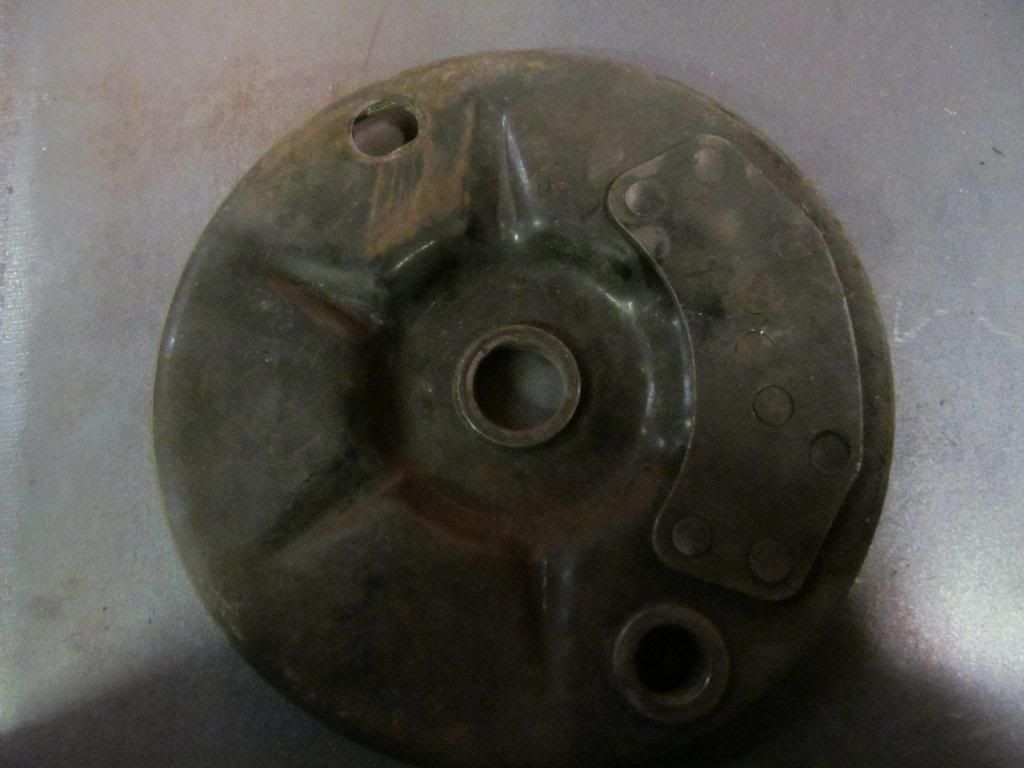
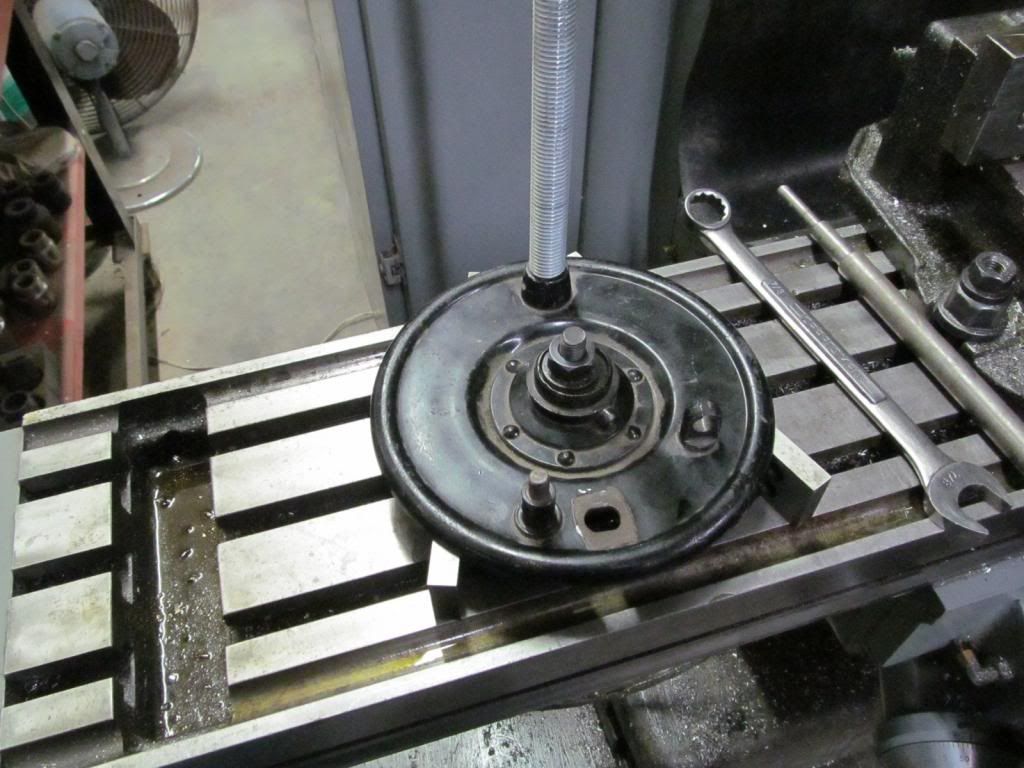
    Front plate has some small issues, its bent.


     photo IMG_1118_zps85c7bb27.jpg


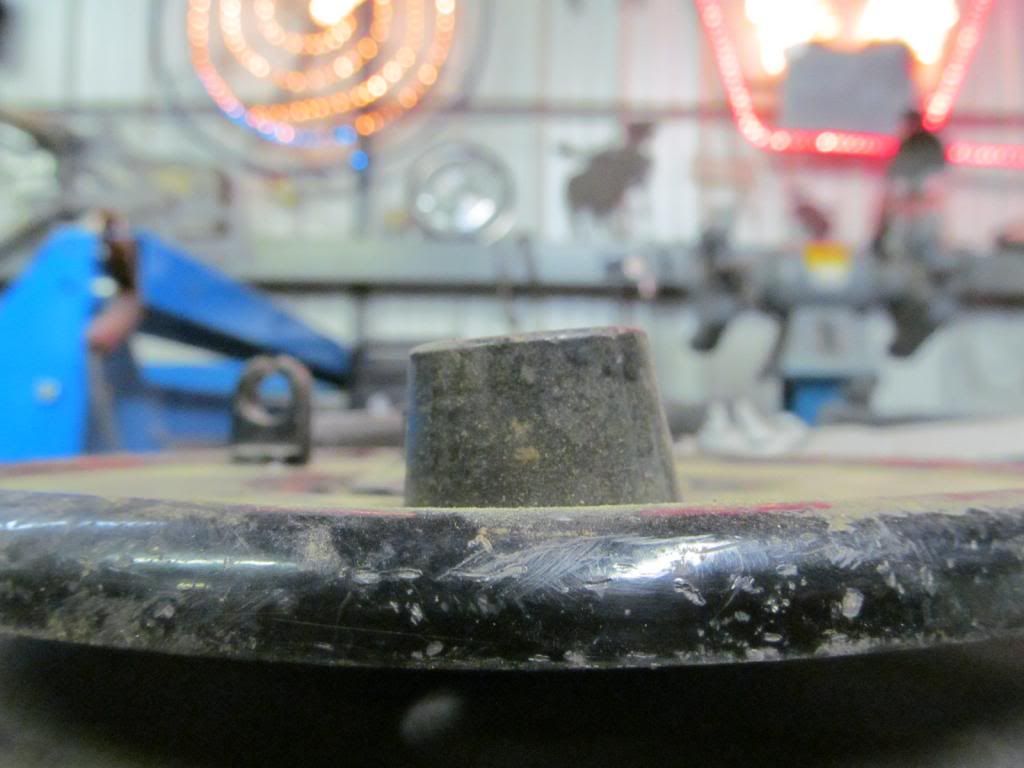
    Bolted to the mill and turned down a bar (allthread because I have a bajillion short pieces laying around as I am a hoarder).
    Tweaked it around and had to put on the press to adjust a little but it came out good.

     photo IMG_1122_zpsa6edc608.jpg

     photo IMG_1124_zps25c72d66.jpg

    Comment


    • #32
      More fixin

      Pulled out Tranny plate and noticed some brass on the corner next to where the adjuster bolts on and got prepared to grind out and re weld.

       photo IMG_1120_zps02e20243.jpg

      Suprise suprise the brass was from a repair someone did to the adjuster some time prior and must not had a wrench to remove so they just poured the brass to it. A couple swipes with the sander and were golden.

       photo IMG_1121_zps7f78f4a9.jpg


      Now comes the work......
      The primary (enter scary music from your favorite horror movie)

       photo IMG_1125_zpsb314917a.jpg


      Does anyone have an inner primary they can show me with this HOOTIS attached?

       photo IMG_1128_zpsc13b2135.jpg


      Offensive top mount must be terminated..

       photo IMG_1129_zps7f866567.jpg

      Comment


      • #33
        More Primary work

        I blast some parts and then use a fine file to go over the surface with so I can see the high spots better.
        Sadly I enjoy bumping out dents and this kind of repair. When you first pick up parts you dont notice the little details but after working and holding the part you find all the details that should have kept you from buying it in the first place. Cracks, dents, rubs and rust everywhere. No problem for a stepper.


         photo IMG_1131_zps40e7bade.jpg


         photo IMG_1132_zps1c6168d4.jpg


         photo IMG_1133_zpscea55a32.jpg


         photo IMG_1134_zps2fc95242.jpg

        Comment


        • #34
          More Primary

          Offensive mount removed.


           photo IMG_1135_zpsee2e603d.jpg


          Donor off a Primary even I wouldnt try and save.


           photo IMG_1136_zps6075e0be.jpg


          I just HAD to buy bags and bags of rivets because Len posted the part numbers. I should have rivets for the rest of my life. My wife said why do you have to have so many rivets and my reply was simple "because Len posted the part numbers" insert
          I didnt have a rivet tool to set these rivets so I made one. Cut off an old air chisel tool and chucked it up in the lathe then found the right size ball nose mill and made a setting tool. these are round nose rivets and the end result has the same profile as existing rivets. I am still working on legnth so there is no extra material squeezing out after setting but you get the idea.


           photo IMG_1137_zpsca8d4508.jpg


          The side that will show on the outside of the Primary


           photo IMG_1139_zpsa9494b8b.jpg


          The side on the inside is diffrent so I had to make a (What I call it) buck tool for backing up the rivet.


           photo IMG_1141_zps4b78a87a.jpg


          I know you are asking your self about the piece of scrap I was playing with (here goes some of that randon shi+ I mentioned in begining of thread).


           photo IMG_1142_zpse5d52ae2.jpg

          Heh Heh Its a fly part. Ok I was bored one day and I thought it would piss off my wife and put it on the picnic table but she thought it was "cute".
          We will put that one in the loss column....

          Comment


          • #35
            Oil tank misc and my helper

            Oil tank needs some love but it will be later this week after I finish the primary.


             photo IMG_1143_zps9a58b6fe.jpg


             photo IMG_1144_zpse8f659a7.jpg


            The only part I didn't have to fix all weekend and that will leave time for me to learn to focus the camera better.


             photo IMG_1145_zps3ce4448f.jpg


            I am sure if you follow a couple threads I have posted you see Austin is always around but this weekend he is on a School fishing tournament so I was left with Autumn. She is quiet, wont change the radio station, drinks from a bowl instead of water bottles......Hmmm might be on to somenthing.


             photo IMG_1146_zps4e5ea847.jpg


            Austins Oil tank for his BSA Bobber bike he is not working on this weekend.


             photo IMG_1147_zps829e4b38.jpg


            And finally..... in there is a Kucklehead, I think... good day all.


             photo IMG_1148_zpsbcab4e6d.jpg
            Last edited by knuckcrazy; 11-11-2013, 02:34 PM.

            Comment


            • #36
              Bob,

              Your rear brake backing plate is for a 37 EL or UL. Its a 1 year only part that is pretty hard to find. The one you need is the common one used on 38-57 models. If you dont have one of the correct ones let me know im sure I have a few extras laying around.

              Matt

              Comment


              • #37
                Originally posted by Matt McManus View Post
                Bob,

                Your rear brake backing plate is for a 37 EL or UL. Its a 1 year only part that is pretty hard to find. The one you need is the common one used on 38-57 models. If you dont have one of the correct ones let me know im sure I have a few extras laying around.

                Matt
                Hello Matt,
                Thanks for the reply and I knew the answer but was in denial. No I dont have a later plate for this project. If you want to swap send me your Address and I will get in the mail sometime this week. Its only hard to find if you need one, I don't. Thought about starting another build thread for a 37EL but might get a little boring talking about 1 part
                Find a good home for it, hopefully a young person and again thanks for the help. Austin says Hi.

                Comment


                • #38
                  Monday shop time

                  I don't get much time during the week to play due to work but someone has to pay for all the folks that need and want so....
                  Whew!!!!
                  That was close, almost got started on a rant but pulled it back. Those anger management classes are helping
                  Worked on the inner primary a little. Welded and smoothed a couple spots that needed attention.

                   photo IMG_1149_zps2e9755b6.jpg


                   photo IMG_1150_zpsce376481.jpg


                  Everyone should have a fab table like mine 4' x 10' by 1 1/4 inch thick!!! The plate welded to table is 3/4 inch thick with the dimple for inside head of rivet.
                  No chance it will move when I hit the trigger on air chisel/rivet masher.


                   photo IMG_1152_zps63d51417.jpg


                   photo IMG_1153_zps494cbf54.jpg


                  Random Picture time.
                  Engineer at the now closed NUMMI automotive plant in Fremont California thought I needed this..it didn't help.


                   photo IMG_1156_zpsc7febd99.jpg

                  Have a great day!
                  Last edited by knuckcrazy; 11-12-2013, 08:31 AM.

                  Comment


                  • #39
                    [QUOTE=knuckcrazy;135435]Pulled out Tranny plate and noticed some brass on the corner next to where the adjuster bolts on and got prepared to grind out and re weld.


                    Does anyone have an inner primary they can show me with this HOOTIS attached?

                     photo IMG_1128_zpsc13b2135.jpg

                    Hope this helps Bob. Dennis Hoffman makes the right guard and the 3 early inner to motor reinforcement clips.
                     photo IMG_8282.jpg

                     photo IMG_8283.jpg

                     photo IMG_8284.jpg

                     photo IMG_8285.jpg
                    AMCA #765

                    Comment


                    • #40
                      Thanks Len!!
                      Cool pics and info.
                      How do I get ahold of Mr Hoffman?
                      Digging your Head light project.

                      Comment


                      • #41
                        I looked for his phone # but couldn't find it. I'll keep looking. My laptop fried on me and I lost everything and had to start all over.
                        I think he is on ebay under 1937hd not sure though but that's where he sells the repo rear chain splash guard and reinforcement tabs and ftgs for the 37 gauges. He'll put them up for sale every so often. Super nice guy and a pleasure to talk too.
                        Thanks on the headlamp as I don't see it on removing the bakelite connector. I hope Dave will tell me his secret.
                        Also, if you find a source for the early clutch fibers let me know as I need some to complete mine and I have been asking around with no luck. Especially the thrust plate fiber. I scored some oem rivets for it and they should show up any day and I should be getting my inner back soon that will be ready to install.
                        The 39 looks really nice Bob, very nice..
                        AMCA #765

                        Comment


                        • #42
                          Hootis

                          http://www.ebay.com/itm/Harley-Knuck...item4acbe95456
                          Thanks Len.

                          Comment


                          • #43
                            Great thread and photos, thanks. Cool idea for the rivet set, what size ball mill did you use to make the set tool? I find myself having to re-attach the same part with no clue as how to do it until now.
                            Thanks
                            Max

                            Comment


                            • #44
                              Hello len have nos thrust plate 2473-36 if you still need.sorry no rivets.

                              Comment


                              • #45
                                Thank you very much. pm sent.
                                Len
                                AMCA #765

                                Comment

                                Working...
                                X