Announcement

Collapse
No announcement yet.

Workshop happenings

Collapse
X
 
  • Filter
  • Time
  • Show
Clear All
new posts

  • Workshop happenings

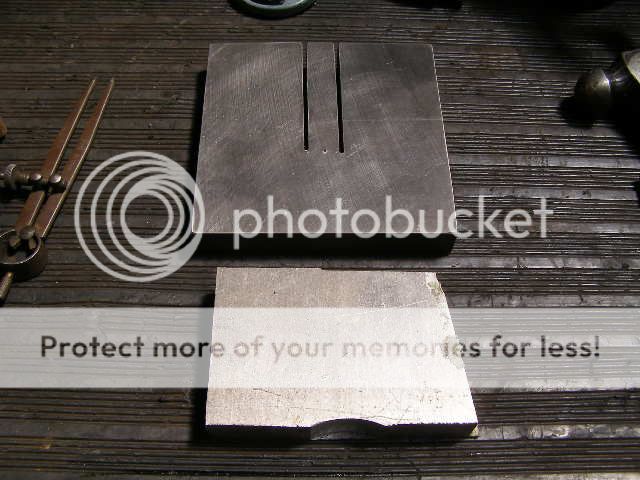
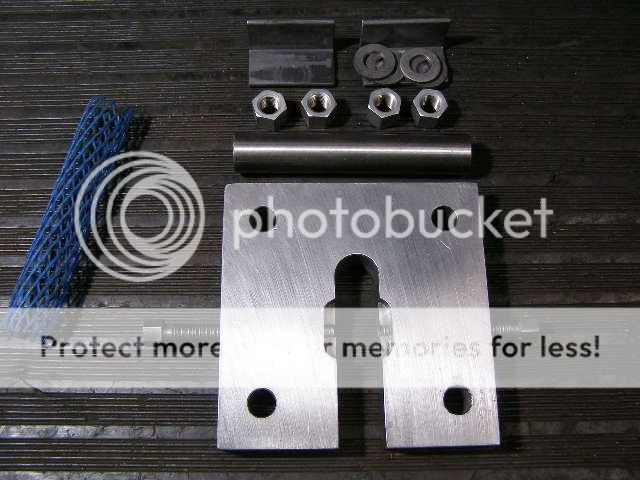
    The top plate is 3/4" wash ground plate and the other piece is a scrap block of alloy.


    The dowel is coated with red texta. I use it as an edge finder.


    Steve Little
    Upper Yarra Valley. Victoria.
    Australia.
    AMCA member 1950

  • #2
    That is the nicest 4 hole, slotted hunk of steel I have seen today

    I never thought of making one myself, but I do have a motor to do in the near future. You are always an inspiration Steve.
    Eric Smith
    AMCA #886

    Comment


    • #3
      Thanks Eric. Nice to hear from you.
      There are times I think about posting some work I am doing, but once I'm up to work speed and concentration, it's distracting to slow down for pictures.
      You and I have mentioned in the past that the forum needs a shot in the bum.
      Here's a 10 cc of Australian git it dun.


      I had to take a cut off the side for clearance for the lifter block. Maybe another cut at some time in the future. But a miss is a miss.


      Some nice washers to stop the nuts from leaving a burr on the nice new tool. I used a wet stone to take the manufacturing burrs off the bottom edge of the washers.


      Steve Little
      Upper Yarra Valley. Victoria.
      Australia.
      AMCA member 1950

      Comment


      • #4
        I agree with Eric, Steve. I enjoy seeing what you got goin' on, too! Dale

        Comment


        • #5


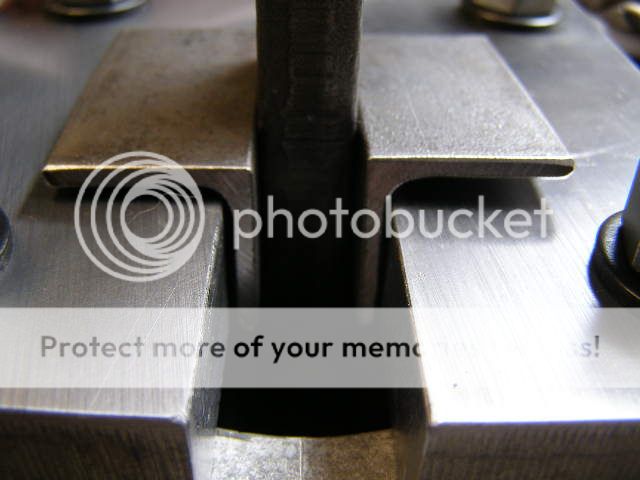
          Need to machine out the radius in the angle iron to allow it them to sit flat on the plate.


          They sit nice and snug now. I added some pinch bolts on the side.
          Doesn't look like I took pictures of that sequence. I was probably on auto pilot during that stage.
          The angle iron buffer function will become evident in later posts.
          Apollogies for galloping along. I would have liked to have added these shots in a slower progression to give the forum a bit of continued interest.
          But wife is dragging me out of my work shop and making me go on a holiday in two days.
          My protestations of : (Honestly, I'm relaxed here. I like my workshop)... didn't work.
          She's dragging me onto a 12 meter catamaran to sail around the Whitsunday islands for two weeks.
          I'll post the rest of the job tomorrow.
          Steve Little
          Upper Yarra Valley. Victoria.
          Australia.
          AMCA member 1950

          Comment


          • #6
            So I expect you're getting up at 4 am, slurping coffee, and keyboarding this thread (while she sleeps?), so's we don't die of suspense wondering what the heck?.....
            I love fixtures, and tooling up. (this should be in custom tools thread?) It has always seemed so archaic to have extra hands on standby for landing cylinders while the blind guy with arthritic fingers did the lost-and-found thing with the keepers.
            May I presume that the plate/clamps are for steadying the rods while the hovering cylinder/piston heads for home?
            This after tweaking the rods?
            More, more, now, now!

            Comment


            • #7
              Looks like a copy of the HD fixtures for straightening con-rods to me
              Peter Thomson, a.k.a. Tommo
              A.M.C.A. # 2777
              Palmerston North, New Zealand.

              Comment


              • #8
                Thanks guys.
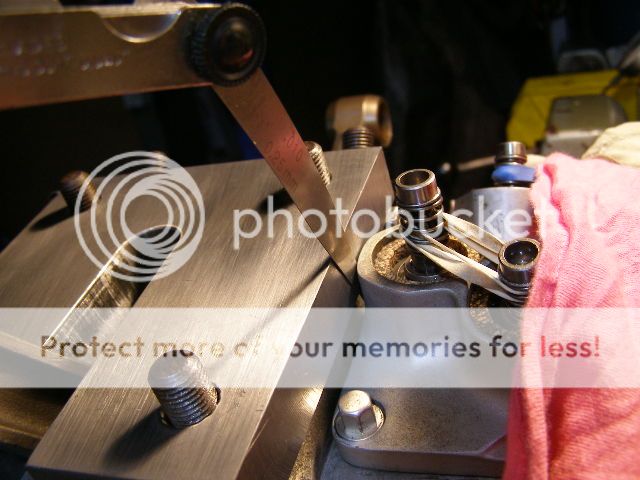
                Fitment to front cylinder deck. Check!


                Machined a pocket in the middle of the plate to allow the hole of the little end bush to come down level with the plate.
                The front cylinder checked out good. The rear cylinder... not so good. 019" out.


                I needed a better - professional tool than I have been using over the years. To date, my conrod alignment tool has been a 2' shifter.

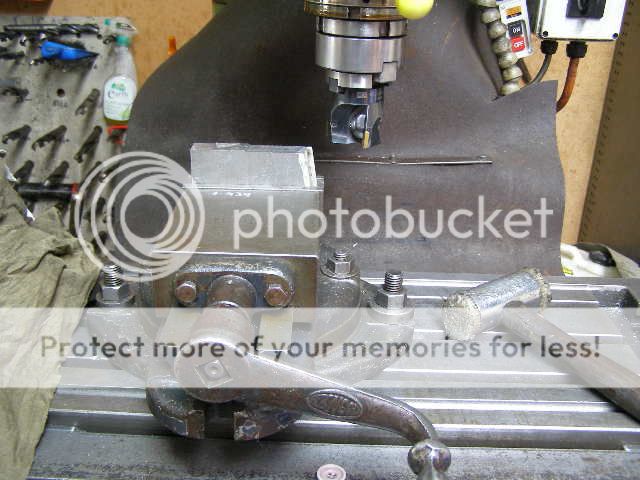
                Milled the edges of the piece of scrap alloy to square it up.


                Then cut it in half.

                Steve Little
                Upper Yarra Valley. Victoria.
                Australia.
                AMCA member 1950

                Comment


                • #9
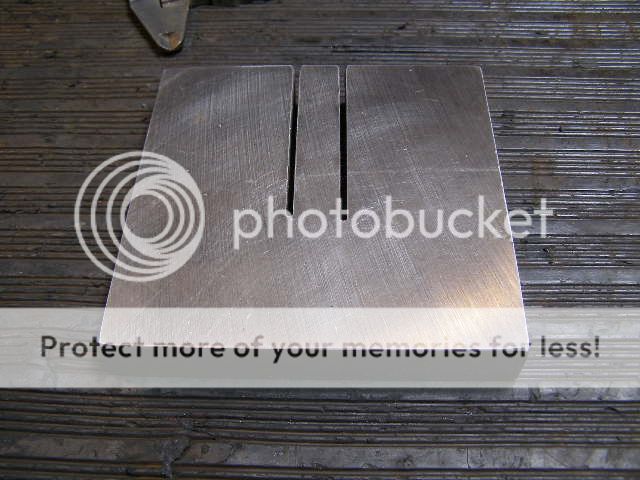
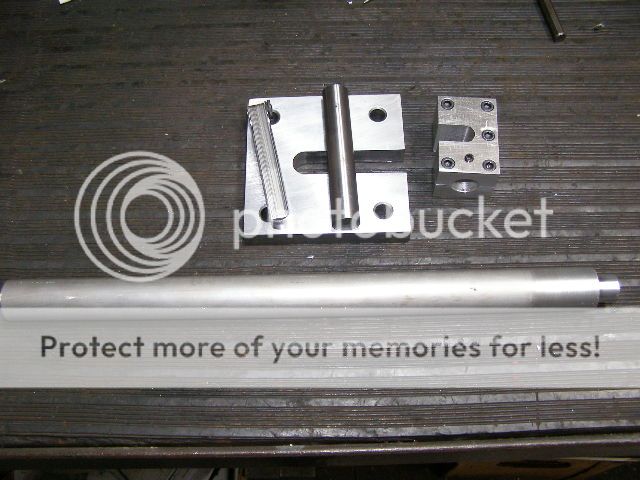
                  Ran the mill over the pair to match them up. And then clamped them on top of each other to drill and tap them together.


                  Once that was done it needed a slot cut all the way through.


                  And a hole in the end

                  Steve Little
                  Upper Yarra Valley. Victoria.
                  Australia.
                  AMCA member 1950

                  Comment


                  • #10
                    Needed a handle so I used a bit of 1 3/16 alloy round bar.


                    Test run on a 46 FL Knuckle fly worked perfect. The story behind these flywheels, I bought a 1946 Knuckle bottom end thinking it was just original.
                    The rods had been polished, it had lightning gears and a 36 cam shaft. I guess it was someones hot rod back in the day. Any way. My tool worked good on the sacrificial rod.


                    Hi Thomo.
                    I didn't know H.D made a tool tool like this. I've seen a rod holding tool in the service book, which stops the flywheels from rotating.
                    I've also seen the tool that slides into the wrist pin bush to straighten rods.
                    I didnt like the idea of the wrist pin tool.
                    The angle iron parts of my jig are used to wedge hard against the rod before trying to bend them. This takes the load off the flywheel and stops any misalignment. After correcting the rear rod of my engine, I put a dial indicator on the end of my pinion shaft. It has a run out of 001" so I am happy to call the tool a success.
                    I look forward to reading the work of someone else.
                    Message to the Mod Squad, please push some buttons and throw some switches and move this thread to "Custom tools". Appologies.
                    Gotta go pack my bag
                    Regards Steve
                    Steve Little
                    Upper Yarra Valley. Victoria.
                    Australia.
                    AMCA member 1950

                    Comment


                    • #11
                      Too much time on your hands, Steve!

                      Most of cut to the chase with a welder and a 4" grinder (attached).

                      Please tell me you are not going to attempt to straighten rods assembled.

                      ....Cotten
                      Attached Files
                      AMCA #776
                      Dumpster Diver's Motto: Seek,... and Ye Shall Find!

                      Comment


                      • #12
                        Originally posted by T. Cotten View Post
                        Too much time on your hands, Steve!

                        Most of cut to the chase with a welder and a 4" grinder (attached).

                        Please tell me you are not going to attempt to straighten rods assembled.

                        ....Cotten
                        Hi Cotton.
                        Nice to see you contributing.
                        Yes is the answer to first accusation.
                        I've got many tools like yours. Thanks for contributing your style of tool.
                        For your last query... already done the job. See previous thread and description.
                        Angle iron sleeves are snugged up tight against the rod and help to alleviate stress on the flywheel.
                        001" on the end of the pinion is acceptable.

                        Any chance you can use your vast knowledge on DC carburetors and have a look at that thread xlr under Sportster. I am hoping you can confirm needle and seat question.

                        Regards Steve
                        Steve Little
                        Upper Yarra Valley. Victoria.
                        Australia.
                        AMCA member 1950

                        Comment


                        • #13
                          Originally posted by T. Cotten View Post
                          Too much time on your hands, Steve!

                          Most of cut to the chase with a welder and a 4" grinder (attached).

                          Please tell me you are not going to attempt to straighten rods assembled.

                          ....Cotten
                          my first jig looked like Cotten's, but eventually I salvaged some 1 1/4" key stock, cut 2 pcs about 4 1/2" long and drilled them to base stud spacing. This makes a good deck for the wrist pin check, and is reliable also for checking the rod's left-to-right throughout the stroke.
                          I usually use 2 tweak bars to keep the stress off the thrust washers, but the shop that does my top ends employs a harley-guy who does very good work on a rod alignment tool. It's important that the guy gives a dam. Last engine needed no tweaking at all.

                          Comment


                          • #14
                            Here's a photo of my two HD factory ones.
                            The smaller one is for the 1926 on singles and the other is the big twin one.
                            Somewhere I've got the instruction sheet for them but I can't lay my hands on it right now but I'll keep looking
                            Attached Files
                            Peter Thomson, a.k.a. Tommo
                            A.M.C.A. # 2777
                            Palmerston North, New Zealand.

                            Comment


                            • #15
                              I'll admit Folks,

                              I've tweaked rods assembled and got away with it,
                              But after observing the behavior of the races of the female rod while straightening and gauging bend and twist on the bench (attached), I'm afraid it carries too much risk to advocate.

                              And please remember that aligning by the decks (attached) can add significant error from the original axis, as I found while replacing a wristpin bushing on previously blue-printed rods.
                              (That's what my tool was for...)
                              It becomes a question of: Do you want the piston square to the decks, or to the rods, if they are not square to each other?

                              The service manual suggestions of the past were 'field' operations for utilitarian machines, whereas the machines are now a great deal more precious. One must weigh what is at risk, against the benefits of a shortcut.

                              My opinion only,

                              ....Cotten
                              PS: Steve!
                              DCs have never needed me much, so I haven't studied them. (Plus, I didn't want to get into that yellow anodizing or whatever.) But I have photos of more un-identified valves if you want me to add to the confusion.
                              Attached Files
                              Last edited by T. Cotten; 11-06-2015, 12:48 PM.
                              AMCA #776
                              Dumpster Diver's Motto: Seek,... and Ye Shall Find!

                              Comment

                              Working...
                              X